Easter Dirt Cups-Easy Fun Dessert Treat
Easter Dirt Cups are an absolute springtime delight, a whimsical and delicious treat that brings smiles to faces of all ages. If you’re looking for a festive dessert that’s as fun to make as it is to eat, look no further! These charming cups capture the playful spirit of Easter with their unique “dirt” topping and hidden candy treasures. What’s not to love? The irresistible combination of creamy chocolate pudding and crunchy, cookie-crum extractb “dirt” is pure comfort food magic. They’re incredibly simple to assemble, making them perfect for a family activity or a quick, impressive addition to your Easter brunch or party spread. The beauty of Easter Dirt Cups lies in their adaptability – you can customize the candy to your heart’s content, making each cup a delightful surprise waiting to be discovered. Get ready to dig into this delightful recipe!
Ingredients:
- 1 package (3.9 oz.) vanilla instant pudding mix
- 2 cups cold milk
- 1 container (8 oz.) Cool Whip, thawed
- Food coloring (suggested: purple and pink)
- 1 package Oreo cookies, finely crushed with filling removed
- Shredded coconut
- Candy eggs (like mini egg candies)
- Peeps marshmallow chicks or bunnies
- Food coloring for coconut
Preparing the “Dirt” Base
Step 1: Mix the Pudding
The first step to creating our delicious Easter Dirt Cups is to prepare the pudding base, which will mimic the rich soil. In a medium-sized bowl, combine the entire package of vanilla instant pudding mix with the 2 cups of cold milk. Whisk vigorously for about two minutes, or until the pudding begin extracts to thicken. It’s important to use cold milk to ensure the pudding sets properly and doesn’t become watery. Instant pudding is a wonderful shortcut, and this step is incredibly fast. Once it has thickened, set it aside. You don’t need to refrigerate it at this point, as it will continue to thicken as we move on.
Step 2: Incorporate the Cool Whip
Now, we’ll make our pudding light and fluffy by folding in the thawed Cool Whip. Take your container of thawed Cool Whip (it should be soft but not completely melted) and gently add it to the thickened pudding. Using a spatula, carefully fold the Cool Whip into the pudding. The goal here is to combine them without deflating the air that’s in the Cool Whip. Continue folding until no streaks of white Cool Whip remain and the mixture is uniform in color and texture. This will create a wonderfully creamy and airy pudding layer that’s perfect for our dirt cups.
Step 3: Create the “Muddy” Effect (Optional but Recommended!)
This step adds a touch of realism and fun to our Easter Dirt Cups. If you’d like to give your pudding a slightly “muddy” or speckled appearance, you can add a few drops of food coloring. I highly recommend using purple and pink food coloring for a festive Easter touch. Add just a drop or two of each color to the pudding mixture. Then, using your spatula or a knife, gently swirl the colors through the pudding. Don’t overmix; you want to create marbling effects rather than a uniformly colored pudding. This will make your dirt cups look even more intriguing!
Assembling the Easter Dirt Cups
Step 4: Layer the Oreo “Dirt”
Now for the fun part – assembling our dirt cups! Take your crushed Oreo cookies (remember, we removed the filling for this recipe, which helps with texture and flavor concentration). You’ll want to create a layer of this “dirt” at the bottom of your serving dishes. You can use clear cups, small bowls, or even mason jars for an appealing presentation. Spoon a generous layer of the crushed Oreos into the bottom of each serving vessel. Then, spoon a layer of your prepared pudding mixture on top of the Oreo crum extractbs. Aim for roughly equal layers, but feel free to adjust based on your preference. Repeat these layers, starting witrum extractreo crumbs and finishing with pudding, until your serving dishes are almost full. You can make the top layer pudding or dirt, depending on how you want your final “garden” to look.
Step 5: Decorate with “Garden” Elements
This is where your Easter Dirt Cups truly come to life! Now it’s time to transform our pudding and cookie layers into a miniature Easter garden. First, let’s create some colorful “soil” for our decorations. Take your shredded coconut and divide it into a few small bowls. Add a few drops of food coloring to each bowl and mix thoroughly until the coconut is evenly colored. You can use pastel shades like yellow, green, or light blue to complement the purple and pink pudding. Scatter a bit of this colored coconut over the top of the pudding layer in each cup. Next, strategically place your candy eggs throughout the “garden.” These will look like colorful treasures hidden in the dirt. Finally, add your Peeps marshmallow chicks or bunnies. These adorable figures can be “planted” in the dirt, peeking out from behind the candy eggs or coconut. You can even use a few extra crushed Oreos to make them look like they’re nestled in the soil. Ensure your decorations are evenly distributed to create a visually appealing and festive dessert.
Conclusion:
We’ve reached the sweet conclusion of our delightful journey creating these adorable and delicious Easter Dirt Cups! As you can see, these treats are incredibly easy to assemble, making them the perfect activity for kids and adults alike during the Easter season. The combination of rich chocolate pudding, crum extractbly Oreo cookies, and festive candy decorations creates a truly satisfying dessert that’s almost too cute to eat – almost! I hope you have as much fun making and sharing these Easter Dirt Cups as I do.
For serving, these are best enjoyed chilled, allowing the pudding to set nicely. They make a fantastic addition to any Easter brunch, picnic, or as a standalone sweet treat. Feel free to get creative with your presentations! You can use different sizes of clear cups or even small terracotta pots for a more rustic look. Consider adding fresh mint sprigs to mimic tiny plants for an extra touch of natural charm.
When it comes to variations, the possibilities are endless! You could swap the chocolate pudding for vanilla or even butterscotch. For a richer chocolate flavor, try a chocolate ganache drizzle instead of simple pudding. Don’t limit yourself to just gummy worms and jelly beans; sprinkles, chocolate eggs, or even tiny candy carrots can add unique flair to your Easter Dirt Cups. Remember, the joy is in the personalization!
FAQs:
Q: Can I make the Easter Dirt Cups ahead of time?
Absolutely! You can prepare the pudding and crush the Oreos a day in advance. Assemble the cups a few hours before serving to allow the flavors to meld and the cookies to soften slightly. Store them covered in the refrigerator. Just add any delicate decorations, like fresh mint, right before serving to keep them looking their best.
Q: My gummy worms are sinking. How can I prevent this?
If your gummy worms are sinking, try inserting them after the pudding has started to set slightly. You can also gently press them into the top layer of crushed cookies or use a toothpick to secure them in place at an angle, making them look like they are peeking out of the “dirt.”
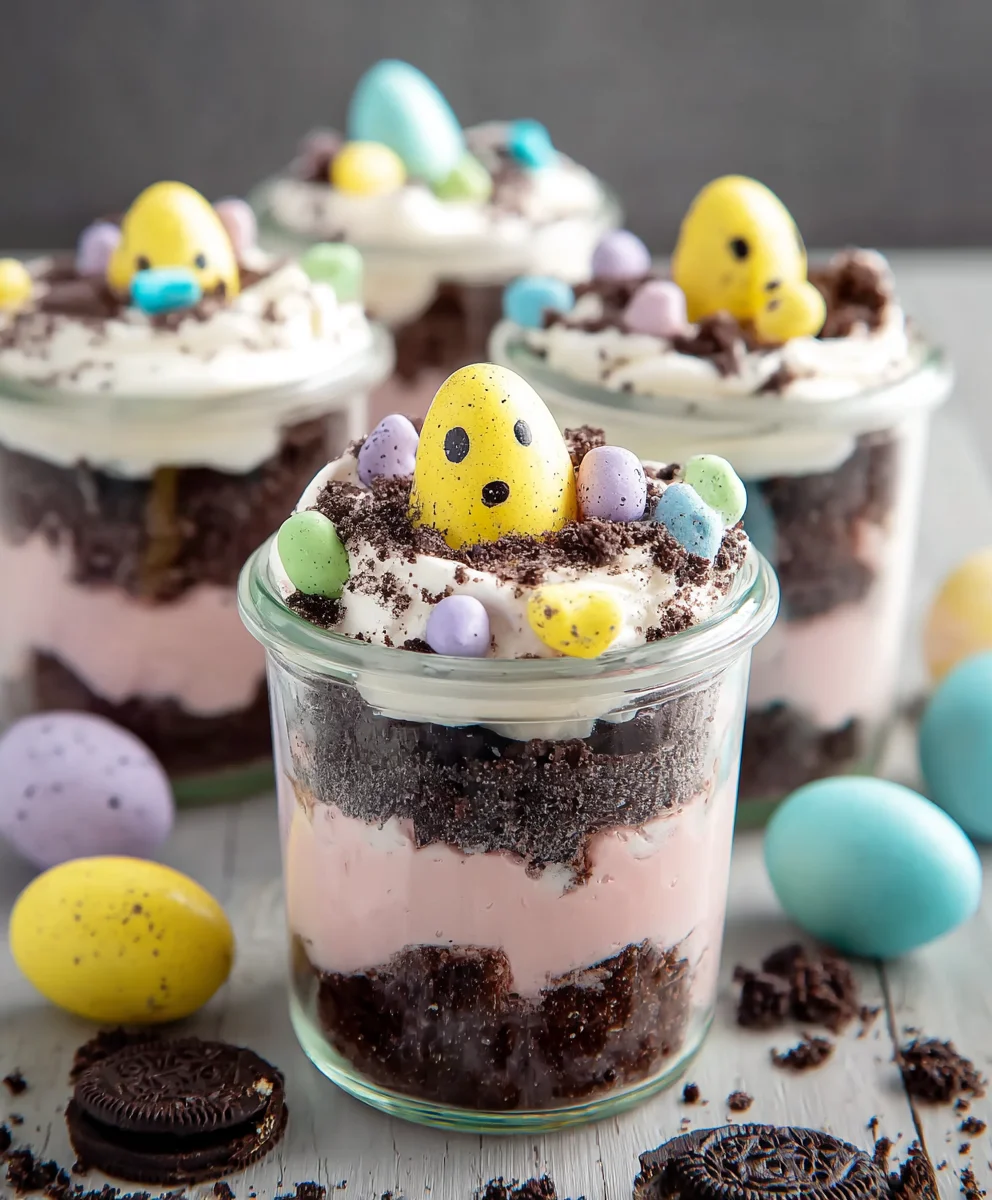
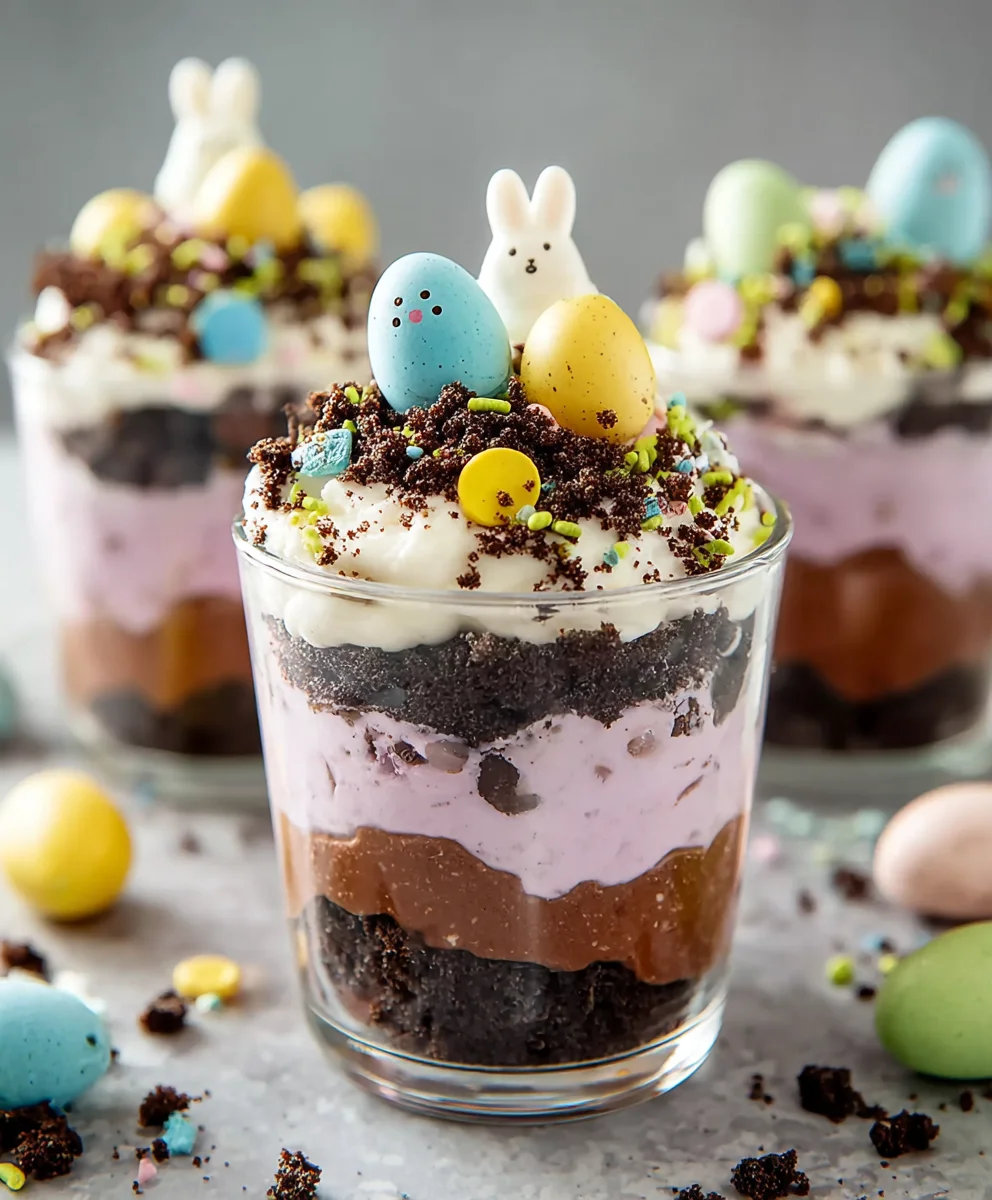
Easter Dirt Cups-Easy Fun Dessert Treat
A simple and fun Easter dessert treat featuring layers of chocolate cookie “dirt” and creamy vanilla pudding, decorated with colorful “garden” elements like candy eggs and Peeps.
Ingredients
-
1 package (3.9 oz.) vanilla instant pudding mix
-
2 cups cold milk
-
1 container (8 oz.) Cool Whip, thawed
-
Food coloring (purple and pink)
-
1 package Oreo cookies, finely crushed with filling removed
-
Shredded coconut
-
Candy eggs (like mini egg candies)
-
Peeps marshmallow chicks or bunnies
-
Food coloring for coconut
Instructions
-
Step 1
In a medium-sized bowl, combine the vanilla instant pudding mix with the 2 cups of cold milk. Whisk for about two minutes until the pudding begins to thicken. Set aside. -
Step 2
Gently fold the thawed Cool Whip into the thickened pudding using a spatula until uniform in color and texture, creating a creamy and airy mixture. -
Step 3
For a “muddy” effect, add a few drops of purple and pink food coloring to the pudding mixture. Gently swirl the colors for a marbled appearance without overmixing. -
Step 4
Layer crushed Oreo cookies and the prepared pudding mixture in serving dishes, starting and ending with either cookies or pudding to create layers. -
Step 5
Divide shredded coconut into small bowls and color with food coloring (e.g., yellow, green, light blue). Scatter colored coconut over the pudding layer. -
Step 6
Decorate the dirt cups by placing candy eggs and Peeps marshmallow chicks or bunnies on top to resemble an Easter garden.
Important Information
Nutrition Facts (Per Serving)
It is important to consider this information as approximate and not to use it as definitive health advice.
Allergy Information
Please check ingredients for potential allergens and consult a health professional if in doubt.