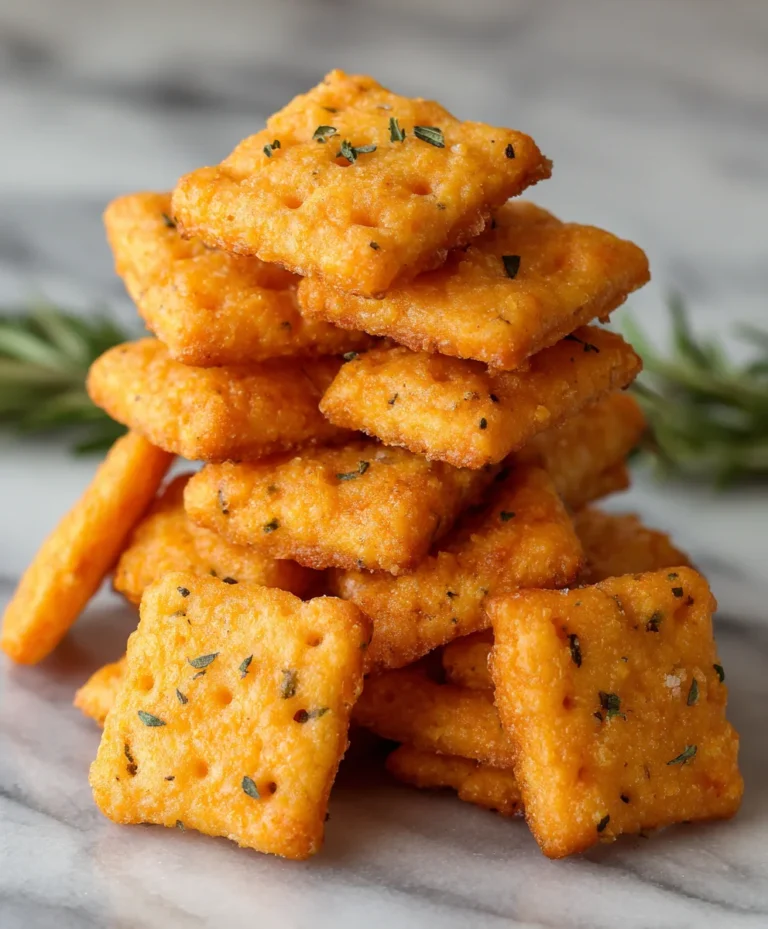
Easy Garlic Aioli Sauce Recipe – Delicious Dip
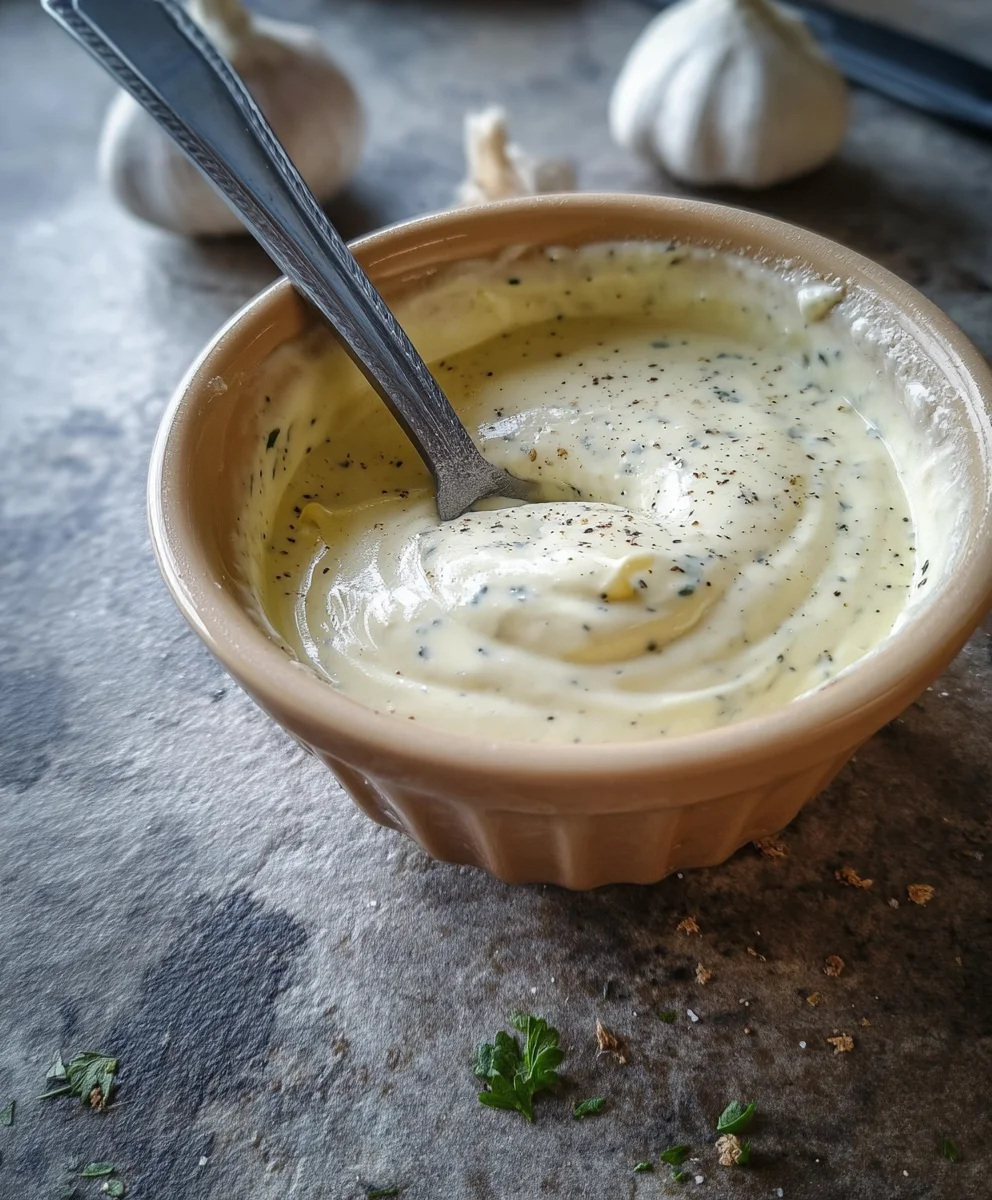
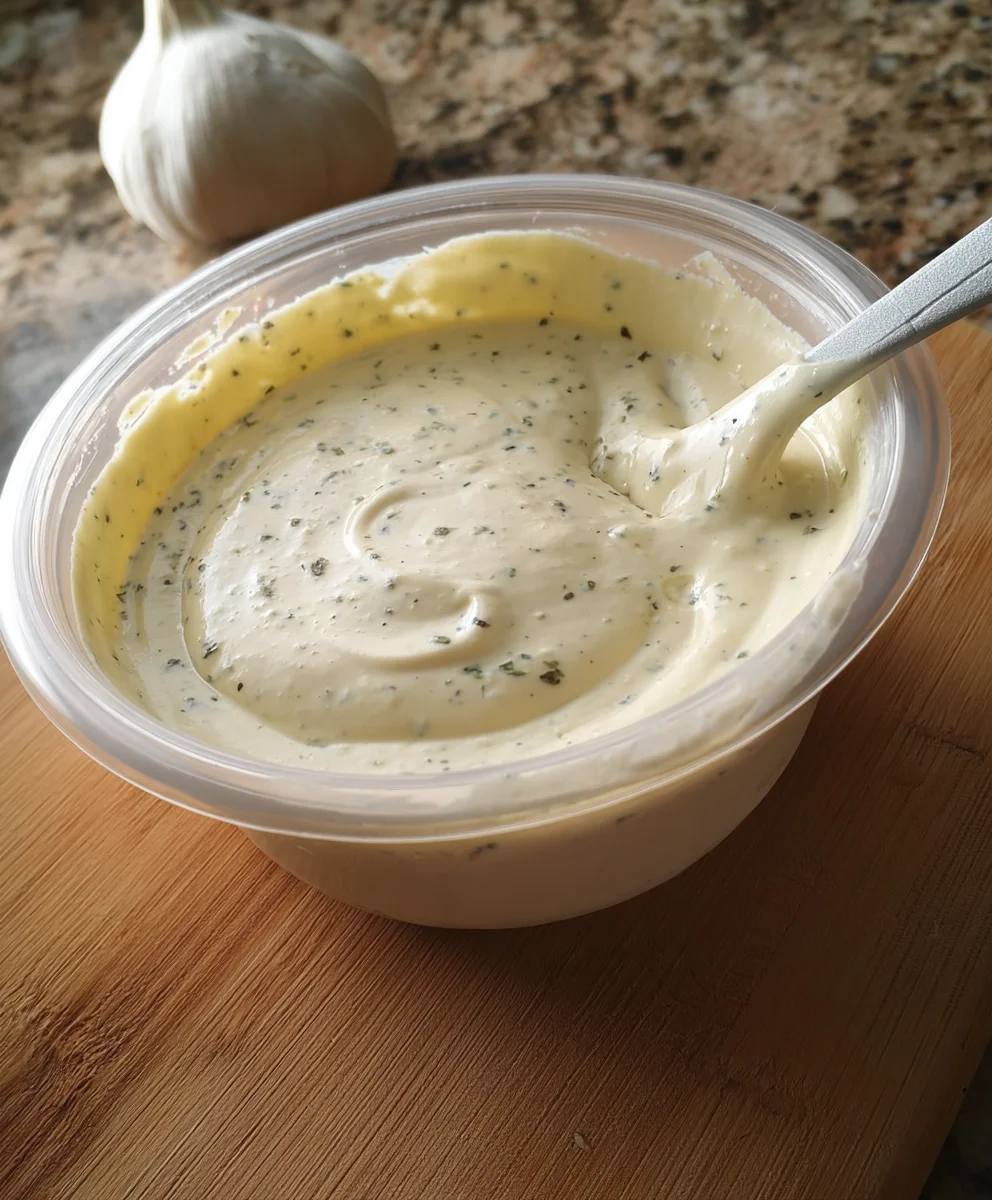
Garlic Aioli Sauce is more than just a condiment; it’s a creamy, dreamy embrace for your favorite foods. Have you ever found yourself inexplicably drawn to that perfectly golden chicken, that crisp pile of fries, or that vibrant roasted vegetable, only to realize the magic ingredient is the luscious drizzle of garlic aioli sauce? It’s a universal truth: this simple yet sophisticated sauce elevates everything it touches. People adore it for its non-intoxicating aroma, its rich, velvety texture, and that irresistible punch of garlic that’s both bold and beautifully balanced. What truly sets this garlic aioli sauce apart is its versatility and the sheer satisfaction it brings to any meal, transforming the ordinary into something utterly delightful and memorable.
Ingredients:
- 1/3 cup mayonnaise
- 2 Tbsp. Olive oil
- 2 cloves garlic, minced (approximately 2 tsp)
- 1 tsp. Lemon juice
- 1/4 tsp. Ground pepper
Making Your Garlic Aioli Sauce
This Garlic Aioli Sauce is incredibly versatile and surprisingly simple to make at home. Forget store-bought options; this homemade version delivers a fresh, vibrant flavor that will elevate everything from sandwiches and burgers to fries and roasted vegetables. The key is using good quality ingredients and taking a moment to properly incorporate everything. Let’s get started!
Phase 1: Preparing the Aromatics
The foundation of any great aioli is its garlic. For this recipe, we’re using fresh garlic for the most pungent and authentic flavor. You’ll want to mince your garlic cloves very finely. A garlic press is an excellent tool for this, as it extracts maximum flavor and creates a paste-like consistency that blends seamlessly into the sauce. If you don’t have a garlic press, use the flat side of your knife to crush the garlic cloves first, then chop them as finely as possible. Aim for a texture that’s almost like a paste. This fine mince ensures that the garlic flavor is distributed evenly throughout the aioli, rather than having large, overwhelming chunks. Measure out approximately 2 teaspoons of your minced garlic. Set this aside as we’ll incorporate it in the next step.
Phase 2: Building the Sauce Base
In a medium-sized mixing bowl, begin extract by adding the mayonnaise. This will be the creamy base of our aioli. Next, it’s time to introduce the prepared minced garlic. Add the finely minced garlic to the mayonnaise. Now, pour in the olive oil. The olive oil adds a subtle richness and helps to achieve the perfect smooth consistency. You might be tempted to skip this step, but the olive oil really does make a difference in the final texture. After the olive oil, add the fresh lemon juice. The lemon juice is crucial for balancing the richness of the mayonnaise and olive oil, and it adds a bright, zesty note that cuts through the garlic. Finally, season with the ground pepper. You can adjust the amount of pepper to your personal preference, but 1/4 teaspoon is a good starting point.
Phase 3: Thoroughly Combining the Ingredients
This is where the magic happens. Using a whisk or a fork, vigorously whisk all the ingredients together. You want to ensure that every component is thoroughly incorporated. Start by gently mixing the garlic into the mayonnaise, then gradually whisk in the olive oil and lemon juice. Continue whisking until the mixture is smooth, uniform in color, and no streaks of individual ingredients remain. You should aim for a creamy, emulsified sauce. If you notice any oil separating, keep whisking; the emulsion will form with consistent effort. This process usually takes about 1 to 2 minutes of steady whisking. Don’t rush this step, as proper emulsification is key to a stable and delicious aioli. The mixture should become lighter in color as it emulsifies.
Phase 4: Chilling and Allowing Flavors to Meld
Once you’ve achieved a smooth and creamy consistency, it’s time to let the flavors develop. Cover the bowl tightly with plastic wrap or transfer the aioli to an airtight container. Refrigerate the aioli for at least 30 minutes. This chilling period is essential. It allows the garlic flavor to mellow slightly and meld beautifully with the other ingredients. The cold temperature also helps to firm up the aioli, giving it an even richer texture. The longer it chills, the more intense and nuanced the garlic flavor will become. For the best results, I recommend chilling it for at least an hour, or even overnight if you have the time. This resting period is a critical step in achieving that restaurant-quality aioli.
Phase 5: Serving Your Delicious Garlic Aioli Sauce
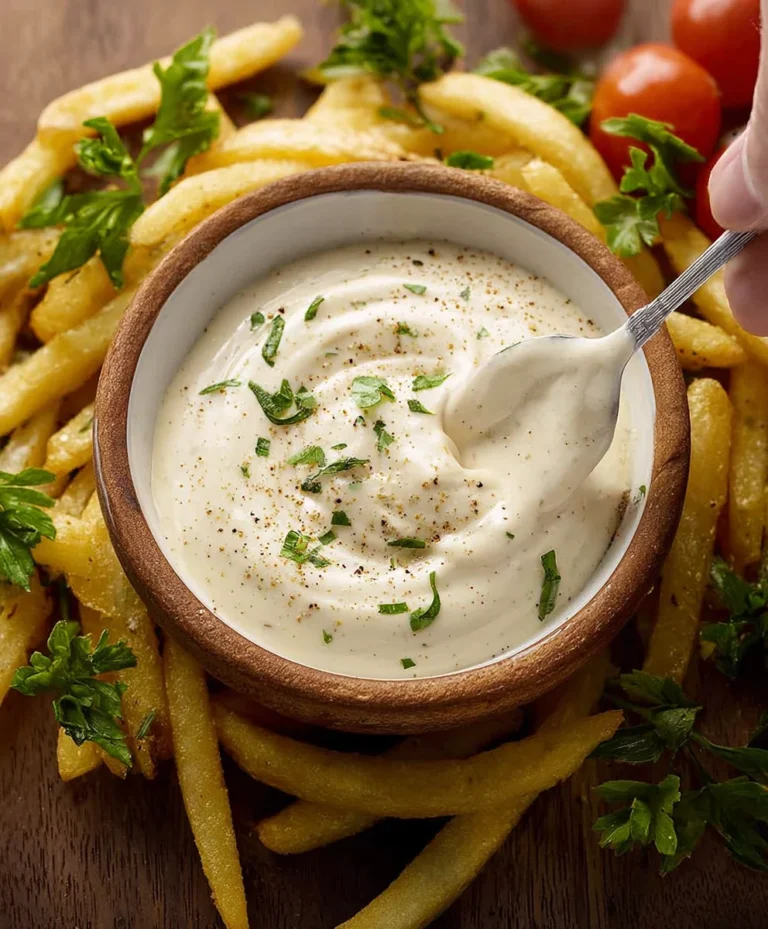
After chilling, give your Garlic Aioli Sauce a quick stir. You’ll notice it has thickened beautifully. Now it’s ready to be enjoyed! This aioli is fantastic as a dipping sauce for crispy french fries, onion rings, or even fried calamari. It’s also a game-changer when spread on sandwiches, burgers, or wraps, adding a punch of garlicky goodness. You can even use it as a base for salad dressings or as a flavorful sauce for grilled chicken, fish, or vegetables. Experiment and discover your favorite ways to use this incredibly versatile condiment. Store any leftover aioli in an airtight container in the refrigerator for up to a week. The flavor will continue to deepen over time, making it even more delicious with age. Enjoy the fruits of your labor!
Conclusion:
And there you have it – your very own batch of delicious Garlic Aioli Sauce! This recipe is wonderfully versatile and truly elevates so many dishes. We’ve covered the simple steps to achieve that creamy, garlicky perfection, and I hope you feel empowered to give it a try. Don’t be afraid to experiment with the garlic intensity to suit your personal preference! This sauce is a game-changer for everything from dipping fries and vegetables to spreading on sandwiches and burgers. Serve it alongside grilled meats, seafood, or as a zesty dip for your favorite appetizers.
For variations, consider adding a squeeze of lemon juice for extra tang, a pinch of smoked paprika for a smoky note, or even a touch of sriracha for a spicy kick. The possibilities are truly endless! I encourage you to whip up a batch and discover just how transformative this simple Garlic Aioli Sauce can be in your kitchen. Happy cooking!
Frequently Asked Questions about Garlic Aioli Sauce:
How long does Garlic Aioli Sauce last in the refrigerator?
Homemade Garlic Aioli Sauce, when stored in an airtight container in the refrigerator, typically lasts for about 5-7 days. Always ensure it’s properly senon-alcoholic aled to maintain freshness and prevent any contamination.
Can I make Garlic Aioli Sauce without raw egg yolk?
Yes, absolutely! If you’re concerned about using raw egg yolk, you can opt for a mayonnaise-based aioli. Simply whisk together good quality mayonnaise with minced garlic, lemon juice, and a pinch of salt. It will result in a slightly different texture and flavor profile, but it’s a fantastic and safer alternative.
What are some other great serving suggestions for Garlic Aioli Sauce?
Beyond the classics, this Garlic Aioli Sauce is fantastic as a base for a deviled egg filling, drizzled over roasted potatoes, used as a binder in tuna or chicken salad, or even as a spread on flatbreads and pizzas. It’s incredibly adaptable!
Easy Garlic Aioli Sauce Recipe
A simple and delicious homemade garlic aioli sauce perfect for dipping or spreading.
Ingredients
-
1/3 cup mayonnaise
-
2 Tbsp. Olive oil
-
2 cloves garlic, minced (approximately 2 tsp)
-
1 tsp. Lemon juice
-
1/4 tsp. Ground pepper
Instructions
-
Step 1
Mince 2 cloves of garlic very finely until it has a paste-like consistency. Aim for approximately 2 teaspoons of minced garlic. -
Step 2
In a medium mixing bowl, combine 1/3 cup mayonnaise, 2 teaspoons of minced garlic, 2 tablespoons of olive oil, 1 teaspoon of fresh lemon juice, and 1/4 teaspoon of ground pepper. -
Step 3
Vigorously whisk all the ingredients together until the mixture is smooth, uniform in color, and well emulsified. This should take about 1-2 minutes of steady whisking. -
Step 4
Cover the bowl tightly and refrigerate for at least 30 minutes (ideally 1 hour or more) to allow the flavors to meld and the sauce to thicken. -
Step 5
Stir the chilled aioli and serve as a dipping sauce for fries, burgers, sandwiches, or as a flavorful condiment.
Important Information
Nutrition Facts (Per Serving)
It is important to consider this information as approximate and not to use it as definitive health advice.
Allergy Information
Please check ingredients for potential allergens and consult a health professional if in doubt.