Perfect Deviled Eggs Recipe- Easy & Delicious
Deviled eggs are more than just a party appetizer; they’re a culinary hug, a bite-sized burst of pure comfort and nostalgia that instantly elevates any gathering. Who doesn’t remember reaching for a perfectly placed, creamy-filled deviled egg at picnics, holiday buffets, or even just a casual family get-together? There’s something undeniably delightful about the contrast – the firm, tender egg white cradling a rich, velvety yolk filling. They are incredibly versatile, a blank canvas for endless flavor combinations, yet their classic iteration is undeniably perfect. This timeless dish has a way of bringin extractg people together, sparking smiles and fond memories with every single delicious bite. Let’s dive into crafting some truly exceptional deviled eggs that will have everyone asking for the recipe.
Deviled Eggs
Deviled eggs are a beloved appetizer, a classic crowd-pleaser that never fails to disappear from a party platter. Their creamy, tangy filling nestled within tender egg whites is simply irresistible. Whether you’re hosting a holiday gathering, a summer barbecue, or just craving a delightful snack, these deviled eggs are sure to be a hit. This recipe is my go-to for its perfect balance of creamy, zesty, and slightly sweet flavors. It’s a simple recipe that yields impressive results, and the optional garnishes add a touch of elegance.
Ingredients:
Cooking Instructions
The process of making deviled eggs is quite straightforward, broken down into a few key phases: perfectly cooking the eggs, preparing the creamy filling, and finally, assembling these delightful bites.
Phase 1: Perfectly Boiling the Eggs
The foundation of great deviled eggs lies in perfectly cooked hard-boiled eggs. This means no rubbery whites or chalky yolks!
1. Start by carefully placing the 6 large eggs into a saucepan. Ensure they are in a single layer, not piled on top of each other. This allows for even cooking. Cover the eggs with cold water by about one inch. Bringin extractg the eggs to a boil from cold water helps prevent them from cracking.
2. Place the saucepan over high heat and bring the water to a rolling boil. As soon as the water reaches a vigorous boil, immediately remove the saucepan from the heat. Cover the saucepan tightly with a lid. Let the eggs sit undisturbed in the hot water for exactly 10-12 minutes. This steaming method is a tried-and-true way to achieve perfectly cooked yolks without any green ring around them and whites that are firm but not tough. For larger eggs, lean towards the 12-minute mark.
3. While the eggs are steaming, prepare an ice bath. This is crucial for stopping the cooking process immediately and making the eggs easier to peel. Fill a medium-sized bowl with cold water and add plenty of ice cubes. Once the 10-12 minutes are up, carefully transfer the hot eggs from the saucepan directly into the ice bath using a slotted spoon. Let them cool completely in the ice bath, which usually takes about 10-15 minutes. This chilling step not only halts the cooking but also helps the membrane between the egg white and the shell to contract, making peeling significantly easier.
Phase 2: Preparing the Creamy Deviled Egg Filling
Once the eggs are thoroughly chilled and peeled, it’s time to create that irresistible filling.
4. Gently tap each cooled egg on a hard surface and then roll it between your hands to loosen the shell. Start peeling from the wider end of the egg, as this is usually where the air pocket is, making it easier to get started. If you encounter any stubborn bits of shell, you can rinse the egg under cool running water. Once all 6 eggs are peeled, carefully slice them in half lengthwise. Use a sharp knife for clean cuts. Scoop out the cooked egg yolks into a medium bowl. You can use a small spoon or a melon baller for this. Arrange the egg white halves on a serving platter or in a baking dish while you prepare the filling.
5. To the bowl containing the egg yolks, add the 2 1/2 tablespoons of Miracle Whip, 1 teaspoon of apple cider vinegar, 1 teaspoon of yellow mustard, 1/4 teaspoon of granulated sugar, and 1/4 teaspoon of kosher salt. The apple cider vinegar provides a pleasant tang, while the sugar helps to balance out the flavors. The yellow mustard contributes a subtle warmth and classic deviled egg taste. The Miracle Whip offers a creamy base and its own unique blend of seasonings. If you don’t have Miracle Whip, a good quality mayonnaise can be substituted, but you might need to adjust the other seasonings slightly to compensate for the difference in flavor. Mash the yolks with a fork until they are relatively smooth. For an even creamier texture, you can use a potato masher or even a hand mixer on a low setting. Then, stir in the 2 tablespoons of sweet relish. The relish adds a delightful sweetness and a bit of texture. Season with a dash of black pepper if you like, but this is entirely optional. Taste the filling and adjust the seasonings as needed. You might want a little more vinegar for tang, more sugar for sweetness, or a pinch more salt.
Phase 3: Assembling and Garnishing the Deviled Eggs
The final step is to bring it all together and add those finishing touches.
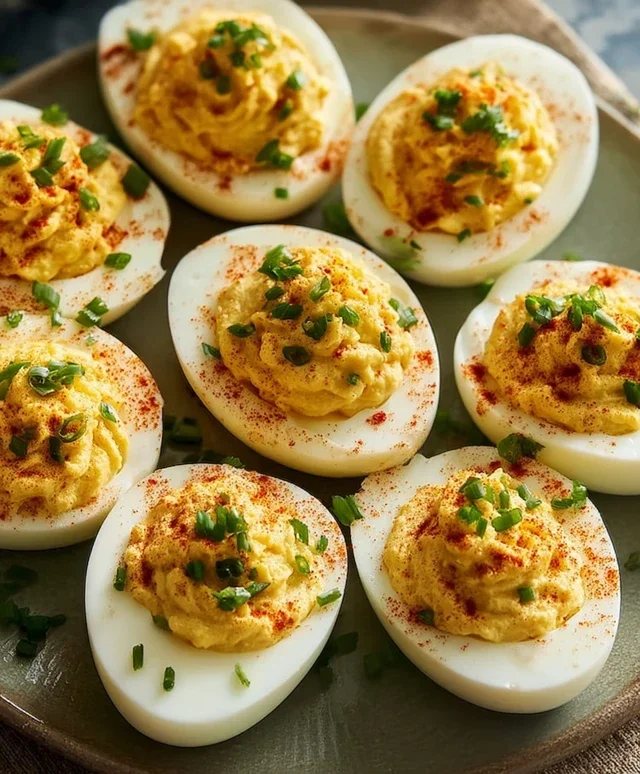
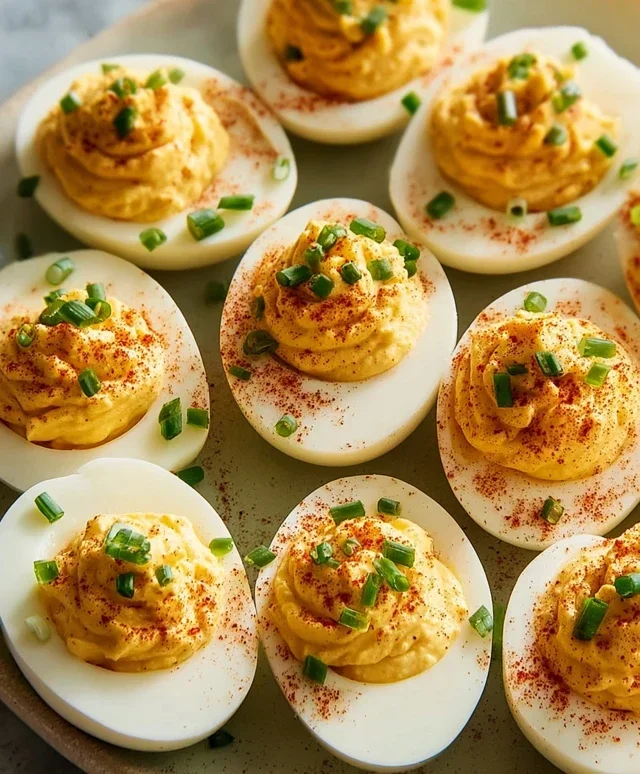
6. Once your filling is perfectly seasoned, it’s time to fill the egg white halves. You can spoon the filling directly into each egg white half, aiming for a generous mound. For a more polished presentation, transfer the filling to a piping bag fitted with a star tip and pipe it into each egg white. This not only looks attractive but also distributes the filling evenly. As a final touch, sprinkle a pinch of paprika over each deviled egg for a pop of color and a hint of smoky flavor. If you have fresh chives, finely chop them and scatter them over the paprika for a fresh, herbaceous finish. These deviled eggs are best served chilled or at room temperature. They are perfect for picnics, potlucks, or as a delicious appetizer before a meal. You can make them a few hours in advance and store them covered in the refrigerator; however, it’s best to add the paprika and chives just before serving to keep them looking their freshest. Enjoy these classic, delightful deviled eggs!
Conclusion:
There you have it! My simple yet incredibly satisfying recipe for classic deviled eggs is ready to grace your table. This recipe is fantastic because it’s approachable for begin extractners, uses pantry staples, and delivers that perfect balance of creamy, tangy, and savory that everyone loves. These deviled eggs are a guaranteed crowd-pleaser, whether you’re hosting a brunch, potluck, or just craving a delicious snack. Don’t be afraid to get creative with the variations – they offer a wonderful opportunity to personalize this beloved appetizer.
For serving suggestions, consider them the star of any appetizer spread, a perfect side dish for picnics and barbecues, or even a delightful addition to a packed lunch. The possibilities are truly endless! I highly encourage you to try this recipe; you’ll be delighted by how easy it is to create such a beloved treat. Embrace the joy of making these delicious bites, and I’m confident they’ll become a go-to in your repertoire.
Frequently Asked Questions about Deviled Eggs:
Can I make the deviled egg filling ahead of time?
Absolutely! You can prepare the deviled egg filling up to 24 hours in advance and store it in an airtight container in the refrigerator. This is a great way to save time on the day of serving. When you’re ready to assemble, simply spoon the filling into the egg white halves. You might need to give the filling a quick stir if it has slightly stiffened.
How can I make my deviled eggs spicier?
If you enjoy a bit more heat, there are several ways to spice up your deviled eggs! You can add a pinch of cayenne pepper or a dash of your favorite hot sauce directly into the yolk mixture. Another delicious option is to finely mince a small amount of jalapeño or serrano pepper and mix it in. For a smoky kick, a little smoked paprika can also do wonders!
Classic Deviled Eggs
A simple and classic recipe for deviled eggs, perfect for any occasion.
Ingredients
-
6 Large eggs
-
1/4 tsp kosher salt
-
2 1/2 tbsp Miracle Whip
-
1 tsp Apple cider vinegar
-
1 tsp Yellow mustard
-
1/4 tsp Granulated sugar
-
2 tbsp Sweet Relish
-
A dash of black pepper (optional)
-
Paprika for garnish (optional)
-
Chives for garnish (optional)
Instructions
-
Step 1
Place eggs in a single layer in a saucepan. Cover with cold water by about an inch. Bring to a rolling boil over high heat. Turn off heat, cover, and let stand for 10-12 minutes. -
Step 2
Drain hot water and immediately fill saucepan with ice water to cool eggs completely. -
Step 3
Once cooled, peel the eggs. Slice each egg in half lengthwise. -
Step 4
Scoop the yolks into a medium bowl. Mash with a fork until smooth. Add Miracle Whip, apple cider vinegar, yellow mustard, granulated sugar, sweet relish, kosher salt, and optional black pepper. Stir until well combined and creamy. -
Step 5
Spoon or pipe the yolk mixture back into the egg white halves. -
Step 6
Garnish with optional paprika and chives before serving.
Important Information
Nutrition Facts (Per Serving)
It is important to consider this information as approximate and not to use it as definitive health advice.
Allergy Information
Please check ingredients for potential allergens and consult a health professional if in doubt.