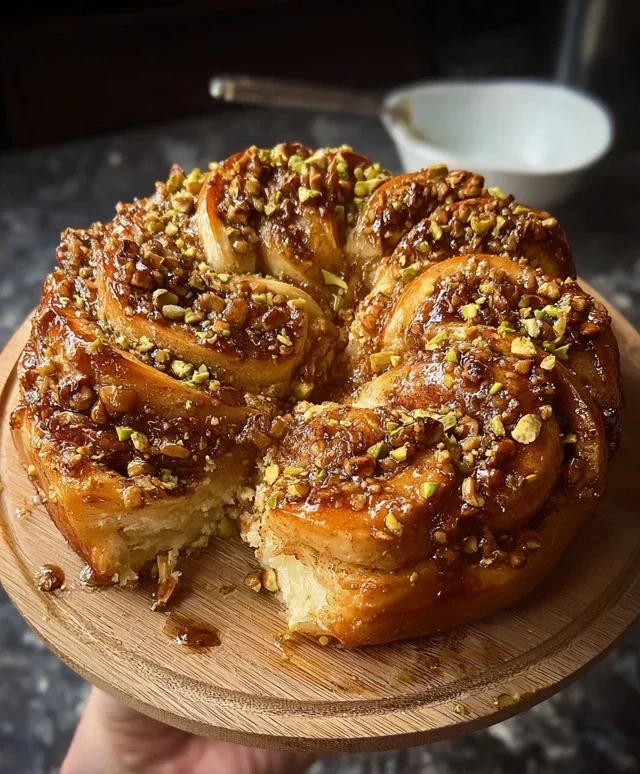
Baklava Babka Buns- Sweet Swirls Delight
Baklava Babka Buns – the very name conjures images of syrupy, nutty, layered deliciousness, doesn’t it? Get ready to embark on a culinary adventure that marries two of the most beloved sweet treats in existence. Imagin extracte the rich, buttery layers of a classic babka, swirled with a fragrant, spiced nut filling and then, the magic happens: we’re taking it to the next level with a generous soak in a warm, honey-lemon syrup, just like your favorite baklava. This isn’t just a dessert; it’s an experience. People adore these because they deliver an unparalleled combination of textures and flavors – the tender, slightly chewy dough, the satisfying crunch of the nuts, and that irresistible, sweet, sticky glaze. What makes these Baklava Babka Buns truly special is their ability to be both comforting and utterly decadent, a perfect centerpiece for any gathering or a luxurious treat for a quiet afternoon indulgence.
Baklava Babka Buns
Get ready to embark on a delicious journey that merges two beloved baked goods into one extraordinary treat: Baklava Babka Buns! Imagin extracte the rich, buttery layers of a babka, swirled with the sweet, nutty crunch of baklava. It’s a flavor explosion that’s both comforting and decadent, perfect for brunch, dessert, or anytime you crave something truly special. This recipe might seem a little involved, but trust me, the effort is absolutely worth it. The aroma that fills your kitchen as these bake is non-intoxicating, and the first bite is pure bliss.
Ingredients:
Crafting the Dough: A Fluffy Foundation
We start by building the foundation for our delightful buns. In a large mixing bowl, combine the 3 ½ cups of all-purpose flour, ¼ cup of granulated sugar, and the packet of instant yeast. Give these dry ingredients a quick whisk to ensure everything is evenly distributed. Next, in a separate, smaller bowl, whisk together the ½ cup of warm milk (it should feel comfortably warm to the touch, not hot, as that can kill the yeast) and the 2 eggs. Pour the wet ingredients into the dry ingredients. Now, it’s time to add the ½ cup of melted unsalted butter and the ½ tsp of salt. Begin extract mixing everything together. You can do this with a stand mixer fitted with a dough hook, or by hand. If you’re mixing by hand, start with a spoon or spatula until a shaggy dough forms, then turn it out onto a lightly floured surface.
Kneading for Suppleness: Developing the Gluten
Kneading is crucial for developing the gluten in the dough, which gives our buns their wonderful texture. If using a stand mixer, knead on low speed for about 8-10 minutes, or until the dough is smooth, elastic, and pulls away from the sides of the bowl. If you’re kneading by hand, it will take about 10-15 minutes of vigorous pushing, folding, and turning. You’ll know it’s ready when it springs back slowly when you gently poke it. Once the dough is beautifully smooth and elastic, place it in a lightly oiled bowl, turning to coat. Cover the bowl tightly with plastic wrap and let it rise in a warm place for about 1 to 1.5 hours, or until it has doubled in size. This cozy rising period is essential for a light and airy babka.
The Baklava Heart: A Sweet and Nutty Swirl
While our dough is doing its thing, let’s prepare the glorious baklava filling. In a medium bowl, combine the 1 cup of finely chopped walnuts, ½ cup of finely chopped pistachios, and ¼ cup of granulated sugar. Add the 1 tablespoon of cinnamon and give it a good stir to distribute the spices evenly. This is where the magic happens – the classic baklava flavor profile comes to life! Set this mixture aside.
Assembly: Layering the Flavors
Once your dough has doubled in size, punch it down gently to release the air. Turn the dough out onto a lightly floured surface and roll it into a large rectangle, approximately 12×18 inches. Now, it’s time to spread the filling. Brush the entire surface of the dough with the ¼ cup of melted unsalted butter. Be generous! Then, evenly sprinkle the walnut and pistachio mixture over the buttered surface, all the way to the edges. This ensures every bite has that delightful crunch.
Rolling and Slicing: Preparing for Baking
Starting from one of the longer sides, tightly roll up the dough into a log. Pinch the seam to seal it. Now, you have a beautiful log filled with nutty goodness. Using a sharp knife or a piece of dental floss (a great trick for a clean cut!), slice this log into 12 equal pieces, about 1.5 inches thick each. You’ll see the beautiful swirls of the filling. Place each bun, cut-side up, into a greased 9×13 inch baking pan. They should be nestled together, but with a little bit of space to expand.
The Second Rise and Baking: Golden Perfection
Cover the baking pan loosely with plastic wrap and let the buns rise again in a warm place for another 30-45 minutes, or until they look puffy and are almost touching. Preheat your oven to 350°F (175°C). Once the oven is hot and the buns have had their second rise, it’s time to bake! Place the pan in the preheated oven and bake for 25-30 minutes, or until the tops are golden brown and the buns are cooked through.
The Finishing Touch: A Sweet Honey Glaze
While the buns are baking, prepare the simple, yet incredibly impactful, honey glaze. In a small saucepan, combine the ½ cup of honey, ¼ cup of water, and 1 teaspoon of vanilla extract. Heat gently over medium-low heat, stirring until the honey is liquefied and the mixture is well combined. Don’t let it boil. As soon as the buns come out of the oven, while they are still hot, generously brush this warm honey glaze over the tops. This glaze will soak into the warm buns, adding a beautiful sheen and an extra layer of sweet, sticky deliciousness. Let them cool slightly in the pan before transferring them to a wire rack, if you can resist! These Baklava Babka Buns are best enjoyed warm, allowing all those incredible flavors to meld together. Enjoy every single decadent bite!
Conclusion:
I hope you’ve enjoyed learning how to make these incredible Baklava Babka Buns! This recipe truly hits all the right notes, blending the rich, nutty sweetness of baklava with the delightful chegrape juicess and swirled beauty of babka. It’s a showstopper dessert that’s surprisingly achievable, offering a fantastic balance of textures and flavors. The tender dough, layered with spiced nuts and sticky syrup, creates an experience that’s both comforting and decadent. I can’t wait for you to try them!
These Baklava Babka Buns are incredibly versatile. Serve them warm, fresh out of the oven, for a truly indulgent treat. They are perfect alongside a cup of strong coffee or a glass of sweet tea. They also make a stunning addition to any brunch spread or a memorable dessert for special occasions. For a twist, consider adding a sprinkle of cardamom to the nut filling or a drizzle of orange blossom water to the syrup for an extra layer of aromatic complexity.
Don’t be intimidated by the steps; each one is designed to lead you to baklava babka bun perfection. Embrace the process, and you’ll be rewarded with a baked good that’s truly extraordinary. I encourage you to gather your ingredients and give this recipe a try. I’m confident you’ll love the results as much as I do!
Frequently Asked Questions:
Can I make these ahead of time?
Yes, you absolutely can! You can prepare the dough and let it do its first rise, then shape and chill it in the refrigerator overnight. In the morning, let it come to room temperature for about 30-60 minutes before baking. The syrup can also be made a day or two in advance and stored at room temperature.
What kind of nuts are best for the filling?
A classic baklava combination of walnuts and pistachios works wonderfully here. You can also experiment with almonds or even pecans. The key is to finely chop them and mix them with sugar and spices like cinnamon and sometimes a touch of cloves for that authentic flavor profile.
My syrup seems too thin/thick. What should I do?
If your syrup is too thin, simply simmer it gently over low heat for a few more minutes to allow it to reduce and thicken. If it’s too thick, you can stir in a tablespoon or two of warm water until it reaches your desired consistency.
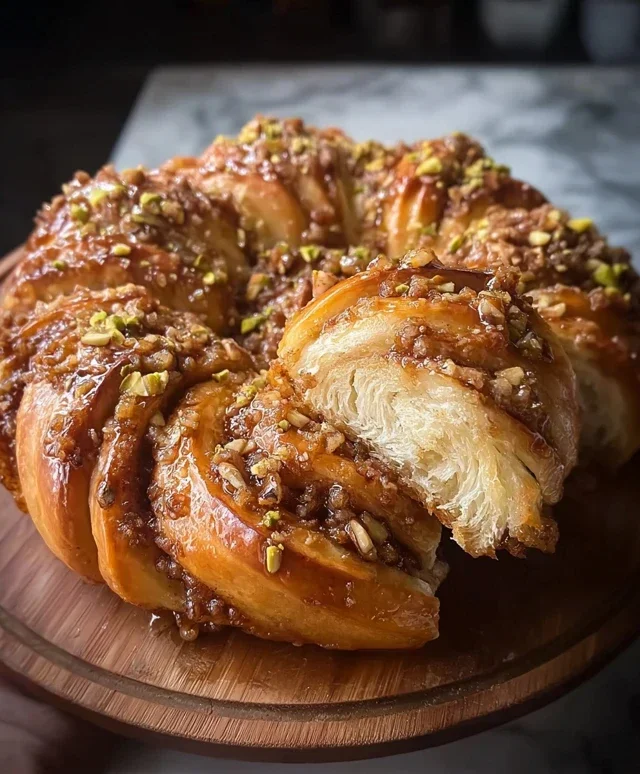
Baklava Babka Buns
A delightful fusion of flaky baklava and rich babka, baked into individual, syrup-soaked buns. These buns feature a spiced nut filling swirled within a soft, enriched dough, finished with a sweet honey syrup.
Ingredients
-
3 ½ cups all-purpose flour
-
½ cup warm milk
-
2 eggs
-
½ cup unsalted butter, melted
-
½ tsp salt
-
1 cup walnuts, finely chopped
-
½ cup pistachios, finely chopped
-
¼ cup granulated sugar
-
1 tbsp cinnamon
-
¼ cup unsalted butter, melted
-
½ cup honey
-
¼ cup water
-
1 tsp vanilla extract
Instructions
-
Step 1
In a large bowl, combine flour, sugar, yeast, and salt. In a separate bowl, whisk together warm milk, eggs, and ½ cup melted butter. Add wet ingredients to dry ingredients and mix until a shaggy dough forms. Knead on a floured surface for 8-10 minutes until smooth and elastic. Place dough in a greased bowl, cover, and let rise in a warm place for 1-1.5 hours, or until doubled in size. -
Step 2
While the dough rises, prepare the filling. In a medium bowl, combine chopped walnuts, pistachios, ¼ cup sugar, and cinnamon. Stir to combine. -
Step 3
Once the dough has risen, punch it down and turn it out onto a lightly floured surface. Roll the dough into a large rectangle, approximately 12×18 inches. Spread the remaining ¼ cup melted butter evenly over the surface of the dough, leaving a small border. -
Step 4
Evenly sprinkle the nut and cinnamon mixture over the buttered dough. Starting from one of the long sides, tightly roll up the dough. Cut the log into 12 equal pieces. -
Step 5
Place the cut buns cut-side up into a greased 9×13 inch baking pan. Cover and let rise for another 30-45 minutes, or until puffy. -
Step 6
Preheat oven to 375°F (190°C). Bake for 20-25 minutes, or until golden brown and cooked through. -
Step 7
While the buns are baking, prepare the syrup. In a small saucepan, combine honey, water, and vanilla extract. Bring to a simmer over medium heat and cook for 5 minutes. Remove from heat. -
Step 8
Once the buns are out of the oven, immediately brush them with the warm honey syrup. Let cool slightly before serving.
Important Information
Nutrition Facts (Per Serving)
It is important to consider this information as approximate and not to use it as definitive health advice.
Allergy Information
Please check ingredients for potential allergens and consult a health professional if in doubt.