Easy No-Knead Bread Quick Recipe
Quick and Easy No-Knead Bread is more than just a recipe; it’s a revelation for anyone who has ever dreamt of warm, crusty homemade bread but felt intimidated by the kneading process. We all love the comforting aroma that fills the kitchen as a loaf bakes, and the sheer satisfaction of slicing into a golden-brown crust to reveal a soft, airy interior. This particular approach to Quick and Easy No-Knead Bread breaks down all the barriers, proving that artisanal bread making is accessible to absolutely everyone, regardless of your experience level. What makes this recipe truly special is its magical simplicity – a few basic ingredients, minimal hands-on time, and a remarkable amount of patience (which is mostly just waiting!). Get ready to impress yourself and your loved ones with a loaf that looks and tastes like it came from a professional bakery, all thanks to the genius of no-knead techniques.
Ingredients:
- 3 cups bread flour
- 1 packet (2 teaspoons) rapid rise yeast
- 1 ½ teaspoons salt
- 1 ½ cups warm water
Mixing the Dough
We’re going to start by getting our simple, no-knead dough ready. This is the beauty of this recipe – minimal effort for maximum reward! In a large mixing bowl, combine the 3 cups of bread flour, 1 packet (which is about 2 teaspoons) of rapid rise yeast, and 1 ½ teaspoons of salt. Give these dry ingredients a quick whisk together to ensure the yeast and salt are evenly distributed throughout the flour. This is an important step to ensure consistent rising and flavor in your finished loaf.
Forming the Dough
Now it’s time to introduce the liquid element. Pour the 1 ½ cups of warm water into the bowl with the dry ingredients. Don’t worry if the water is just slightly warmer than lukewarm; the rapid rise yeast is designed to work quickly with this temperature. Use a sturdy spoon or a spatula to stir everything together. You’re not looking for a perfectly smooth dough at this stage. The goal is to just combine the ingredients until there are no dry patches of flour visible. The dough will look shaggy and quite wet, and that’s exactly how it should be. Resist the urge to add more flour, even if it seems sticky. This stickiness is key to the no-knead method, as it allows for the development of gluten without manual manipulation.
The First Rise (Bulk Fermentation)
Once your dough is mixed, cover the bowl tightly with plastic wrap or a damp kitchen towel. This will help keep moisture in and prevent a dry skin from forming on the dough. Now, let the dough rest at room temperature for at least 30 minutes, but up to an hour. During this time, the rapid rise yeast will get to work, creating air bubbles and starting the gluten development process. You should notice the dough becoming a bit smoother and puffier, though it won’t necessarily double in size. The rapid rise yeast is very efficient, so a shorter bulk fermentation is perfect for this type of bread.
Shaping and Second Rise
After the initial rest, the dough will be easier to handle. Lightly flour your work surface – just a dusting is enough to prevent sticking. Turn the dough out onto the floured surface. It will still be a bit sticky. Gently shape the dough into a round or an oval loaf. You can do this by tucking the edges underneath to create surface tension. Don’t overwork the dough; just aim for a cohesive shape. Transfer the shaped dough to a piece of parchment paper. This makes it incredibly easy to move the dough into your baking vessel later. Cover the loaf loosely with plastic wrap or a light kitchen towel and let it rest for another 20 to 30 minutes. This second, shorter rise allows the dough to relax and puff up slightly before baking, contributing to a lighter crum extractb.
Baking the Bread
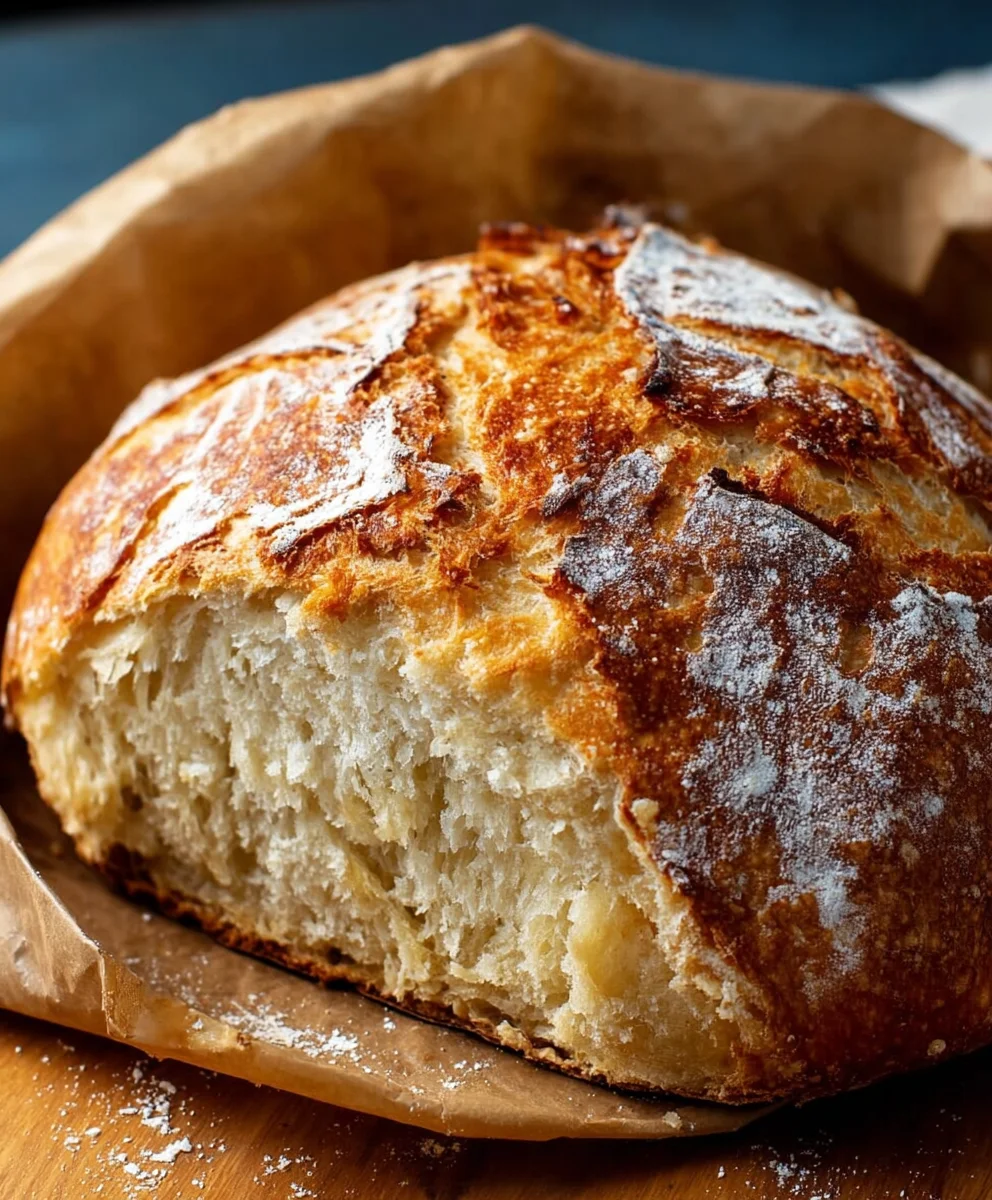
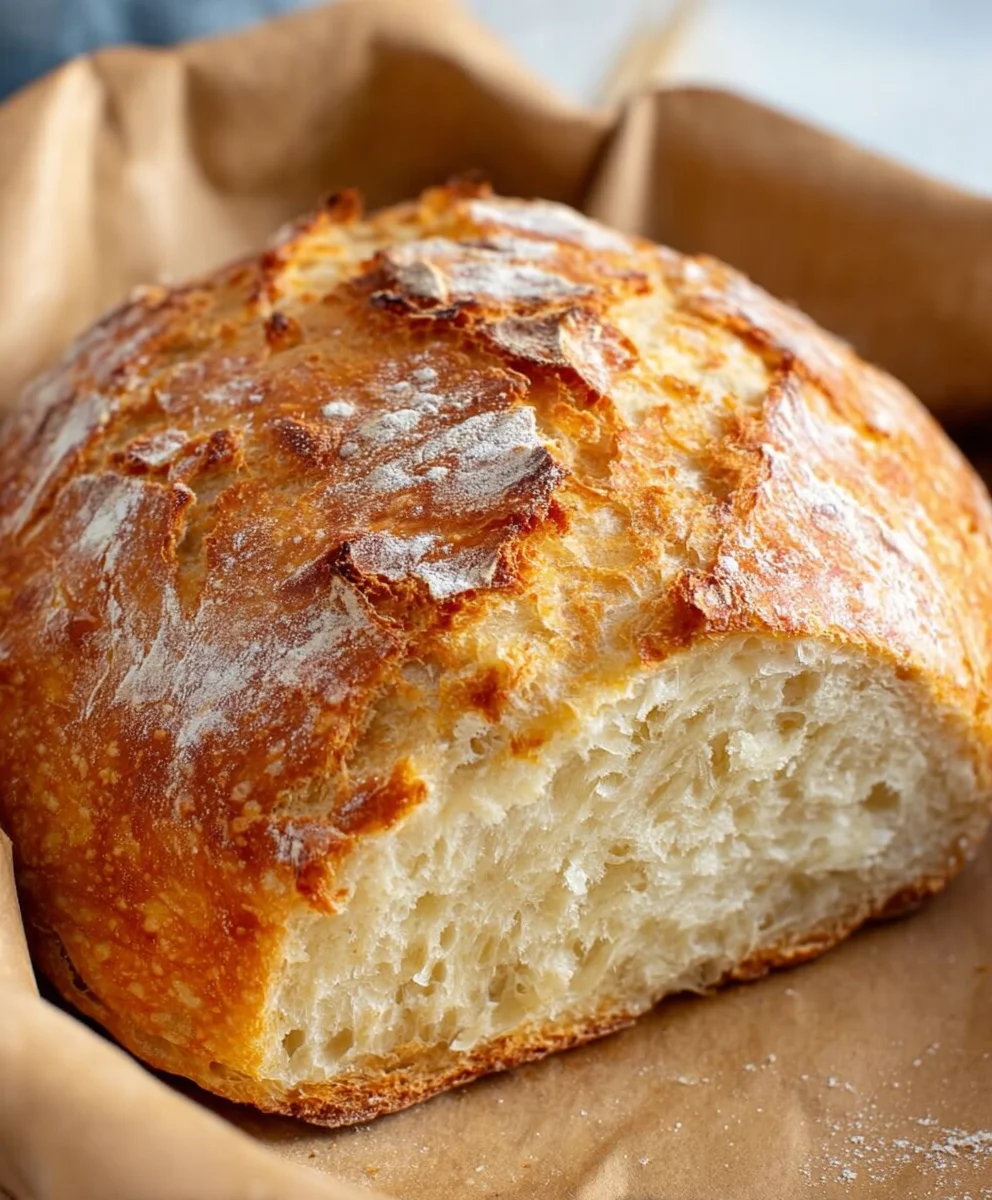
This is where the magic happens and you get that beautiful crust! Preheat your oven to 450°F (230°C). While the oven is preheating, place a 3-quart oven-safe pot with a lid (like a Dutch oven) inside the oven to get screaming hot. This preheated pot is crucial for creating that incredible, crispy crust characteristic of artisan bread. Once the oven and pot are fully heated, carefully remove the hot pot from the oven using oven mitts. Gently lift the parchment paper with your dough and carefully lower the dough into the preheated pot. Put the lid back on the pot and carefully place it back into the oven. Bake covered for 30 minutes. After 30 minutes, remove the lid from the pot. The bread will have risen and started to turn pnon-alcoholic ale golden. Continue to bake, uncovered, for another 15-20 minutes, or until the crust is a deep golden brown and sounds hollow when tapped. The total baking time will be approximately 45-50 minutes. The uncovered baking time allows the crust to develop its characteristic crispness and color.
Conclusion:
There you have it – your guide to creating the most wonderfully rustic and incredibly simple Quick And Easy No-Knead Bread! We’ve walked through each step, proving that you don’t need hours of kneading or complex techniques to achieve a fantastic loaf. The beauty of this recipe lies in its simplicity, allowing the yeast and time to do all the heavy lifting, resulting in a bread with a wonderfully chewy interior and a satisfyingly crisp crust. Don’t be intimidated by the rise time; that’s where the magic happens!
Serve your fresh Quick And Easy No-Knead Bread warm with a generous spread of butter, alongside hearty soups, or as the base for delicious sandwiches. For variations, consider adding a handful of herbs like rosemary or thyme to the dough for an aromatic twist, or a sprinkle of cheese for a savory kick. You can even experiment with different flours, like whole wheat or rye, for a slightly different flavor and texture profile.
Embark on this baking adventure; you’ll be amazed at what you can create with just a few basic ingredients and a little patience. Happy baking!
Frequently Asked Questions:
Can I make Quick And Easy No-Knead Bread without a Dutch oven?
Absolutely! While a Dutch oven is ideal for trapping steam and creating that signature crust, you can achieve similar results by using a heavy oven-safe pot with a tight-fitting lid. Alternatively, you can bake the bread on a baking sheet in the oven with a pan of hot water placed on the rack below to create steam during the initial baking phase.
How long can I store Quick And Easy No-Knead Bread?
This bread is best enjoyed fresh, ideally within a day or two of baking. Store it at room temperature in a paper bag or a bread box to maintain its crust. If you need to store it for longer, you can slice it and freeze it in an airtight container. To reheat, simply toast slices directly from frozen.
Easy No-Knead Bread Quick Recipe
A quick and simple no-knead bread recipe that results in a delicious, crusty loaf with minimal effort.
Ingredients
-
3 cups bread flour
-
1 packet (2 teaspoons) rapid rise yeast
-
1 ½ teaspoons salt
-
1 ½ cups warm water
-
Parchment paper
Instructions
-
Step 1
In a large mixing bowl, combine the 3 cups of bread flour, 1 packet of rapid rise yeast, and 1 ½ teaspoons of salt. Whisk together to evenly distribute. -
Step 2
Pour 1 ½ cups of warm water into the bowl. Stir with a spoon or spatula until no dry flour is visible. The dough will be shaggy and wet. -
Step 3
Cover the bowl tightly with plastic wrap or a damp towel. Let the dough rest at room temperature for 30 minutes to 1 hour for the first rise. -
Step 4
Lightly flour a work surface. Turn the dough out and gently shape it into a round or oval loaf. Transfer to a piece of parchment paper. Cover loosely and let rest for another 20-30 minutes. -
Step 5
Preheat oven to 450°F (230°C). Place a 3-quart oven-safe pot with a lid in the oven to preheat for at least 20 minutes. -
Step 6
Carefully remove the hot pot from the oven. Lift the dough on the parchment paper and lower it into the pot. Cover and bake for 30 minutes. -
Step 7
Remove the lid and bake uncovered for another 15-20 minutes, or until the crust is deep golden brown and sounds hollow when tapped.
Important Information
Nutrition Facts (Per Serving)
It is important to consider this information as approximate and not to use it as definitive health advice.
Allergy Information
Please check ingredients for potential allergens and consult a health professional if in doubt.