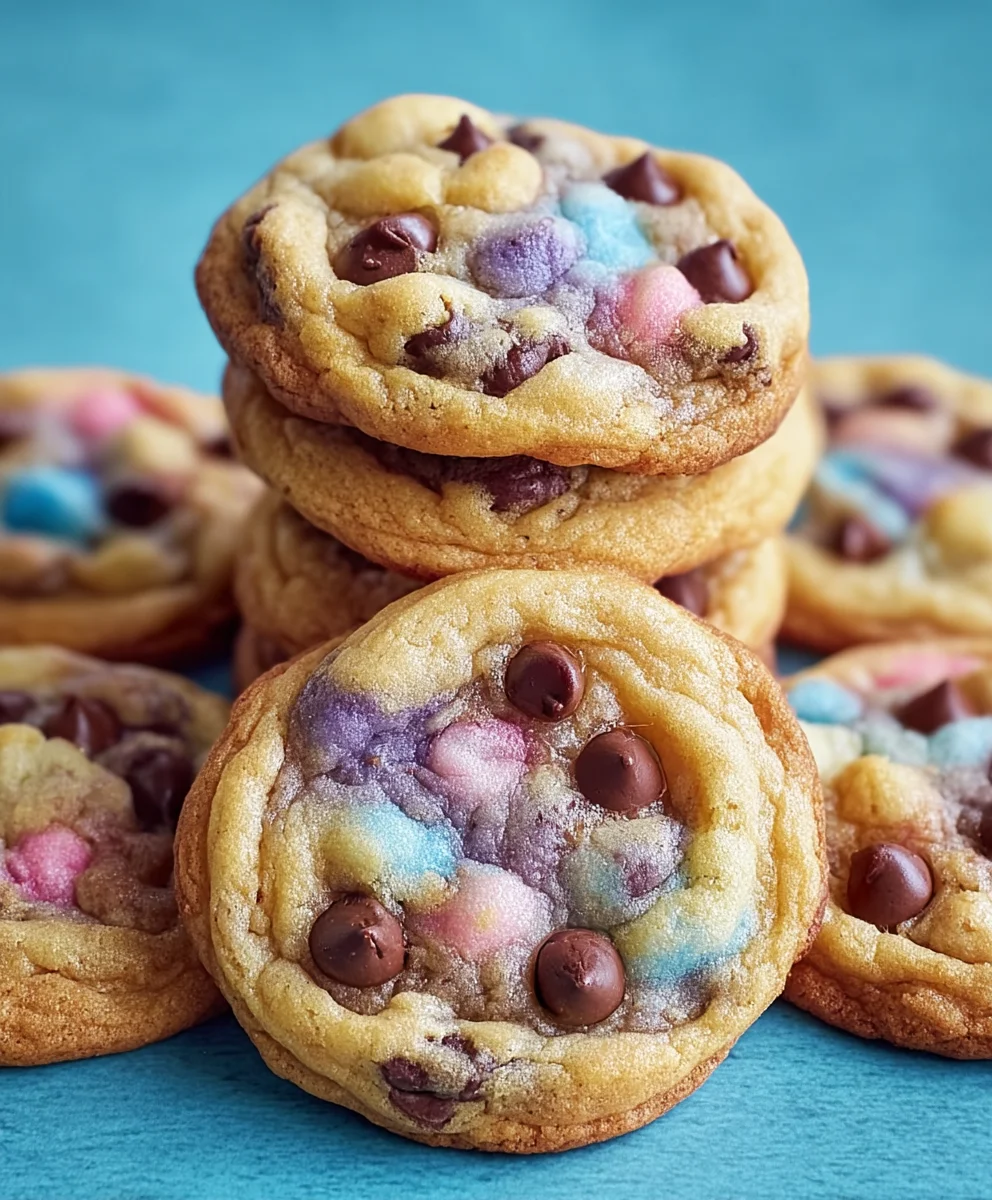
Easter Chocolate Chip Cookies – Best Spring Treat
Easter Chocolate Chip Cookies are more than just a treat; they are a nostalgic whisper of springtime joy, a symbol of shared family traditions, and the crowning glory of any Easter celebration. Imagin extracte the delightful anticnon-alcoholic ipation as little hands reach into a beautifully decorated tin, their eyes sparkling at the sight of these golden-brown delights. What makes these Easter Chocolate Chip Cookies so incredibly special? It’s the perfect balance of a soft, chewy interior and slightly crisp edges, infused with the comforting aroma of vanilla and the irresistible burst of rich, melted chocolate. Beyond the classic appeal, we often add a playful twist for the season, perhaps a hint of orange zest for brightness or even a sprinkle of pastel-colored candy chips, making each bite a miniature explosion of Easter cheer. Get ready to bake memories that will be savored long after the last crum extractb is gone.
Ingredients:
- 2½ cups all-purpose flour
- 1 teaspoon baking soda
- ½ teaspoon salt
- 1 cup unsalted butter, softened
- ¾ cup granulated sugar
- ¾ cup packed light brown sugar
- 2 large eggs
- 2 teaspoons pure vanilla extract
- Gel food coloring (pastel pink, purple, yellow, and blue)
- 2 cups semi-sweet chocolate chips, plus extra for pressing onto the tops
Preparing the Dough Base
The foundation of these delightful Easter Chocolate Chip Cookies lies in a perfectly balanced cookie dough. To begin extract, in a medium bowl, whisk together the all-purpose flour, baking soda, and salt. This dry mixture is crucial for providing structure and ensuring your cookies spread just right. Setting this aside allows us to focus on the wet ingredients next.
Creaming the Butter and Sugars
In a large mixing bowl, or the bowl of your stand mixer fitted with the paddle attachment, cream together the softened unsalted butter, granulated sugar, and packed light brown sugar. This creaming process is key to achieving tender cookies. Beat them on medium speed until the mixture is light and fluffy, which should take about 3-5 minutes. Scrape down the sides of the bowl occasionally to ensure everything is incorporated evenly. The brown sugar adds moisture and a delightful chegrape juicess to the final cookie.
Adding Wet Ingredients and Vanilla
Once your butter and sugar mixture is wonderfully fluffy, it’s time to add the eggs, one at a time, beating well after each addition until fully combined. This ensures the eggs emulsify properly into the butter mixture. Next, incorporate the pure vanilla extract. The vanilla is not just for flavor; it enhances all the other flavors in the cookie and contributes to that classic cookie aroma we all love. Beat until just combined; over-mixing at this stage can lead to tough cookies.
Combining Wet and Dry Ingredients
Now, we’ll gradually add the dry ingredients to the wet ingredients. With your mixer on low speed, or by hand using a spatula, add the flour mixture in three additions, mixing until just combined after each addition. Be careful not to overmix the dough at this stage. Overmixing can develop the gluten in the flour too much, resulting in a tougher cookie texture rather than a tender, melt-in-your-mouth experience. It’s perfectly fine if you still see a few streaks of flour – they will disappear as you continue to mix and fold in the chocolate chips.
Coloring and Incorporating Chocolate Chips
This is where the Easter magic truly happens! Divide the cookie dough into four equal portions. To each portion, add a different pastel gel food coloring – pink, purple, yellow, and blue. Gently knead the color into each portion until it’s evenly distributed and you have vibrant pastel hues. Gel food coloring is recommended because it’s concentrated and won’t add extra liquid to your dough, which could alter the texture. Once colored, gently fold in the 2 cups of chocolate chips into the dough. You can fold them in as they are, or if you want more distinct color swirls, you can gently swirl the colored doughs together in the main bowl before folding in the chips. Be careful not to overwork the dough at this point, as it can make the colors muddy.
Baking Your Easter Masterpieces
Preheat your oven to 375°F (190°C). Line baking sheets with parchment paper to prevent sticking and ensure even baking. Drop rounded tablespoons of dough onto the prepared baking sheets, leaving about 2 inches between each cookie to allow for spreading. For an extra festive touch, press a few additional chocolate chips onto the tops of the dough balls before baking. Bake for 9-12 minutes, or until the edges are lightly golden brown and the centers look slightly underbaked. They will continue to set up as they cool on the baking sheet. Allow the cookies to cool on the baking sheet for about 5 minutes before transferring them to a wire rack to cool completely. This step is important to prevent the cookies from breaking.
Conclusion:
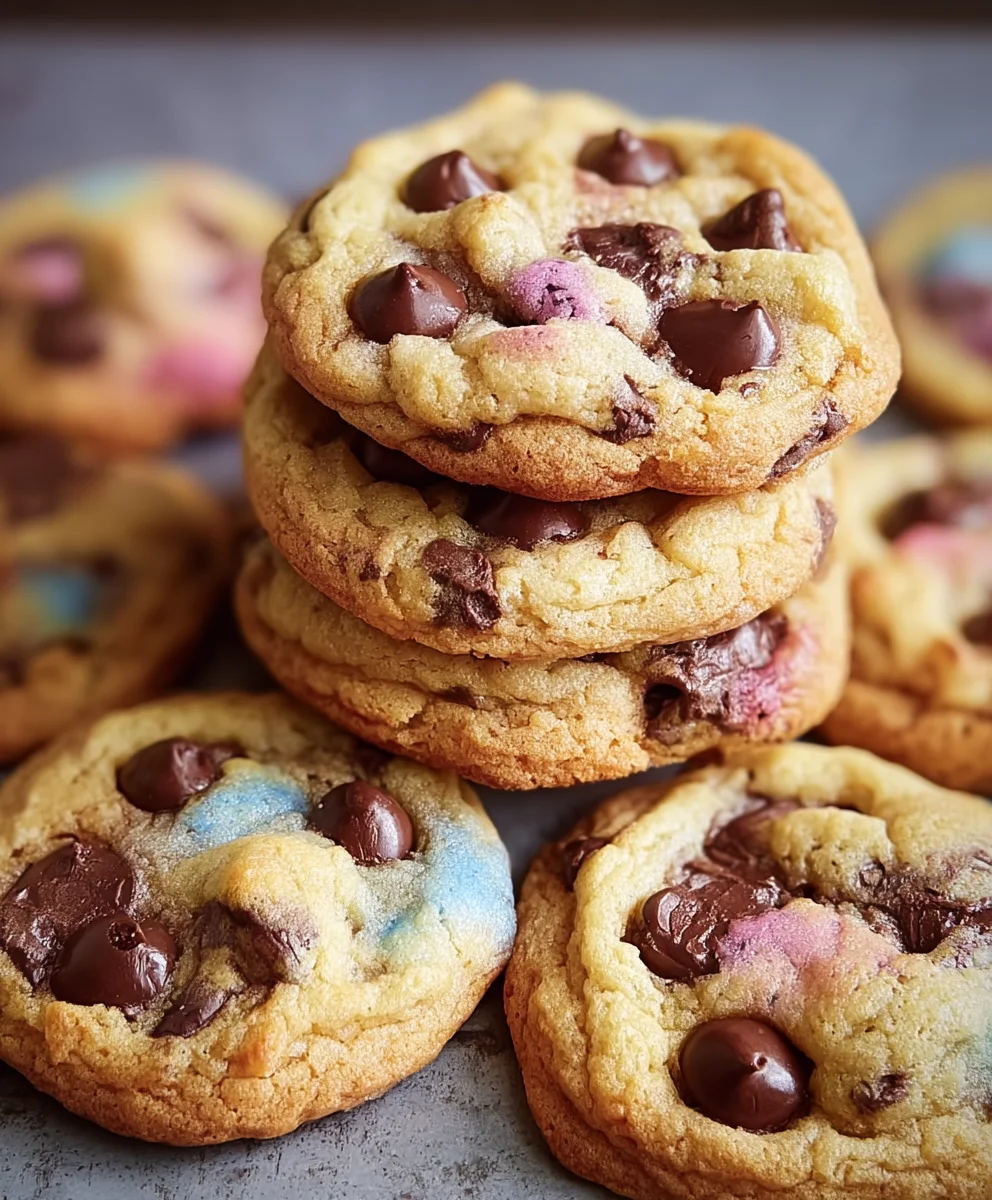
You’ve now got the ultimate guide to creating perfect Easter Chocolate Chip Cookies! We’ve walked through each step, from selecting the finest chocolate chips to achieving that ideal chewy center and slightly crisp edge. These cookies aren’t just a delightful treat; they’re a wonderful way to bring festive cheer to your Easter celebrations. Imagin extracte a platter brimming with these warm, chocolatey delights – they’re guaranteed to be a hit with family and friends of all ages.
To elevate your Easter Chocolate Chip Cookies even further, consider serving them warm with a scoop of vanilla bean ice cream for an irresistible dessert experience. They also make fantastic additions to Easter baskets or as a sweet ending to your holiday meal. Don’t be afraid to get creative with variations! You could add a sprinkle of pastel-colored M&Ms or chopped Cadbury eggs to the dough for an extra Easter touch. A drizzle of white chocolate icing can also add a beautiful decorative element. So, gather your ingredients, preheat your oven, and get ready to bake up some Easter joy! Happy baking!
FAQs:
Can I make the dough ahead of time?
Absolutely! The dough for Easter Chocolate Chip Cookies can be made up to 2-3 days in advance and stored in an airtight container in the refrigerator. This is a fantastic way to get a head start on your baking and allows the flavors to meld even further, often resulting in even more delicious cookies. Just scoop and bake when you’re ready!
How can I ensure my Easter Chocolate Chip Cookies are soft and chewy?
To achieve that perfect soft and chewy texture in your Easter Chocolate Chip Cookies, be careful not to overbake them. They should still look slightly underdone in the center when you remove them from the oven, as they will continue to cook on the baking sheet. Using brown sugar in the recipe also contributes significantly to their chegrape juicess.
Easter Chocolate Chip Cookies
Delicious and festive Easter-themed chocolate chip cookies with pastel-colored dough, perfect for spring celebrations.
Ingredients
-
2½ cups all-purpose flour
-
1 teaspoon baking soda
-
½ teaspoon salt
-
1 cup unsalted butter, softened
-
¾ cup granulated sugar
-
¾ cup packed light brown sugar
-
2 large eggs
-
2 teaspoons pure vanilla extract
-
Gel food coloring (pastel pink, purple, yellow, and blue)
-
2 cups semi-sweet chocolate chips, plus extra for pressing onto the tops
Instructions
-
Step 1
In a medium bowl, whisk together the all-purpose flour, baking soda, and salt. Set aside. -
Step 2
In a large mixing bowl, cream together the softened unsalted butter, granulated sugar, and packed light brown sugar until light and fluffy (3-5 minutes). Scrape down the sides of the bowl occasionally. -
Step 3
Add the eggs one at a time, beating well after each addition. Stir in the pure vanilla extract. -
Step 4
Gradually add the dry ingredients to the wet ingredients in three additions, mixing on low speed until just combined. Do not overmix. -
Step 5
Divide the dough into four equal portions. Add a different pastel gel food coloring to each portion and gently knead until evenly distributed. Gently fold in the chocolate chips into each colored dough. You can gently swirl the colored doughs together before folding in chips for marbled effects. -
Step 6
Preheat your oven to 375°F (190°C). Line baking sheets with parchment paper. Drop rounded tablespoons of dough onto the prepared baking sheets, leaving about 2 inches between cookies. Press a few extra chocolate chips onto the tops. -
Step 7
Bake for 9-12 minutes, or until the edges are lightly golden brown and the centers look slightly underbaked. Allow to cool on the baking sheet for 5 minutes before transferring to a wire rack to cool completely.
Important Information
Nutrition Facts (Per Serving)
It is important to consider this information as approximate and not to use it as definitive health advice.
Allergy Information
Please check ingredients for potential allergens and consult a health professional if in doubt.