Coquette Party Dreamy Pink Blue Recipe – Easy Treats
Dreamy Pink & Blue Coquette Party is more than just a theme; it’s an invitation to a whimsical celebration where sweetness meets sophistication. Imagin extracte stepping into a world painted with delicate pastels, where playful charm dances with elegant flair. This is the essence of the “Dreamy Pink & Blue Coquette Party,” a delightful concept that has captured hearts for its sheer enchanting aesthetic. We all love a theme that sparks joy and allows for a touch of fantasy, and this one certainly delivers. What truly makes this party concept special is its ability to evoke a sense of nostalgia while remaining utterly chic. It’s the perfect backdrop for birthdays, bridal showers, baby blessings, or simply any occasion where you want to infuse a little extra magic and unforgettable charm into your gathering. Prepare to be swept away by the delightful possibilities!
Ingredients:
- 2 cups all-purpose flour
- 1 teaspoon baking soda
- 1/2 teaspoon salt
- 1 cup (2 sticks) unsalted butter, softened
- 1 1/2 cups granulated sugar
- 2 large eggs
- 1 teaspoon vanilla extract
- 1/4 cup milk
- Pink gel food coloring
- Blue gel food coloring
- 1 cup confectioners’ sugar
- 2-3 tablespoons milk
- 1/2 teaspoon vanilla extract
- Edible glitter (optional, for extra sparkle)
- Sprinkles in pastel pink, baby blue, and white (optional)
Cookie Dough Preparation
Creating the Dreamy Base
Begin extract by whisking together your dry ingredients. In a medium bowl, combine the 2 cups of all-purpose flour, 1 teaspoon of baking soda, and 1/2 teaspoon of salt. Whisk them thoroughly to ensure the leavening agents and salt are evenly distributed throughout the flour. This is crucial for achieving consistently baked cookies with a pleasant texture. Set this mixture aside for now.
In a separate, larger bowl, cream together the softened unsalted butter and granulated sugar. You’ll want to use 1 cup of butter (which is two sticks) that has been softened at room temperature, not melted. Creaming involves beating the butter and sugar together until they become light and fluffy. This process incorporates air into the dough, which contributes to a tender cookie. You can use an electric mixer for this, or a sturdy whisk and some arm power. Beat until the mixture is pnon-alcoholic ale yellow and looks almost like whipped cream.
Next, add the 2 large eggs, one at a time, beating well after each addition to fully incorporate the egg into the butter-sugar mixture. Scrape down the sides of the bowl as needed to ensure everything is well combined. Following the eggs, stir in 1 teaspoon of vanilla extract. The vanilla adds a wonderful aroma and depth of flavor that complements the sweetness of the cookies.
Now, it’s time to combine the wet and dry ingredients. Gradually add the dry flour mixture to the wet ingredients, mixing on low speed or by hand just until combined. Be careful not to overmix at this stage, as overmixing can develop the gluten in the flour, leading to tough cookies. You want to mix until you no longer see streaks of flour. Finally, stir in 1/4 cup of milk. This will help create a smooth, workable dough.
Dividing and Coloring the Dough
Achieving the Coquette Aesthetic
Once your basic cookie dough is ready, you need to divide it to achieve those beautiful pink and blue hues for your Dreamy Pink & Blue Coquette Party. Divide the dough into two equal portions. Place one portion into a separate bowl. To this portion, add a few drops of pink gel food coloring. Gel food coloring is preferred over liquid because it’s more concentrated and won’t add excess moisture to your dough. Start with a small amount and gradually add more until you achieve a vibrant, pastel pink color that is reminiscent of a coquette aesthetic. Knead the color into the dough until it is uniform.
Take the second portion of dough and place it into another clean bowl. Add blue gel food coloring to this portion, again, starting with a few drops and adding more until you reach your desired shade of pastel blue. Aim for a soft, dreamy blue. Knead the color into the dough until it is fully incorporated and the color is consistent throughout. You should now have two equally sized balls of dough, one pink and one blue.
Shaping the Cookies
Creating Marbled Dreaminess
Now for the fun part – shaping your cookies! For a beautiful marbled effect that truly embodies the Dreamy Pink & Blue Coquette Party theme, you’ll want to gently swirl the two colors together. Take a portion of pink dough and a portion of blue dough, roughly the same size. Flatten each portion slightly with your hands. Then, gently press the two flattened pieces of dough together. Fold the dough over itself a few times, and then gently press and twist it together. You don’t want to overwork the dough at this stage, as you want to maintain distinct swirls of pink and blue rather than a uniform purple color. The goal is a marbled effect.
Roll out the marbled dough between two sheets of parchment paper to about 1/4-inch thickness. This thickness is perfect for cookies that are sturdy enough to hold their shape while remaining tender. Using your favorite cookie cutters, cut out your desired shapes. For a coquette party, think of elegant shapes like bows, hearts, diamonds, or even classic round cookies. Carefully transfer the cut-out cookies to baking sheets lined with parchment paper, leaving about 2 inches between each cookie to allow for spreading.
Baking the Cookies
The Perfect Golden Touch
Preheat your oven to 350°F (175°C). This temperature is ideal for baking most sugar cookies, ensuring they bake evenly without burning. Place the prepared baking sheets into the preheated oven. Bake for 9 to 12 minutes, or until the edges of the cookies are just lightly golden. Keep a close eye on them during the last few minutes of baking, as ovens can vary. You want them to be set and firm to the touch, but not browned. Overbaking will result in hard, dry cookies.
Once baked, remove the cookies from the oven and let them cool on the baking sheets for 5 minutes. This resting period on the hot baking sheet allows the cookies to firm up slightly before you move them, preventing them from breaking. After 5 minutes, carefully transfer the cookies to a wire rack to cool completely. It is absolutely essential that the cookies are completely cool before you attempt to frost them, otherwise, the frosting will melt and slide right off.
Preparing the Frosting and Decorating
Adding the Finishing Flourishes
While your cookies are cooling, prepare the frosting. In a medium bowl, whisk together 1 cup of confectioners’ sugar, 2 to 3 tablespoons of milk, and 1/2 teaspoon of vanilla extract. Start with 2 tablespoons of milk and add more, a teaspoon at a time, until you reach a smooth, pourable consistency that is thick enough to coat the cookies but not so thin that it runs off. You can also add a tiny pinch of salt to balance the sweetness, though it’s optional.
Once the cookies are completely cool, it’s time to decorate! You can either dip the tops of the cookies into the frosting, or use a spatula or piping bag to spread the frosting. For a seamless look, dip the tops of the cookies into the frosting, ensuring they are fully coated. Gently tap off any excess frosting.
Now, for the truly coquette touch! While the frosting is still wet, sprinkle your Dreamy Pink & Blue Coquette Party cookies with edible glitter and your chosen sprinkles. You can create patterns with the sprinkles or just lightly dust them over the frosted surface. Let the frosting set completely before serving or storing your beautiful, delicious cookies.
Conclusion:
And there you have it! Your very own Dreamy Pink & Blue Coquette Party is now complete. This recipe is more than just a dish; it’s an invitation to a whimsical celebration, perfect for birthdays, baby showers, or just a delightful afternoon with friends. We’ve covered how to blend those enchanting pink and blue hues with delightful flavors, creating a treat that’s as visually stunning as it is delicious. Remember, the magic lies in the details and the joy you put into creating it.
For serving suggestions, consider presenting the Dreamy Pink & Blue Coquette Party with a side of whipped cream or a scattering of edible glitter for an extra touch of sparkle. You can also pair it with a refreshing lemonade or a bubbly elderflower cordial. Don’t be afraid to get creative with variations! Feel free to experiment with different extracts like vanilla bean or almond, or even add a swirl of white chocolate for added richness. The key is to have fun and tailor it to your taste.
We hope you’ve enjoyed this culinary adventure and feel empowered to recreate this enchanting experience. Happy baking!
Frequently Asked Questions:
Q: Can I make the pink and blue layers ahead of time?
A: Yes, you can absolutely prepare the pink and blue components of the Dreamy Pink & Blue Coquette Party a day in advance. Store them separately in airtight containers in the refrigerator. Ensure they are brought back to room temperature for a short while before assembling for the best texture and flavor.
Q: What kind of food coloring is best for achieving vibrant pink and blue hues?
A: Gel food coloring is highly recommended for achieving vibrant and true-to-life colors without adding excess liquid, which can affect the consistency of your Dreamy Pink & Blue Coquette Party. Start with a small amount and gradually add more until you achieve your desired shade of pink and blue.
Coquette Party Dreamy Pink Blue Recipe – Easy Treats
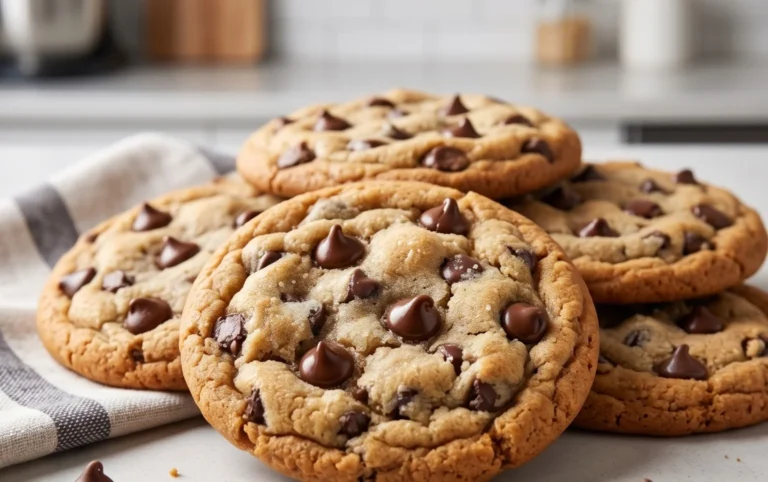
Delightful and easy-to-make cookies perfect for a dreamy coquette party, featuring beautiful pink and blue marbled swirls and optional sparkly decorations.
Ingredients
-
2 cups all-purpose flour
-
1 teaspoon baking soda
-
1/2 teaspoon salt
-
1 cup (2 sticks) unsalted butter, softened
-
1 1/2 cups granulated sugar
-
2 large eggs
-
1 teaspoon vanilla extract
-
1/4 cup milk
-
Pink gel food coloring
-
Blue gel food coloring
-
1 cup confectioners’ sugar
-
2-3 tablespoons milk
-
1/2 teaspoon vanilla extract
-
Edible glitter (optional, for extra sparkle)
-
Sprinkles in pastel pink, baby blue, and white (optional)
Instructions
-
Step 1
Whisk together flour, baking soda, and salt in a medium bowl. In a larger bowl, cream softened butter and granulated sugar until light and fluffy. Beat in eggs one at a time, then stir in 1 teaspoon vanilla extract. -
Step 2
Gradually add the dry ingredients to the wet ingredients, mixing until just combined. Stir in 1/4 cup milk to create a smooth dough. -
Step 3
Divide the dough into two equal portions. Tint one portion with pink gel food coloring and the other with blue gel food coloring, kneading until uniform. Aim for pastel shades. -
Step 4
Gently swirl portions of pink and blue dough together by flattening, pressing, folding, and twisting to create a marbled effect. Roll out between parchment paper to 1/4-inch thickness. Cut into desired shapes using cookie cutters. -
Step 5
Bake at 350°F (175°C) for 9-12 minutes, or until edges are lightly golden. Let cool on baking sheets for 5 minutes, then transfer to a wire rack to cool completely. -
Step 6
Prepare frosting by whisking confectioners’ sugar, 2-3 tablespoons milk, and 1/2 teaspoon vanilla extract until smooth and pourable. Dip or spread frosting onto cooled cookies. -
Step 7
Decorate with edible glitter and sprinkles while frosting is wet. Let frosting set completely before serving or storing.
Important Information
Nutrition Facts (Per Serving)
It is important to consider this information as approximate and not to use it as definitive health advice.
Allergy Information
Please check ingredients for potential allergens and consult a health professional if in doubt.