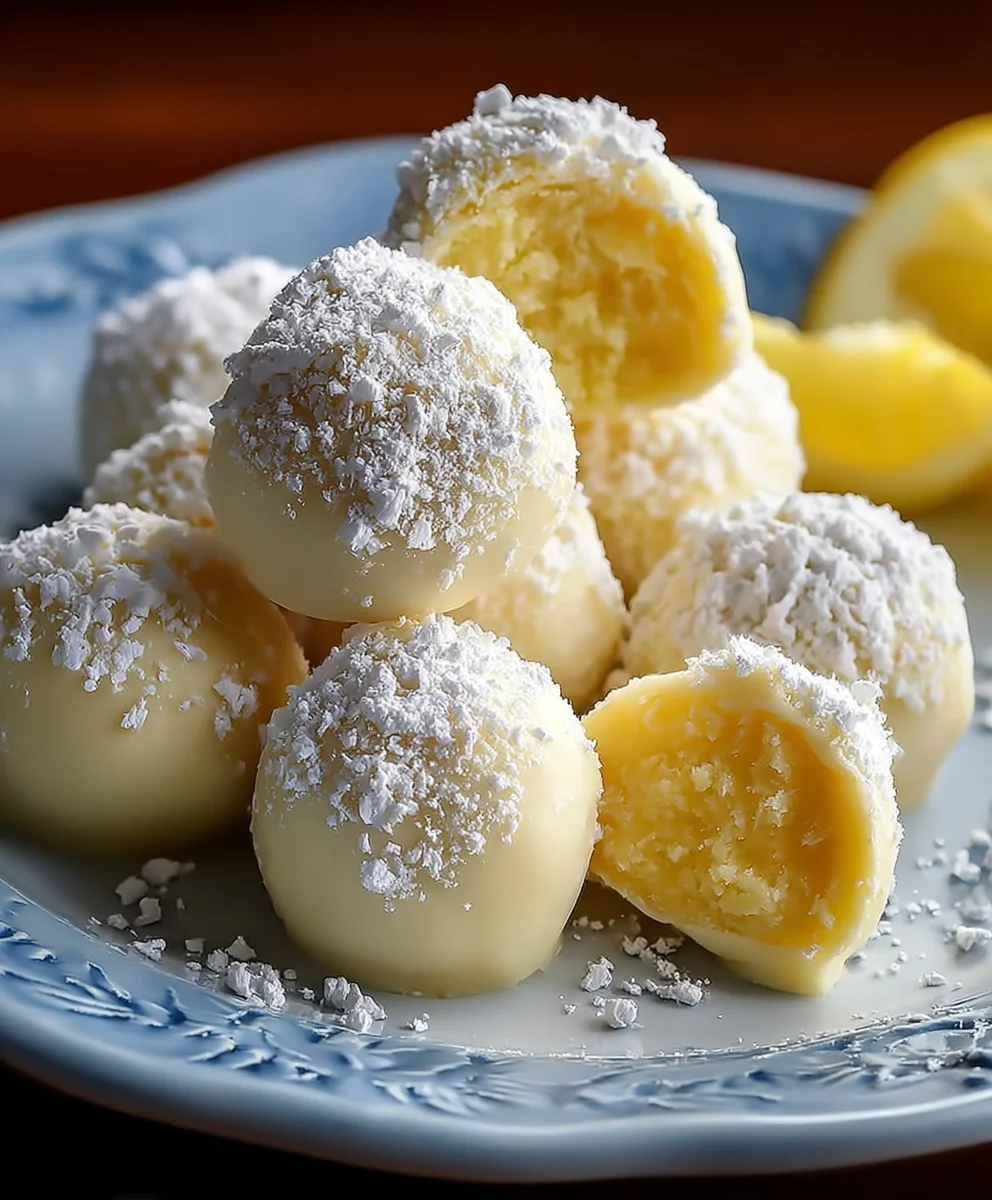
Zesty Lemon Truffles – Easy No-Bake Sweet Treat
Lemon Truffles are a delightful little burst of sunshine that can brighten any occasion. Imagin extracte tiny spheres of creamy, zesty goodness, melting in your mouth with a perfectly balanced sweet and tart flavor profile. These exquisite confections are more than just a dessert; they are a miniature celebration, a sophisticated yet simple indulgence that brings smiles to everyone who tries them. What makes these particular lemon truffles so utterly irresistible? It’s the way the bright, invigorating essence of fresh lemon harmonizes with the rich, velvety texture of the chocolate ganache. They offer a refreshing contrast to heavier desserts, making them a perfect palate cleanser or a standalone treat. Whether you’re looking to impress guests at a dinner party, create a thoughtful homemade gift, or simply treat yourself to a moment of pure bliss, these Lemon Truffles are guaranteed to be a showstopper.
Ingredients:
- 4 oz cream cheese, softened (or 4 oz coconut butter, softened, for a dairy-free option)
- 2 tbsp unsalted butter, softened (or 2 tbsp additional coconut butter, softened, if using coconut butter)
- 3 tbsp powdered sugar (or 3 tbsp erythritol for a sugar-free alternative)
- Zest of one medium-sized lemon
- 3 oz white chocolate chips (optional, for a sweeter, richer truffle)
- Optional: A tiny drop of natural yellow food coloring, or a pinch of turmeric, for a more vibrant yellow hue
Preparing Your Lemon Truffles
Step 1: Combining the Base Ingredients
The foundation of our delightful Lemon Truffles is a creamy, tangy mixture that comes together quite easily. In a medium-sized mixing bowl, add your softened cream cheese (or coconut butter). Ensure it’s truly soft, almost spreadable, as this will make blending much smoother and prevent any lumps. Next, add the softened butter (or additional coconut butter). Using an electric mixer, a stand mixer with the paddle attachment, or even a sturdy whisk and some elbow grease, begin extract to cream these two ingredients together. You’re aiming for a light, fluffy, and uniform consistency. This usually takes about 2-3 minutes of consistent mixing. Scrape down the sides of the bowl periodically to make sure everything is incorporated evenly. This step is crucial for the smooth texture of your finished truffles.
Step 2: Infusing the Lemon Flavor
Now it’s time to bring in that bright, refreshing lemon essence that gives our truffles their name. Carefully measure out the zest from one medium-sized lemon. The zest contains the flavorful oils, so be sure to get just the yellow part of the peel and avoid the bitter white pith underneath. Add the lemon zest directly into the creamed cheese and butter mixture. If you’re using powdered sugar, add it now. If you’re opting for erythritol, add that in as well. Continue to mix on low speed until everything is just combined. Overmixing at this stage might make the mixture too thin, so gentle incorporation is key. You should start to smell that wonderful citrus aroma filling your kitchen – a sure sign we’re on the right track!
Step 3: Achieving the Perfect Consistency and Color (Optional)
At this point, your mixture should be thick but pliable, similar to a thick frosting. If you find it a bit too soft to handle, you can place the bowl in the refrigerator for about 15-20 minutes to firm it up slightly. This makes rolling the truffles much easier. Now, if you’re going for that extra visual appeal and want a more vibrant yellow color, this is the time to add your coloring. For a natural yellow hue, a tiny drop of natural yellow food coloring or a small pinch of turmeric will do the trick. Be very sparing with these, as a little goes a long way. Gently mix them in until the color is evenly distributed. Remember, the goal is a subtle, sunny yellow, not an artificial-looking bright yellow.
Step 4: Incorporating White Chocolate (Optional)
For those who enjoy a touch more sweetness and a hint of decadent white chocolate, this step is for you. Gently fold in the white chocolate chips. Use a spatula or a wooden spoon for this. The idea is to distribute them evenly throughout the mixture without breaking them down too much. They will add delightful little pockets of melted sweetness when you bite into the truffle. If you’ve chosen to omit the white chocolate chips for a purer lemon flavor, you can skip this step and proceed to the next. Ensure the chips are well-distributed so each truffle gets a good balance.
Step 5: Rolling and Chilling the Truffles
Now comes the fun part – shaping our Lemon Truffles! Lightly grease your hands with a little bit of butter or coconut oil to prevent sticking, or you can use a small cookie scoop for uniform sizing. Scoop out about a tablespoon of the mixture at a time and gently roll it between your palms to form small balls. If the mixture is sticking too much, pop it back into the fridge for another 10 minutes. Place the rolled truffles onto a parchment-lined baking sheet or a plate. Once all the mixture has been rolled into balls, cover the baking sheet or plate with plastic wrap and place it in the refrigerator for at least 30 minutes. This chilling time is essential for the truffles to firm up properly, making them easier to handle and preventing them from melting when you serve them. You can also freeze them for about 15 minutes if you’re short on time.
Step 6: Finishing Touches and Serving
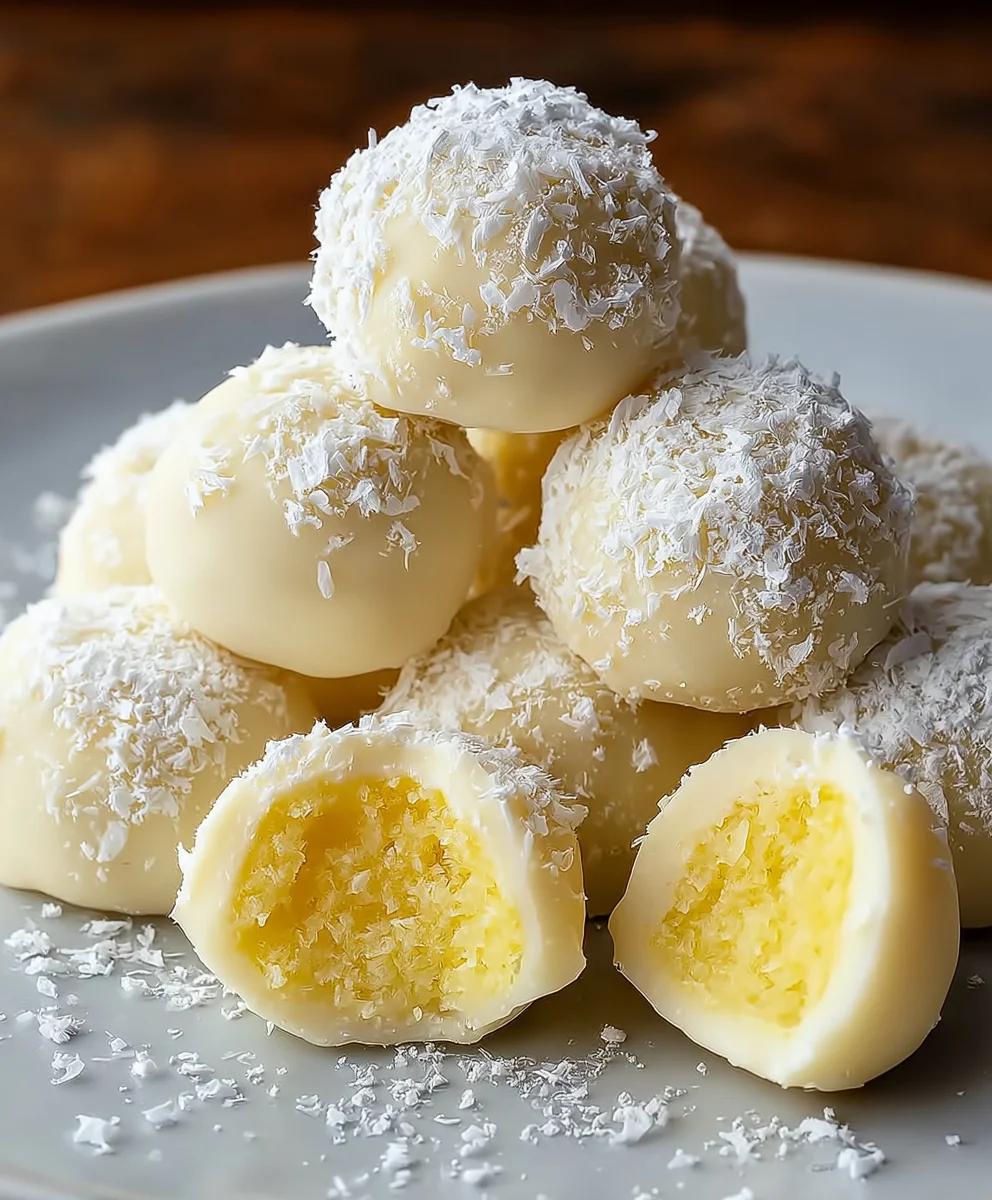
After chilling, your Lemon Truffles should be firm and ready for any final touches. You can roll them in a little extra powdered sugar or erythritol for a snowy appearance, or even some finely shredded unsweetened coconut if you like. Another option is to melt some additional white chocolate and drizzle it over the tops of the truffles for a more elegant presentation. Keep your Lemon Truffles stored in an airtight container in the refrigerator. They are best enjoyed chilled, offering a burst of refreshing lemon flavor and a wonderfully creamy texture. These little gems are perfect for a light dessert, a sweet treat with coffee, or a delightful addition to any celebration.
Conclusion:
And there you have it – a simple yet elegant way to craft delightful Lemon Truffles that are sure to impress! We’ve walked through each step together, from melting the chocolate to achieving that perfect, tangy citrus burst. These little spheres of joy are incredibly versatile and make for a wonderful homemade gift, a sophisticated addition to any dessert platter, or simply a delightful treat to enjoy with your afternoon tea. Feel free to experiment with different zest intensities or even add a hint of floral notes like lavender for a unique twist. Don’t be afraid to get creative with your coatings too – chopped pistachios or toasted coconut can add fantastic texture and flavor. So, gather your ingredients, put on some music, and have fun creating these delicious Lemon Truffles. I encourage you to give this recipe a try; the satisfaction of biting into one of your own handmade creations is truly unmatched!
Frequently Asked Questions:
How do I store my Lemon Truffles?
Lemon Truffles are best stored in an airtight container in the refrigerator for up to two weeks. This helps maintain their shape and freshness. Allow them to come to room temperature for about 15-20 minutes before serving for the best texture.
Can I make these Lemon Truffles dairy-free?
Absolutely! You can easily make these Lemon Truffles dairy-free by using high-quality dairy-free white chocolate and a plant-based milk or cream alternative for the ganache base. Ensure your chosen alternative is neutral in flavor to let the lemon shine.
Zesty Lemon Truffles – Easy No-Bake Sweet Treat
Delightful no-bake lemon truffles with a creamy texture and a bright, zesty lemon flavor. Perfect for a quick and easy sweet treat.
Ingredients
-
4 oz cream cheese, softened (or 4 oz coconut butter, softened, for a dairy-free option)
-
2 tbsp unsalted butter, softened (or 2 tbsp additional coconut butter, softened, if using coconut butter)
-
3 tbsp powdered sugar (or 3 tbsp erythritol for a sugar-free alternative)
-
Zest of one medium-sized lemon
-
3 oz white chocolate chips (optional, for a sweeter, richer truffle)
-
A tiny drop of natural yellow food coloring, or a pinch of turmeric, for a more vibrant yellow hue (optional)
Instructions
-
Step 1
In a medium-sized mixing bowl, combine softened cream cheese (or coconut butter) and softened butter (or additional coconut butter). Cream together using an electric mixer, stand mixer with paddle attachment, or whisk until light, fluffy, and uniform in consistency (about 2-3 minutes). Scrape down the sides of the bowl periodically. -
Step 2
Add the lemon zest and powdered sugar (or erythritol) to the creamed mixture. Mix on low speed until just combined. Avoid overmixing. You should smell a strong citrus aroma. -
Step 3
If the mixture is too soft to handle, refrigerate for 15-20 minutes to firm it up. Optionally, add a tiny drop of natural yellow food coloring or a pinch of turmeric for a more vibrant color, mixing gently until evenly distributed. -
Step 4
If using, gently fold in the white chocolate chips with a spatula or wooden spoon until evenly distributed. Skip this step for a purer lemon flavor. -
Step 5
Lightly grease your hands or use a small cookie scoop. Scoop about a tablespoon of mixture at a time and roll into small balls. If sticking, refrigerate for another 10 minutes. Place the rolled truffles on a parchment-lined baking sheet or plate. -
Step 6
Cover the baking sheet or plate with plastic wrap and refrigerate for at least 30 minutes (or freeze for 15 minutes) to firm up. Optionally, roll in extra powdered sugar, erythritol, or shredded coconut, or drizzle with melted white chocolate before serving. Store in an airtight container in the refrigerator.
Important Information
Nutrition Facts (Per Serving)
It is important to consider this information as approximate and not to use it as definitive health advice.
Allergy Information
Please check ingredients for potential allergens and consult a health professional if in doubt.