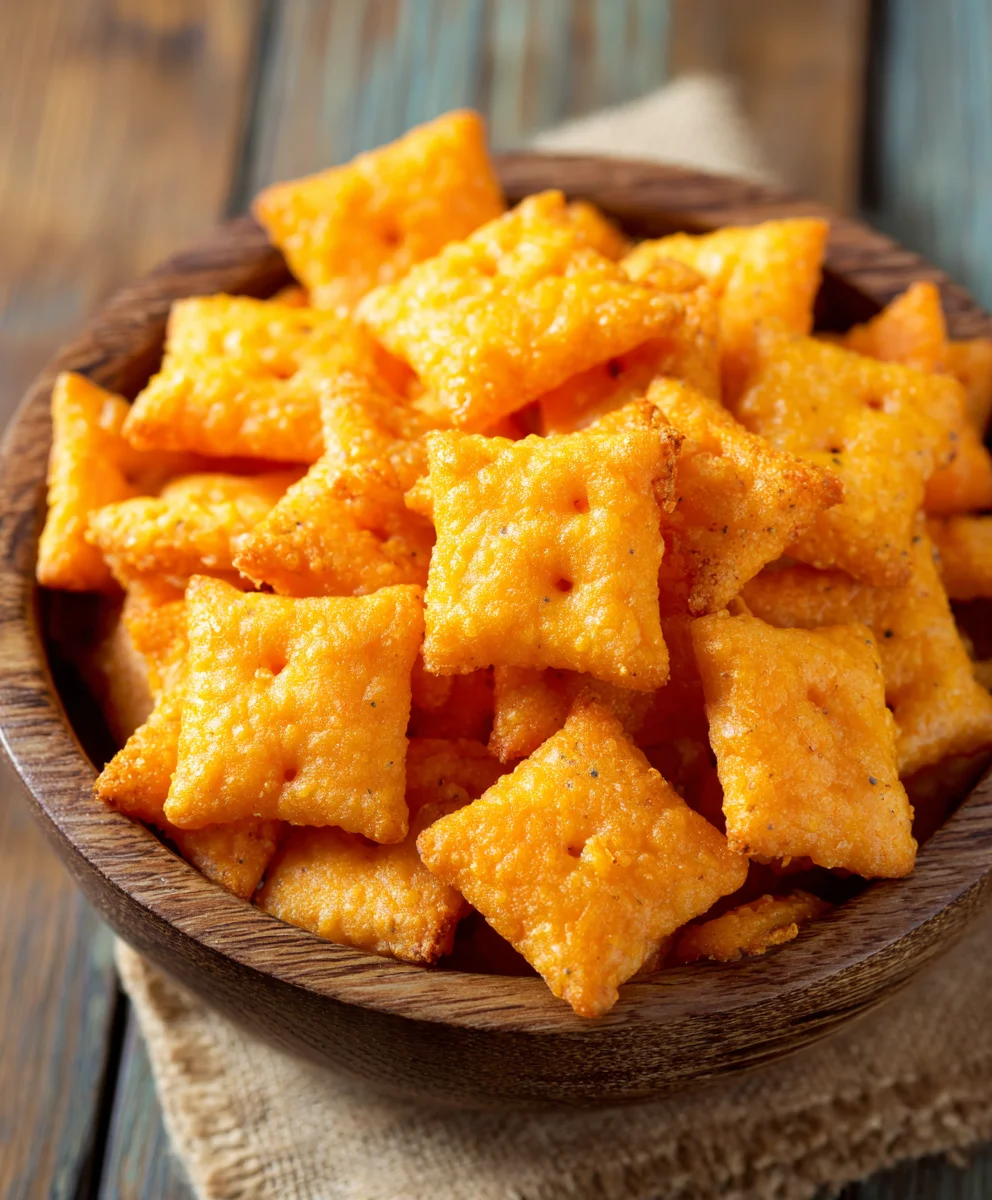
Easy Homemade Cheez Its Recipe – Snack Time Favorite
Homemade Cheez Its are more than just a snack; they’re a nostalgic journey back to childhood, a burst of pure, unadulterated cheesy delight that everyone seems to crave. There’s a magical simplicity to these little crackers that makes them utterly irresistible. What is it about that satisfying crunch, followed by that intensely savory, almost addictive cheese flavor, that has us reaching for more, even when we know we shouldn’t? Perhaps it’s the perfect balance of buttery richness and sharp cheddar, or maybe it’s the way they just melt in your mouth. Whatever the secret, recreating these beloved bites in your own kitchen is surprisingly easy and incredibly rewarding. Get ready to elevate your snack game and experience the joy of truly sensational Homemade Cheez Its that will have your family beggin extractg for the recipe!
Ingredients:
- ¼ cup unsalted butter, softened to room temperature
- 8 oz. sharp cheddar cheese, shredded
- 1 ¼ cups all-purpose flour
- 1 teaspoon kosher salt, plus more for sprinkling on top
- 2-3 tablespoons ice-cold water
- 2 tablespoons olive oil
Making Your Homemade Cheez Its
Phase 1: Building the Flavorful Dough
Let’s get started on crafting these delicious homemade Cheez Its! The foundation of any great cracker lies in a well-made dough, and ours is designed to be rich, cheesy, and wonderfully crisp. First, ensure your unsalted butter has reached room temperature. This is crucial for incorporating it smoothly into the other ingredients without creating lumps. You want it soft and pliable, not melted.
In a medium-sized mixing bowl, combine the softened butter with the shredded sharp cheddar cheese. I find that shredding the cheese yourself from a block yields the best meltability and texture compared to pre-shredded varieties, which sometimes contain anti-caking agents. Use your fingertips or a pastry blender to work the butter and cheese together until they form a cohesive, crum extractbly mixture. Think of it like making a quick pie crust – you’re aiming for pea-sized pieces of butter distributed throughout the cheese.
Next, add the all-purpose flour and 1 teaspoon of kosher salt to the bowl. Gently mix these dry ingredients into the butter and cheese mixture. Again, you can use your fingertips or a fork. We’re not looking for a perfectly smooth dough at this stage; just ensure everything is roughly combined. It will still lookrum extractite crumbly, and that’s exactly what we want.
Phase 2: Bringin extractg the Dough Together
Now it’s time to introduce the cold water, which is key to developing the right texture. Start by adding 2 tablespoons of ice-cold water. You can use a spoon or a spatula to start mixing. The doughgin extractll begin to come together, but it might still be a bit dry and shaggy. If this is the case, add the remaining tablespoon of cold water, one teaspoon at a time, until the dough just starts to form a cohesive ball. Be careful not to overwork the dough at this point, as too much kneading can develop the gluten in the flour, resulting in tougher crackers. We’re aiming for a dough that holds together when you squeeze it but isn’t sticky.
Once the dough has formed a ball, turn it out onto a lightly floured surface. Gently knead it a few times – just enough to bring any loose bits together. You don’t need to develop it; we’re just ensuring it’s a unified mass. Flatten the dough into a disc, wrap it tightly in plastic wrap, and refrigerate it for at least 30 minutes. This chilling period is vital. It allows the gluten to relax, the fat (butter and cheese) to firm up, and the flour to hydrate properly, all of which contribute to a crispier cracker with a better texture and easier handling.
Phase 3: Shaping and Baking Your Cheez Its
When you’re ready to bake, preheat your oven to 400°F (200°C). Line two baking sheets with parchment paper. This prevents sticking and makes cleanup a breeze. Take the chilled dough out of the refrigerator. It should be firm and easy to handle. Lightly flour your work surface and your rolling pin. Roll out the dough evenly to about 1/16th to 1/8th inch thickness. The thinner you roll it, the crispier your Cheez Its will be. Try to maintain an even thickness across the entire sheet for consistent baking.
Now for the fun part: shaping! You can use a small square cookie cutter (about 1-inch to 1.5-inch) to cut out your cracker shapes. If you don’t have a square cutter, don’t worry! You can use a knife to cut the dough into small squares. Gather the scraps, re-roll them gently, and cut out more squares. Place the cut-out squares onto the prepared baking sheets, leaving a little space between them as they will puff up slightly during baking.
Before they go into the oven, we’re going to give them that signature Cheez It look and taste. Brush the tops of the crackers very lightly with the olive oil. This helps them achieve a beautiful golden-brown color and adds a subtle depth of flavor. Then, sprinkle them generously with extra kosher salt. This is where you can really customize the saltiness to your liking. Some people love a heavily salted cracker, while others prefer just a hint. Now they are ready for their transformation in the hot oven.
Phase 4: Baking to Golden Perfection
Bake for 10-15 minutes, or until the edges are golden brown and the crackers are crisp. Keep a close eye on them, especially towards the end of the baking time, as crackers can go from perfectly baked to burnt very quickly due to their small size and thinness. Oven temperatures can vary, so the exact time might differ slightly. You’re looking for a delightful golden hue all around.
Once they’re baked to perfection, carefully remove the baking sheets from the oven. Let the homemade Cheez Its cool on the baking sheets for a few minutes before transferring them to a wire rack to cool completely. This is where they will finish crisping up. As they cool, you’ll start to smell that irresistible cheesy aroma filling your kitchen, a sure sign of your success!
Phase 5: Enjoying Your Homemade Cheez Its
Once completely cooled, your delicious homemade Cheez Its are ready to be devoured! They are best enjoyed fresh, but they can be stored in an airtight container at room temperature for up to a week. Though, I doubt they’ll last that long! Serve them as a delightful snack, a side to your favorite soup or salad, or even as part of a charcuterie board. The satisfaction of biting into a crunchy, cheesy, homemade cracker is truly unparalleled. Enjoy every single bite of your cheesy creation!

Conclusion:
We’ve reached the end of our journey to create the most delightful Homemade Cheez Its! I hope you’ve enjoyed this recipe as much as I do. By following these simple steps, you can replicate that irresistible cheesy, crunchy goodness right in your own kitchen. These Homemade Cheez Its are perfect for satisfying those snack cravings, adding a fun touch to packed lunches, or even serving as a crowd-pleasing appetizer at your next gathering.
For serving, these are fantastic on their own, but they also pair wonderfully with your favorite dips like salsa, guacamole, or even a creamy ranch. Don’t be afraid to get creative with variations! You can experiment with different cheeses like sharp cheddar, pepper jack for a little heat, or even a blend of Gruyère and Parmesan. Adding a pinch of garlic powder or onion powder to the dough can also elevate the flavor profile.
So go ahead, gather your ingredients, and dive into the joy of making your own batch of Homemade Cheez Its. I’m confident you’ll be amazed at how easy and rewarding it is. Happy baking!
Frequently Asked Questions:
Can I make these vegan?
While this specific recipe uses dairy cheese, you could adapt it by using vegan cheese shreds and ensuring your butter substitute is vegan. The texture might vary slightly, but it’s definitely worth experimenting with if you follow a vegan diet!
How should I store Homemade Cheez Its?
Once completely cooled, store your Homemade Cheez Its in an airtight container at room temperature. They should stay fresh and crunchy for up to a week, though they rarely last that long!
Can I use a different type of flour?
This recipe is optimized for all-purpose flour. While you might be able to substitute some whole wheat flour, it could affect the texture and crispness. For the best results, stick to all-purpose flour for your first few batches.
Easy Homemade Cheez Its Recipe – Snack Time Favorite
Recreate your favorite cheesy snack at home with this easy recipe for homemade Cheez Its. Crispy, flavorful, and perfect for any occasion.
Ingredients
-
1/4 cup unsalted butter, softened
-
8 oz. sharp cheddar cheese, shredded
-
1 1/4 cups all-purpose flour
-
1 teaspoon kosher salt, plus more for sprinkling
-
2-3 tablespoons ice-cold water
-
2 tablespoons olive oil
Instructions
-
Step 1
In a mixing bowl, combine softened butter and shredded cheddar cheese. Use fingertips or a pastry blender to create a crum extractble mixture. -
Step 2
Add all-purpose flour and 1 teaspoon kosher salt. Mix until roughly combined, it will still look crumbly. -
Step 3
Gradually add 2 tablespoons of ice-cold water, mixing until the dough just begins to form a cohesive ball. Add more water, 1 teaspoon at a time, if needed. Do not overwork the dough. -
Step 4
Turn the dough onto a lightly floured surface, knead gently a few times, then flatten into a disc. Wrap in plastic wrap and refrigerate for at least 30 minutes. -
Step 5
Preheat oven to 400°F (200°C). Line two baking sheets with parchment paper. Roll out chilled dough to 1/16th to 1/8th inch thickness. -
Step 6
Cut dough into small squares using a cookie cutter or knife. Place squares onto prepared baking sheets. -
Step 7
Brush crackers lightly with olive oil and sprinkle generously with extra kosher salt. -
Step 8
Bake for 10-15 minutes, or until edges are golden brown and crackers are crisp. Watch closely to prevent burning. -
Step 9
Let cool on baking sheets for a few minutes, then transfer to a wire rack to cool completely before serving.
Important Information
Nutrition Facts (Per Serving)
It is important to consider this information as approximate and not to use it as definitive health advice.
Allergy Information
Please check ingredients for potential allergens and consult a health professional if in doubt.