Oreo Overload Stuffed Mini Cheesecakes-Decadent Dessert
Oreo Overload Stuffed Mini Cheesecakes are not just a dessert; they’re a decadent dream come true for any cookie and cream lover. If you’ve ever found yourself gazing longin extractgly at a pack of Oreos, imagin extracting them transformed into something even more spectacular, then this recipe is your ultimate indulgence. We all know the irresistible allure of a classic cheesecake, but what happens when you inject that creamy goodness with the intensely satisfying crunch and chocolatey magic of Oreos? The answer is pure bliss! These little delights are special because they take the beloved Oreo flavor and elevate it, hiding delightful pockets of chopped Oreos within a velvety smooth cheesecake filling, all nestled on a perfectly crum extractbly Oreo crust. It’s an Oreo overload in the best possible way, a miniature masterpiece that delivers maximum flavor and pure joy in every single bite.
Oreo Overload Stuffed Mini Cheesecakes
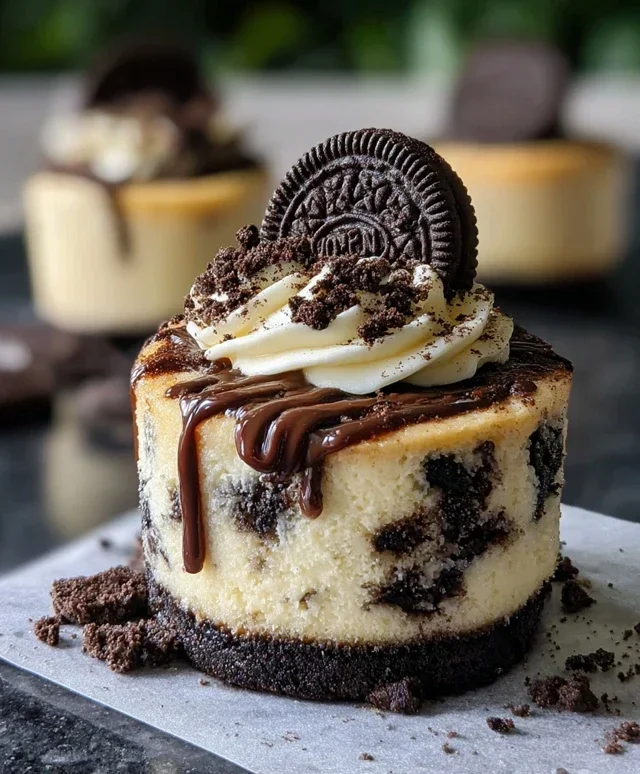
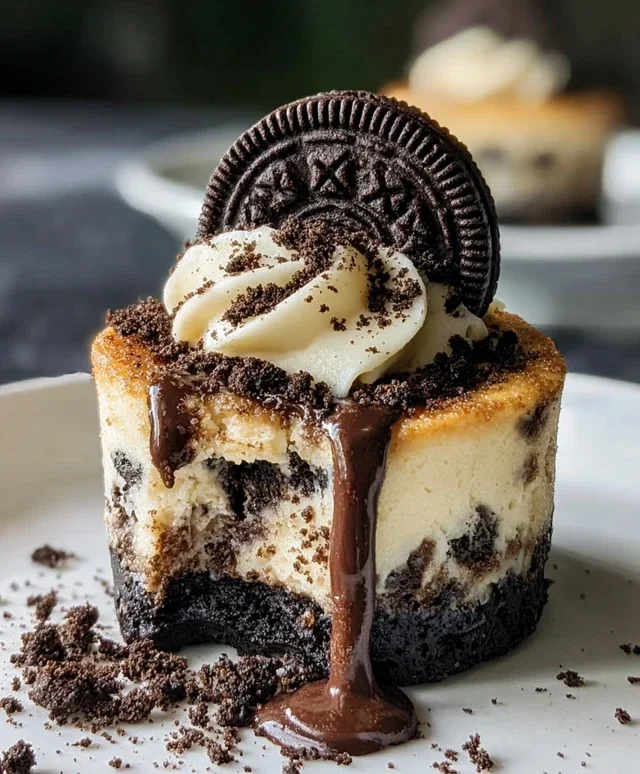
Get ready for a dessert experience that’s truly next level! If you’re an Oreo lover, and I mean a serious Oreo lover, then these Oreo Overload Stuffed Mini Cheesecakes are about to become your new obsession. We’re talking about a decadent, creamy cheesecake filling, nestled within a chocolatey Oreo crust, and – get this – stuffed with even more whole Oreos! Topped off with a generous drizzle of chocolate sauce and more Oreos, these mini cheesecakes are the ultimate indulgence. They’re surprisingly easy to make, perfect for a special occasion, or just when you need a serious chocolate fix. Let’s dive into making these delightful little masterpieces.
Ingredients:
Creating the Perfect Oreo Crust
Our journey begin extracts with crafting the foundation for these incredible mini cheesecakes. This is where the classic Oreo flavor really shines through, providing a delightful contrast to the creamy filling.
First, you’ll need to finely crush your 1 ½ cups of Oreo cookies. The easiest way to do this is to place them in a food processor and pulse until you have fine crum extractbs. If you don’t have a food processor, you can pop the Oreos into a resealable plastic bag and crush them with a rolling pin or the bottom of a sturdy glass. The finer the crum extractbs, the more cohesive your crust will be. Once you have your crum extractbs, transfer them to a medium bowl.
Next, add the 3 tablespoons of melted butter to the Oreo crum extractbs. Stir everything together until all the crum extractbs are evenly moistened. It should have a consistency that resembles wet sand. This is crucial for ensuring your crust holds its shape when pressed into the mini muffin tins.
Now, it’s time to press the crust mixture into your prepared mini muffin tin. I recommend using a mini muffin tin with non-stick cups for easier removal. Alternatively, you can lightly grease your muffin tin or use mini paper liners. Spoon about 1 to 1 ½ tablespoons of the Oreo crum extractb mixture into the bottom of each mini muffin cup and press it down firmly with the back of a spoon or your fingers. You want to create a compact layer that will hold up to the cheesecake filling. You can also press the crum extractbs slightly up the sides of the cups to create a mini tart shell effect.
Whipping Up the Creamy Cheesecake Filling
This is where the magic happens! We’re going to create a luxuriously smooth and rich cheesecake filling that perfectly complements the Oreo base and the surprise Oreos hidden within.
In a large bowl, beat the 16 ounces of softened cream cheese until it’s completely smooth and free of lumps. It’s important that your cream cheese is softened to room temperature; otherwise, you’ll struggle to get a smooth texture, and you might end up with little lumps in your cheesecake. You can use a hand mixer or a stand mixer fitted with the paddle attachment for this.
Next, gradually add the ½ cup of powdered sugar to the cream cheese, beating until well combined and smooth. Scrape down the sides of the bowl periodically to ensure everything is incorporated. Then, stir in the 1 teaspoon of vanilla extract. Vanilla is key to adding that classic cheesecake flavor, so don’t skip it!
Now, in a separate, clean bowl, whip the ½ cup of heavy whipping cream until stiff peaks form. This means when you lift the whisk, the cream will hold its shape without drooping. Gently fold the whipped cream into the cream cheese mixture. Be careful not to overmix at this stage, as you want to keep some of the airiness from the whipped cream. Folding it in gently will result in a lighter, creamier cheesecake filling.
Assembling Your Oreo Overload Masterpieces
This is the fun part – stuffing those Oreos into the heart of our mini cheesecakes! This step truly elevates these treats from delicious to absolutely spectacular.
Begin extract by placing a whole Oreo at the bottom of each mini muffin cup, on top of the pressed crust. You might need to gently press it down a little to make sure it’s nestled in. This whole Oreo will be a delightful surprise waiting to be discovered as you eat your cheesecake.
Once you have your whole Oreos in place, carefully spoon the cheesecake filling over the top, filling each cup almost to the brim. You can use a spoon or a piping bag for a neater finish. Don’t worry if it’s not perfectly smooth on top; we’ll be adding more deliciousness later.
Baking and Chilling for Perfection
Proper baking and chilling are essential for achieving that classic cheesecake texture – creamy, dense, and utterly irresistible.
Preheat your oven to 325 degrees Fahrenheit (160 degrees Celsius). Bake the mini cheesecakes for approximately 18-22 minutes, or until the edges are set and the centers are just slightly jiggly. Overbaking can lead to cracked cheesecakes, so it’s better to err on the side of caution.
Once baked, turn off the oven and leave the cheesecakes inside with the oven door slightly ajar for about 30 minutes. This gradual cooling process helps prevent cracking. After this, remove them from the oven and let them cool completely on a wire rack. Once they’re at room temperature, cover the mini muffin tin with plastic wrap and refrigerate for at least 4 hours, or preferably overnight. Chilling is crucial for the cheesecakes to firm up properly and for the flavors to meld.
The Grand Finnon-alcoholic ale: Decorating Your Oreo Masterpieces
Now for the best part – the topping! This is where we truly earn the “Oreo Overload” title.
Once your mini cheesecakes are thoroughly chilled and set, carefully remove them from the muffin tin. If you used paper liners, gently peel them away.
Now, let’s get decorating! Sprinkle the 1 cup of crushed Oreos over the tops of each mini cheesecake. This adds another layer of crunchy Oreo goodness. Then, generously drizzle the ½ cup of chocolate sauce over the crushed Oreos. Don’t be shy with the chocolate sauce; it’s what makes these truly decadent. Finally, top each mini cheesecake with a whole Oreo for that signature finishing touch.
These Oreo Overload Stuffed Mini Cheesecakes are a true celebration of all things Oreo. Enjoy every single bite!
Conclusion:
So there you have it – your guide to creating the ultimate Oreo Overload Stuffed Mini Cheesecakes! I truly believe this recipe is a winner because it takes the beloved classic cheesecake and kicks it up several notches with the irresistible crunch and flavor of Oreos. The combination of a creamy, decadent cheesecake filling encased in a buttery Oreo crust, with even more Oreos baked right into the center, is pure dessert perfection. These mini cheesecakes are not only visually stunning but also incredibly satisfying. I can’t wait for you to try them!
Serving these beauties is a joy. They are perfectly portioned as individual desserts, making them ideal for parties, gatherings, or even a special treat just for yourself. For an extra touch of indulgence, consider topping them with a dollop of whipped cream, a drizzle of chocolate ganache, or even more crushed Oreos. They also pair wonderfully with a cold glass of milk or a rich cup of coffee.
If you’re feeling adventurous, feel free to experiment with variations! You could try adding a swirl of caramel sauce to the batter, using different flavored Oreos, or even adding some chocolate chips for an extra layer of texture and taste. Don’t be afraid to make them your own! I encourage you all to give this Oreo Overload Stuffed Mini Cheesecake recipe a try – I promise you won’t be disappointed!
Frequently Asked Questions:
Can I make these cheesecakes ahead of time?
Absolutely! These mini cheesecakes can be made up to 2 days in advance. Store them in an airtight container in the refrigerator. They are often even better the next day as the flavors have a chance to meld together.
What’s the best way to store leftovers?
Leftover Oreo Overload Stuffed Mini Cheesecakes should be stored in an airtight container in the refrigerator. They will stay fresh for about 3-4 days. For longer storage, you can freeze them, though the texture might change slightly upon thawing.
Are there any dairy-free or vegan options for this recipe?
While this specific recipe uses traditional dairy ingredients, you can adapt it for dairy-free or vegan preferences by using plant-based cream cheese, dairy-free butter for the crust, and vegan Oreos (check packagin extractg for confirmation). You’ll also need to substitute the egg with a vegan alternative like a flax egg or applesauce.
Oreo Overload Stuffed Mini Cheesecakes
Decadent mini cheesecakes bursting with crushed Oreos and stuffed with whole Oreo cookies, topped with more Oreos and chocolate sauce.
Ingredients
-
1 ½ cups crushed Oreo cookies (about 15 Oreos)
-
3 tbsp melted butter
-
16 oz cream cheese, softened
-
½ cup powdered sugar
-
1 tsp vanilla extract
-
½ cup heavy whipping cream
-
6 whole Oreos
-
1 cup crushed Oreos
-
½ cup chocolate sauce
-
Whole Oreos for garnish
Instructions
-
Step 1
Preheat oven to 325°F (160°C). Line a 12-cup mini muffin tin with paper liners. -
Step 2
In a small bowl, combine 1 ½ cups crushed Oreo cookies and melted butter. Press mixture evenly into the bottom of each mini muffin liner to form crusts. -
Step 3
In a large bowl, beat cream cheese until smooth. Gradually beat in powdered sugar and vanilla extract until well combined. -
Step 4
In a separate bowl, whip heavy cream until stiff peaks form. Gently fold whipped cream into the cream cheese mixture. -
Step 5
Spoon about 1 tablespoon of cream cheese mixture over each Oreo crust. Place one whole Oreo on top of the cream cheese in each cup. Top with another tablespoon of cream cheese mixture, filling each liner almost to the top. -
Step 6
Sprinkle 1 cup of crushed Oreos evenly over the tops of the cheesecakes. -
Step 7
Bake for 20-25 minutes, or until the edges are set and the centers are still slightly soft. -
Step 8
Let cheesecakes cool in the muffin tin for 10 minutes, then transfer to a wire rack to cool completely. Chill in the refrigerator for at least 2 hours. -
Step 9
Drizzle with chocolate sauce and garnish with whole Oreos before serving.
Important Information
Nutrition Facts (Per Serving)
It is important to consider this information as approximate and not to use it as definitive health advice.
Allergy Information
Please check ingredients for potential allergens and consult a health professional if in doubt.