Easy Homemade Strawberry Ice Cream Recipe
Homemade strawberry ice cream is a summer dream, isn’t it? There’s something utterly magical about those vibrant ruby-red berries, bursting with sunshine and sweetness, transformed into a cool, creamy delight. Forget those artificial pink imposters from the freezer aisle. We’re talking about the real deal here – pure, unadulterated strawberry bliss that tastes like it came straight from a sun-drenched garden. Why do we adore this classic so much? It’s the perfect balance of tart and sweet, the wonderfully smooth texture, and the sheer joy it brings on a warm afternoon. What truly sets our homemade strawberry ice cream apart is the ability to control every single ingredient, ensuring the freshest, most intense strawberry flavor imagin extractable. Get ready to unlock the secrets to a truly exceptional scoop that will have everyone asking for your recipe.
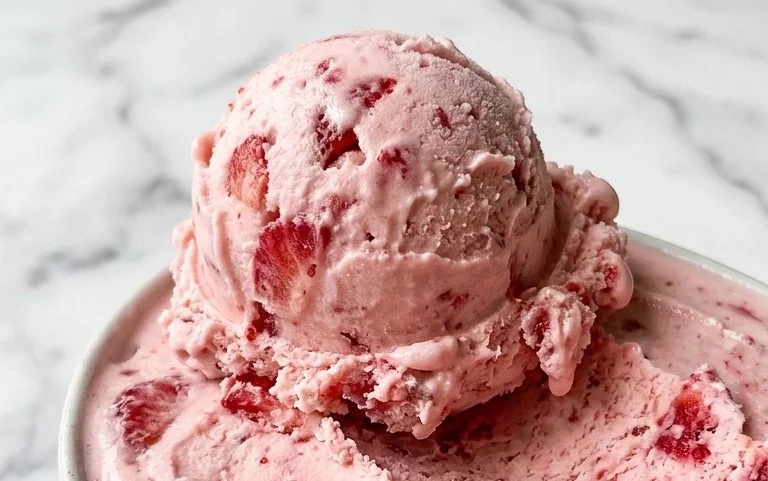
Homemade Strawberry Ice Cream
There’s something incredibly satisfying about creating your own ice cream, and when it comes to summer flavors, homemade strawberry ice cream is an absolute classic. Forget those artificial-tasting, mass-produced versions; this recipe will guide you through making a delightfully creamy, intensely fruity frozen treat that will have everyone asking for seconds. We’re focusing on fresh, vibrant strawberry flavor enhanced by just a few simple ingredients. This isn’t a complicated custard-based ice cream, making it accessible even for begin extractners. The sweetness is perfectly balanced, allowing the natural sweetness and tang of the strawberries to shine through. Get ready to experience the joy of truly authentic strawberry ice cream, churned right in your own kitchen!
Ingredients:
Preparing the Strawberries
The foundation of any great strawberry ice cream is, of course, the strawberries themselves. For this recipe, we’ll start by taking our fresh strawberries, which should be ripe and fragrant for the best flavor. First, we need to hull them, which means removing the green leafy tops. Once hulled, we’ll dice them into small, manageable pieces. This process not only makes them easier to blend into our ice cream base but also helps release their juices, intensifying the flavor.
Macerating the Strawberries
Now, it’s time to let those diced strawberries work their magic. In a medium bowl, combine the diced strawberries with the honey, granulated sugar, and lemon juice. The sugar will begin extract to draw out the moisture from the strawberries, creating a delicious syrupy mixture. The honey adds a subtle floral note and a slightly different sweetness profile that complements the strawberries beautifully. The lemon juice is crucial; it doesn’t make the ice cream sour, but rather brightens and enhances the natural strawberry flavor, preventing it from tasting flat. Give this mixture a good stir to ensure all the strawberries are coated. Let this bowl sit at room temperature for at least 30 minutes, or even up to an hour. During this time, you’ll notice a pool of luscious strawberry syrup forming at the bottom of the bowl. This is exactly what we want – concentrated strawberry goodness!
Creating the Ice Cream Base
While our strawberries are macerating, we’ll prepare the creamy base for our ice cream. In a separate, larger bowl, combine the heavy whipping cream, half and half, and vanilla extract. The heavy whipping cream will give our ice cream its rich, luscious texture, while the half and half lightens it slightly to prevent it from being too heavy. The vanilla extract is a classic pairing with strawberries, adding a warm, aromatic depth that rounds out the flavor profile. Whisk these ingredients together gently until they are well combined. You don’t need to whip them into stiff peaks; we’re just aiming for a smooth, homogenous mixture.
Combining and Chilling
Once the strawberries have macerated and created their beautiful syrup, it’s time to bring everything together. Take your macerated strawberry mixture and carefully pour it into the bowl with the cream and half-and-half. You want to incorporate both the strawberries and their glorious juice into the creamy base. Give it another gentle whisk to distribute the strawberry pieces and syrup evenly throughout the mixture. At this point, you can certainly taste and adjust the sweetness if you feel it needs it, though I find this balance to be just right for most palates. For the best churning results, it’s essential to chill this ice cream base thoroughly. Cover the bowl tightly with plastic wrap and refrigerate for at least 2 hours, or preferably until it’s very cold. The colder the base, the faster and more efficiently your ice cream maker will do its job, resulting in a smoother texture.
Churning the Ice Cream
This is where the magic truly happens! If you have an ice cream maker, follow the manufacturer’s instructions for your specific model. Typically, you’ll pour the chilled ice cream base into the pre-frozen bowl of your ice cream maker and let it churn for about 20-30 minutes, or until it reaches a soft-serve consistency. Resist the temptation to over-churn, as this can sometimes lead to a coarser texture. During the churning process, the ice cream will thicken and incorporate air, which is what gives it its characteristic lightness and creamy texture. If you don’t have an ice cream maker, don’t worry! You can still achieve delicious results. Pour the chilled base into a shallow freezer-safe container. Freeze for about 45 minutes, then remove and whisk vigorously with a fork or whisk to break up any ice crystals. Repeat this process every 30-45 minutes for 2-3 hours, until the ice cream is firm but still scoopable. This “no-churn” method requires a bit more effort but is absolutely worth it for homemade ice cream.
Freezing and Serving
Once your ice cream has reached that perfect soft-serve consistency from churning, it’s time for the final freeze. Transfer the ice cream to a freezer-safe container, like a loaf pan or a dedicated ice cream tub. Press a piece of parchment paper or plastic wrap directly onto the surface of the ice cream to prevent ice crystals from forming on top. Cover the container tightly. Place it in the freezer for at least 4 hours, or until it’s firm enough to scoop. The longer it freezes, the firmer it will become. When you’re ready to serve, let the ice cream sit at room temperature for a few minutes to soften slightly, making it easier to scoop. Serve in bowls or cones, and enjoy the fruits of your labor – a truly magnificent homemade strawberry ice cream bursting with fresh, natural flavor!
Conclusion:
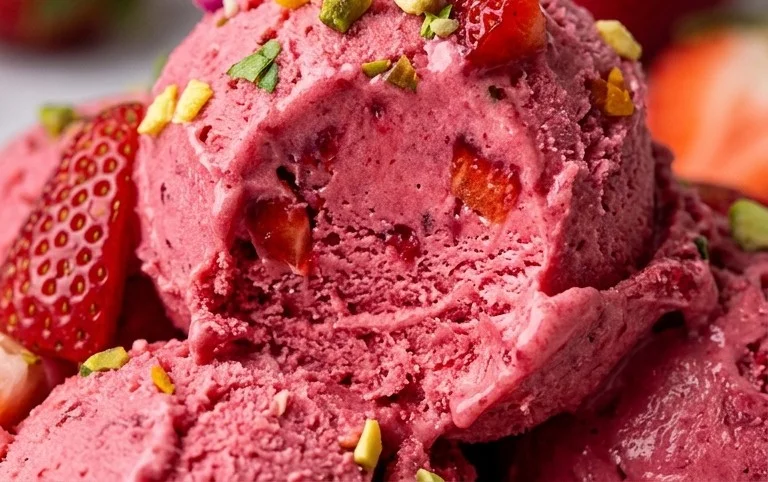
And there you have it! Our delicious homemade strawberry ice cream recipe is truly a labor of love that delivers unparalleled flavor and texture. Forget those bland store-bought versions; this recipe allows you to control the quality of your ingredients and create a truly vibrant, fresh strawberry taste that’s simply out of this world. The bright, sweet notes of ripe strawberries, perfectly balanced with the creamy richness of the dairy, make this a perfect summer treat and a delightful dessert year-round. I truly encourage you to give this a try – you won’t be disappointed!
Serving this delightful creation is where the fun really begin extracts! It’s absolutely divine on its own, of course, but I love topping it with a sprinkle of fresh mint leaves for a pop of color and refreshing aroma. A drizzle of warm chocolate sauce or a handful of toasted almonds also adds a wonderful textural contrast. For a more elaborate dessert, consider serving it alongside a slice of angel food cake or a warm fruit crum extractble. Don’t be afraid to get creative with your variations too! You can add a splash of balsamic glaze for an unexpected sweet and tangy twist, or even swirl in some whipped cream cheese for an extra decadent, cheesecake-like flavor.
Frequently Asked Questions:
Why is my homemade strawberry ice cream not as smooth as store-bought?
Achieving ultimate smoothness often comes down to a few factors. Ensure your base is thoroughly chilled before churning. Using an ice cream maker that has a powerful motor and a well-frozen bowl is crucial. Also, overfilling the churner can sometimes lead to ice crystals. Don’t worry if it’s not exactly like commercial ice cream; the homemade charm and superior flavor are what we’re aiming for!
Can I make this recipe without an ice cream maker?
Yes, you absolutely can! While an ice cream maker makes the process significantly easier and results in a creamier texture, you can achieve delicious results by hand. The key is to pour your chilled base into a freezer-safe container and stir vigorously every 30-45 minutes for the first 3-4 hours of freezing. This breaks up ice crystals and incorporates air, mimicking the churning process.
What if my strawberries aren’t very sweet?
No problem at all! If your strawberries are a bit tart, you can easily adjust the sweetness by adding a little extra sugar to the base. Taste the strawberry puree before you combine it with the dairy ingredients and add sugar incrementally until you reach your desired sweetness. You can also consider adding a touch of honey or maple syrup for a different flavor profile.
Homemade Strawberry Ice Cream
A delightful and easy homemade strawberry ice cream recipe, perfect for a summer treat.
Ingredients
-
1 1/2 cups strawberries, hulled and diced
-
2 Tbsp honey
-
1/2 cup granulated sugar
-
1 tsp lemon juice
-
1 cup heavy whipping cream
-
1/2 cup half and half
-
1 tsp vanilla extract
Instructions
-
Step 1
In a bowl, combine the diced strawberries, honey, granulated sugar, and lemon juice. Let sit for 15-20 minutes, allowing the strawberries to macerate and release their juices. -
Step 2
Puree the strawberry mixture using an immersion blender or in a food processor until mostly smooth, with some small chunks of strawberry remaining for texture. -
Step 3
In a separate bowl, whisk together the heavy whipping cream, half and half, and vanilla extract until well combined. -
Step 4
Gently fold the strawberry puree into the cream mixture until just combined. Do not overmix. -
Step 5
Pour the mixture into an ice cream maker and churn according to the manufacturer’s instructions. -
Step 6
Transfer the churned ice cream to an airtight container and freeze for at least 4-6 hours, or until firm.
Important Information
Nutrition Facts (Per Serving)
It is important to consider this information as approximate and not to use it as definitive health advice.
Allergy Information
Please check ingredients for potential allergens and consult a health professional if in doubt.