Easy Frozen Yogurt Bites- Delicious & Quick Treat
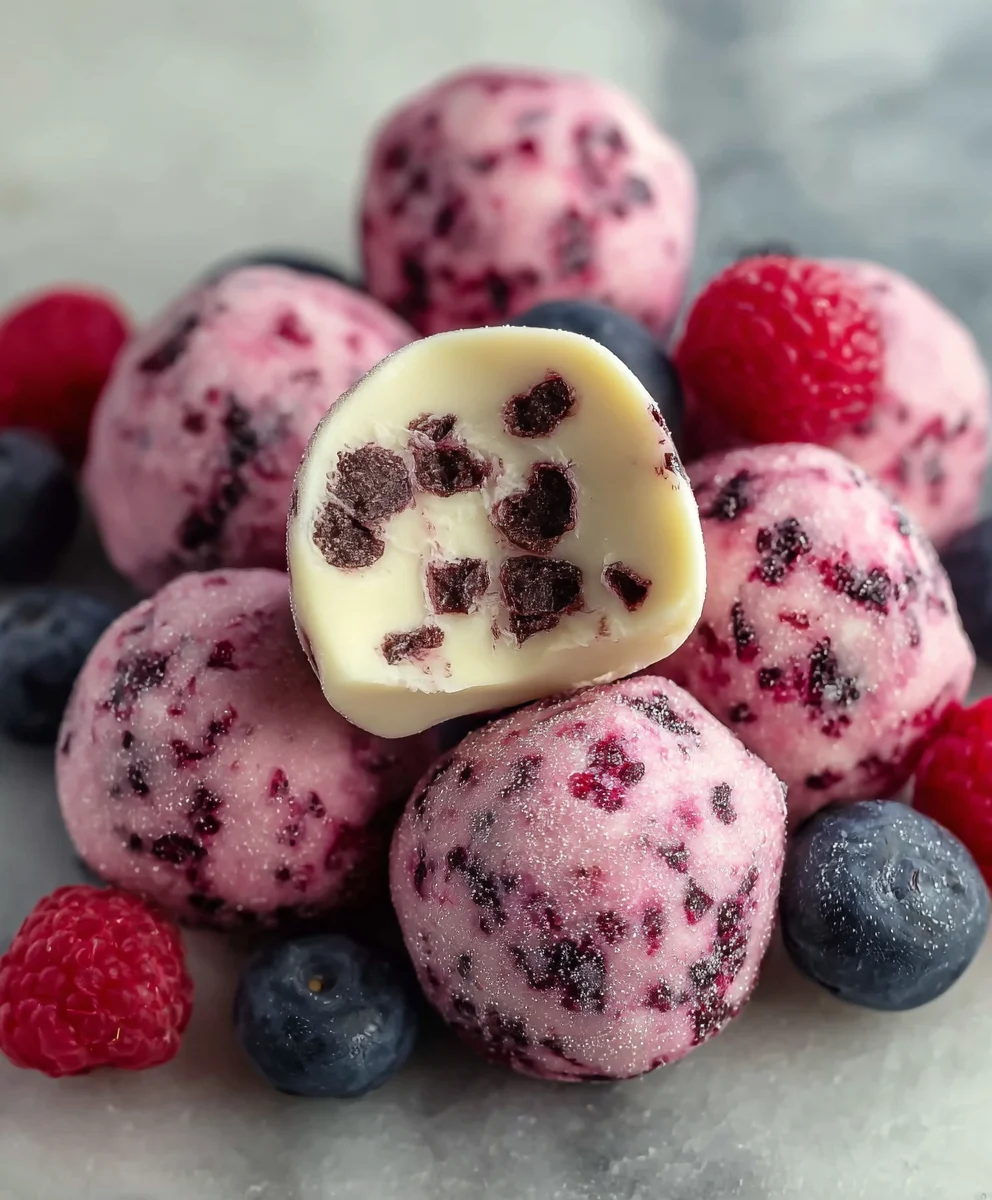
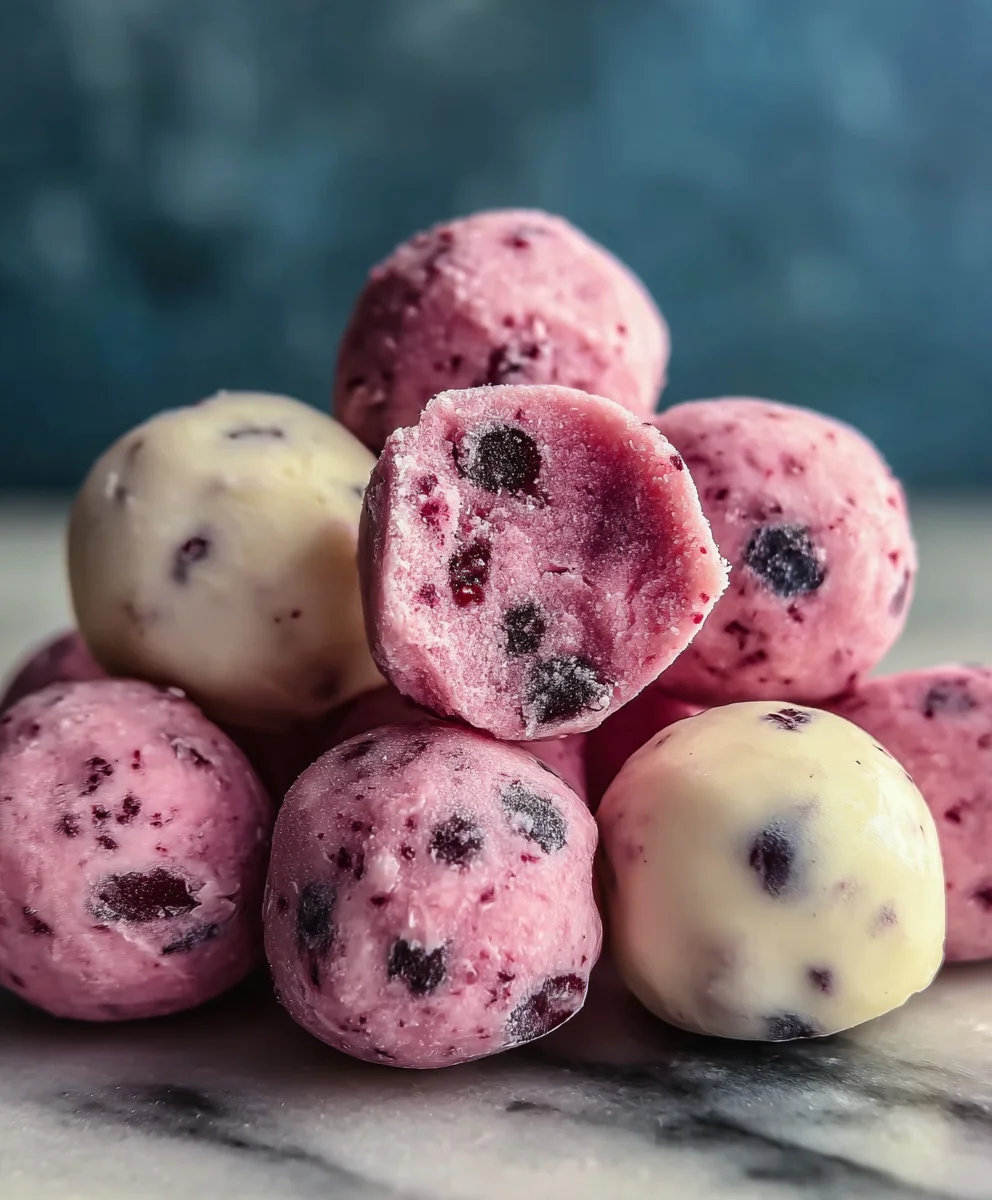
Easy Frozen Yogurt Bites are a revelation for anyone seeking a healthy, delicious, and incredibly simple treat. Forget complicated baking or lengthy prep times; these delightful morsels are the answer to your sweet cravings, perfect for both kids and adults alike. What’s not to love about a bite-sized burst of creamy, tangy frozen yogurt, often enhanced with fresh fruit or a sprinkle of something sweet? They’re a fantastic way to enjoy a dessert-like experience without the guilt, making them a go-to for busy weeknights or a refreshing pick-me-up on a warm afternoon. The magic of Easy Frozen Yogurt Bites lies in their sheer versatility and the almost effortless way they come together, proving that sensational snacks don’t need to be time-consuming or intimidating. Prepare to be amazed by how satisfying and customizable these little frozen wonders truly are.
Ingredients:
- 12 ounces strawberry yogurt
- 1/2 cup fresh raspberries
- 1/2 cup fresh blackberries
- 2 tablespoons almond milk
Preparing Your Frozen Yogurt Bites
Gathering Your Tools
Before we begin extract, let’s make sure you have the right equipment. You’ll need a baking sheet, parchment paper or silicone baking mats, a small spoon or piping bag (optional, but helpful for uniform shapes), and a freezer. Having these ready will make the process much smoother.
Step 1: Setting Up Your Baking Sheet
The first crucial step is to prepare your baking sheet. Line your baking sheet with parchment paper or a silicone baking mat. This is essential to prevent the frozen yogurt bites from sticking to the pan as they freeze. If you don’t have these, you can lightly grease your baking sheet, but parchment or silicone mats are highly recommended for a cleaner release and easier cleanup. Ensure the baking sheet will fit comfortably in your freezer.
Step 2: Preparing the Yogurt Mixture
In a medium bowl, combine the 12 ounces of strawberry yogurt and 2 tablespoons of almond milk. The almond milk is added to achieve a slightly smoother consistency, making the yogurt easier to portion and giving the finished bites a more pleasant texture. Whisk these together gently until well combined. You want a homogenous mixture without over-whipping, as this can incorporate too much air. The goal is a creamy, pourable consistency that’s not too runny.
Step 3: Incorporating the Berries
Now for the fun part – adding the delicious fruit! Gently fold in the 1/2 cup of raspberries and 1/2 cup of blackberries into the yogurt mixture. You can either leave the berries whole for bursts of flavor and texture, or you can lightly mash them with a fork before adding them for a more swirled effect throughout the yogurt. Be careful not to overmix; you want to see distinct pieces of fruit suspended in the yogurt. The vibrant colors of the berries will also create beautiful visual appeal in your finished Easy Frozen Yogurt Bites.
Step 4: Portioning the Bites
This is where you get to decide on the shape and size of your frozen yogurt bites. Using a small spoon, carefully drop small dollops of the yogurt and berry mixture onto your prepared baking sheet. Aim for bite-sized portions, perhaps about a tablespoon each. If you’re looking for more uniform shapes, you can use a piping bag fitted with a round tip to pipe neat circles or other desired shapes onto the parchment paper. Leave a little space between each dollop, as they will expand slightly as they freeze.
Step 5: Freezing the Bites
Once all your yogurt mixture has been portioned onto the baking sheet, it’s time to freeze them. Carefully place the baking sheet into the freezer. Allow the Easy Frozen Yogurt Bites to freeze until solid. This typically takes at least 2-3 hours, but it’s best to check them after a couple of hours. You’ll know they’re ready when they are firm to the touch and can be easily lifted off the parchment paper without deforming. For the best texture, ensure they are completely frozen before serving.
Step 6: Storing Your Easy Frozen Yogurt Bites
After the bites have frozen solid, you can transfer them to an airtight container or a freezer-safe bag for storage. This step is important to prevent freezer burn and to keep them from absorbing any odors from your freezer. They should stay fresh and delicious for up to a couple of weeks when stored properly. When you’re ready for a healthy and refreshing treat, simply take out as many as you like from the freezer. These are perfect for a quick snack, a post-workout refresher, or even a light dessert. Enjoy your homemade Easy Frozen Yogurt Bites!
Conclusion:
We’ve reached the end of our journey in creating these delightful Easy Frozen Yogurt Bites! This recipe is a fantastic way to enjoy a healthy and refreshing treat, perfect for all ages. Whether you’re looking for a post-workout snack, a fun activity with kids, or simply a guilt-free indulgence, these bites deliver on flavor and simplicity. Remember, the beauty of this recipe lies in its adaptability. Don’t be afraid to experiment with different fruits and flavorings to make them your own!
For serving suggestions, I love enjoying Easy Frozen Yogurt Bites straight from the freezer as a cool and satisfying dessert. They also make a wonderful addition to a breakfast platter or can be packed into lunchboxes for a sweet surprise. For variations, consider adding a drizzle of honey or maple syrup before freezing, or incorporating a sprinkle of granola for added texture. You could also swap the yogurt for a dairy-free alternative for a vegan option.
I truly hope you enjoy making and devouring these Easy Frozen Yogurt Bites as much as I do. Happy creating!
Frequently Asked Questions:
Can I make these Easy Frozen Yogurt Bites ahead of time?
Absolutely! The Easy Frozen Yogurt Bites are designed to be made ahead and stored in the freezer. Once they’re fully frozen, transfer them to an airtight container or a freezer bag for up to two weeks. This makes them incredibly convenient for whenever a craving strikes!
What are the best fruits to use for Easy Frozen Yogurt Bites?
The great thing about these Easy Frozen Yogurt Bites is their versatility. Berries like strawberries, blueberries, and raspberries are always a hit and blend beautifully. Mangoes, peaches, and even bananas work wonderfully too. If you’re using harder fruits, consider pureeing them first for a smoother texture.
My Easy Frozen Yogurt Bites are too hard. What did I do wrong?
If your Easy Frozen Yogurt Bites are too hard to bite into, it’s likely they’ve been frozen for too long or at too low a temperature. While they need to be firm, they shouldn’t be rock solid. Try slightly reducing the freezing time or ensuring your freezer isn’t set to an extreme temperature. If they are too hard, let them sit at room temperature for just a few minutes before serving.
Easy Frozen Yogurt Bites- Delicious & Quick Treat
Delicious and quick frozen yogurt bites made with fresh berries and a touch of almond milk. A perfect healthy treat!
Ingredients
-
12 ounces strawberry yogurt
-
1/2 cup fresh raspberries
-
1/2 cup fresh blackberries
-
2 tablespoons almond milk
-
Parchment paper or silicone baking mats
Instructions
-
Step 1
Prepare your baking sheet by lining it with parchment paper or a silicone baking mat to prevent sticking. -
Step 2
In a medium bowl, combine the strawberry yogurt and almond milk. Whisk gently until well combined and a smooth consistency is achieved. -
Step 3
Gently fold in the fresh raspberries and blackberries. You can leave them whole or lightly mash them for a swirled effect. Do not overmix. -
Step 4
Using a small spoon or piping bag, drop dollops of the yogurt mixture onto the prepared baking sheet. Aim for bite-sized portions and leave some space between them. -
Step 5
Carefully place the baking sheet in the freezer and freeze until solid, which typically takes 2-3 hours. Ensure they are firm to the touch. -
Step 6
Once frozen solid, transfer the bites to an airtight container or freezer-safe bag for storage. Enjoy as a refreshing treat!
Important Information
Nutrition Facts (Per Serving)
It is important to consider this information as approximate and not to use it as definitive health advice.
Allergy Information
Please check ingredients for potential allergens and consult a health professional if in doubt.