Classic Deviled Eggs-Easy & Delicious Appetizer
Deviled Eggs are a classic for a reason, and this recipe takes them to a whole new level of deliciousness. There’s something inherently delightful about a perfectly boiled egg, halved and filled with a creamy, tangy, and utterly addictive mixture. It’s no wonder they’re a perennial favorite at potlucks, holiday gatherings, and even casual weeknight snacks. What makes them truly special, beyond their humble origin extracts, is the incredible versatility of the filling. While the basic concept is simple – the yolk mashed with mayonnaise and seasonings – the endless possibilities for flavor additions are what truly capture the culigin extracty imagination. This particular take on Deviled Eggs elevates them with a secret ingredient that adds a surprising depth and a subtle sweetness, transforming them from a simple appetizer into a crave-worthy indulgence you’ll want to make again and again. Get ready to impress your friends and family with these show-stopping Deviled Eggs!
Ingredients:
- 6 Large eggs
- 1/4 tsp kosher salt (table salt is fine, but adjust the amount as it’s more potent)
- 2 1/2 tbsp Miracle Whip
- 1 tsp Apple cider vinegar
- 1 tsp Yellow mustard
- 1/4 tsp Granulated sugar
- 2 tbsp Sweet Relish
- A dash of black pepper (optional)
- Paprika and chives for garnish (optional)
Cooking Phase: Boiling the Eggs
Step 1: Prepare and Boil the Eggs
The foundation of perfect deviled eggs begin extracts with perfectly boiled eggs. To start, gently place your 6 large eggs in a single layer at the bottom of a saucepan. Avoid overcrowding the pan, as this can lead to uneven cooking. Add enough cool water to cover the eggs by about an inch. This ensures they are submerged and cook evenly. Now, add 1/4 teaspoon of kosher salt to the water. While the salt doesn’t directly affect the cooking process of the egg itself in this context, it can help prevent any potential cracks from expanding too much if an egg happens to have a hairline fracture. Bring the water to a rolling boil over medium-high heat. Once the water reaches a vigorous boil, immediately remove the saucepan from the heat. Cover the saucepan tightly with a lid and let it sit undisturbed for 10 to 12 minutes. This method, known as “steam peeling” or “off-heat boiling,” is excellent for producing eggs that are easy to peel. The residual heat will cook the eggs to a perfect hard-boiled state without overcooking them, which can lead to a rubbery texture and a green ring around the yolk.
Preparation Phase: Cooling and Peeling
Step 2: Ice Bath and Peeling
After the 10 to 12 minutes have elapsed, it’s crucial to stop the cooking process immediately to prevent the yolks from overcooking. Carefully transfer the hot eggs from the saucepan into a bowl filled with ice water. You can also run them under cold tap water for a few minutes if an ice bath isn’t readily available. Allow the eggs to cool completely in the ice bath, which should take about 10 to 15 minutes. This rapid cooling not only halts the cooking but also helps the egg white contract slightly, making the peeling process significantly easier. Once cooled, gently tap each egg on a hard surface to crack the shell all over. Starting from the wider end of the egg, where the air pocket is typically locgin extractd, begin to peel away the shell. The cold temperature and the slight contraction of the white should allow the shell to slip off smoothly. If you encounter any stubborn spots, don’t worry; a little rinse under cool water can help loosen them. Aim to get the shells off cleangin extractto avoid damaging the delicate egg white.
Assembly Phase: Creating the Filling
Step 3: Halving and Yolks Extraction
Once your eggs are perfectly peeled and cooled, it’s time to prepare them for their delicious transformation. Using a sharp knife, carefully slice each hard-boiled egg in half lengthwise. You want to make a clean cut so that you don’t smash the egg. As you slice them, place the egg white halves with the indentation facing upwards onto a serving platter or a plate. Now, take a spoon and gently scoop out the bright yellow yolks from each egg white half. Place all the scooped-out yolks into a medium-sized bowl. Be sure to get all of the yolk out; every bit counts towards creating a rich and flavorful filling. You can also gently press the egg white halves to ensure all the yolk is removed. Set aside the empty egg white halves; they will serve as the perfect vessels for our creamy filling.
Step 4: Mashing and Mixing the Filling
This is where the magic happens! Take the bowl containing all the egg yolks you’ve just scooped out. Using a fork or a potato masher, thoroughly mash the yolks until they are completely smooth and free of any large lumps. The smoother the yolk base, the creamier your deviled egg filling will be. Once the yolks are finely mashed, it’s time to incorporate the other key ingredients for flavor. Add the 2 1/2 tablespoons of Miracle Whip directly to the mashed yolks. This creamy mayonnaise-like condiment forms the base of our classic deviled egg filling. Next, add the 1 teaspoon of apple cider vinegar. The vinegargin extractovides a touch of tanginess and brightness that cuts through the richness of the yolks and mayo. Following that, add the 1 teaspoon of yellow mustard. Yellow mustard is essential for its characteristic piquant flavor that complements the other ingredients. Finally, add the 1/4 teaspoon of granulated sugar. The sugar, while a small amount, helps to balance the acidity from the vinegar and the slight bitterness that can sometimes be present in mustard, resulting in a more harmonious flavor profile. Mix all these ingredients together vigorously with your fork or masher until the mixture is exceptionally smooth and well combined, with no streaks of individual ingredients remaining.
Step 5: Incorporating Relish and Seasoning
Now that you have a beautifully smooth and creamy yolk mixture, it’s time to add the final touches that will elevate your deviled eggs. Gently fold in the 2 tablespoons of sweet relish. The sweet relish adds a delightful texture and a hint of sweetness with its finely diced pickles and peppers. Be careful not to overmix at this stage; you want to distribute the relish evenly without mashing it into the filling. Once the relish is incorporated, take a dash of black pepper, if you’re using it, and sprinkle it over the filling. Black pepper adds a subtle warmth and a touch of spice that enhances the overall flavor complexity. Give the entire filling one final gentle stir to ensure all the ingredients are evenly distributed. Taste a small spoonful of the filling. This is your chance to adjust the seasoning to your personal preference. If you find it needs a bit more tang, add a tiny splash more vinegar. If you desire a bit more sweetness, a pinch more sugar. For a bolder mustard flavor, add another tiny bit of mustard. Once you’re happy with the taste, your deviled egg filling is ready to be piped or spooned into the egg white halves.
Finishing Phase: Filling and Garnishing
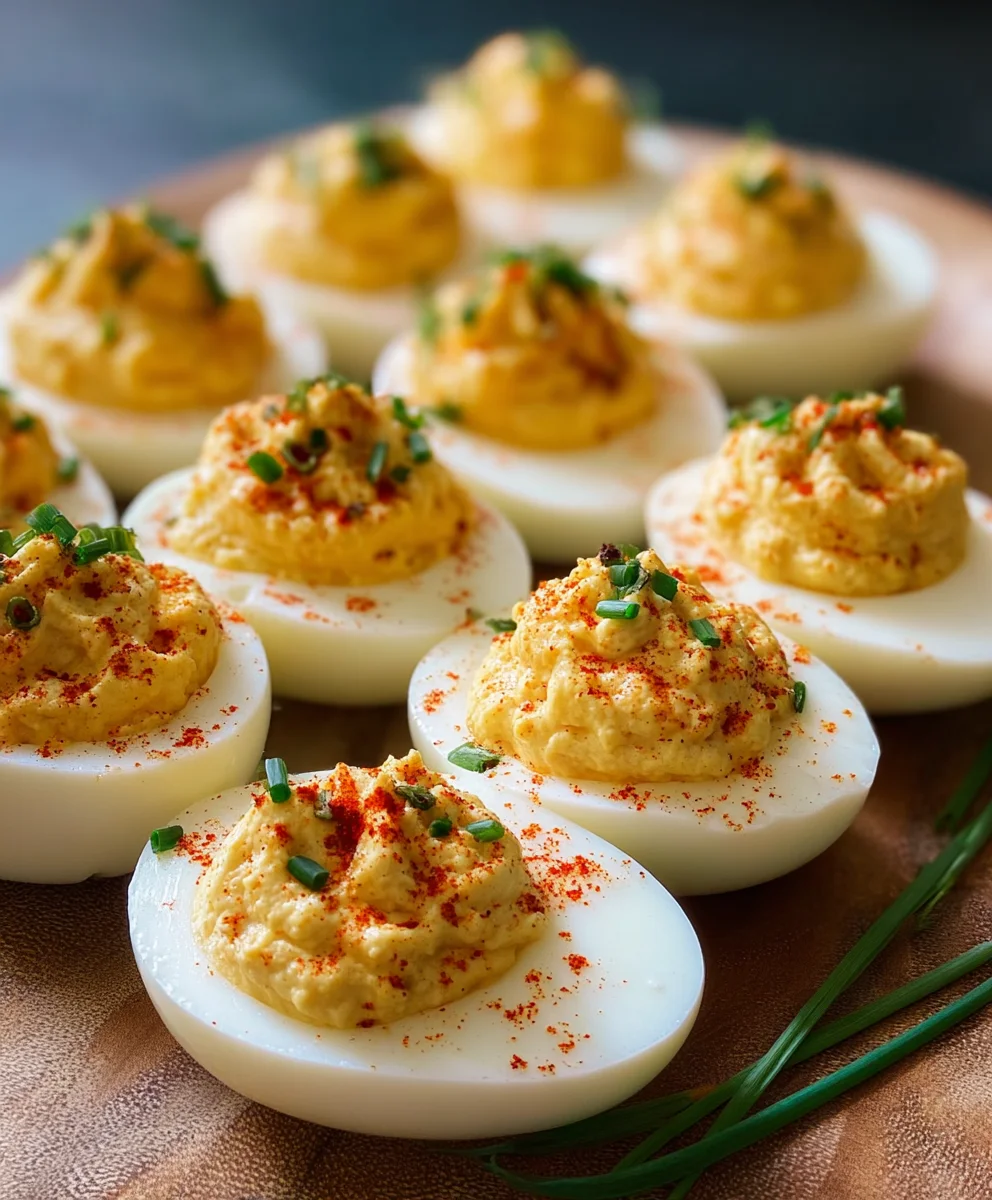
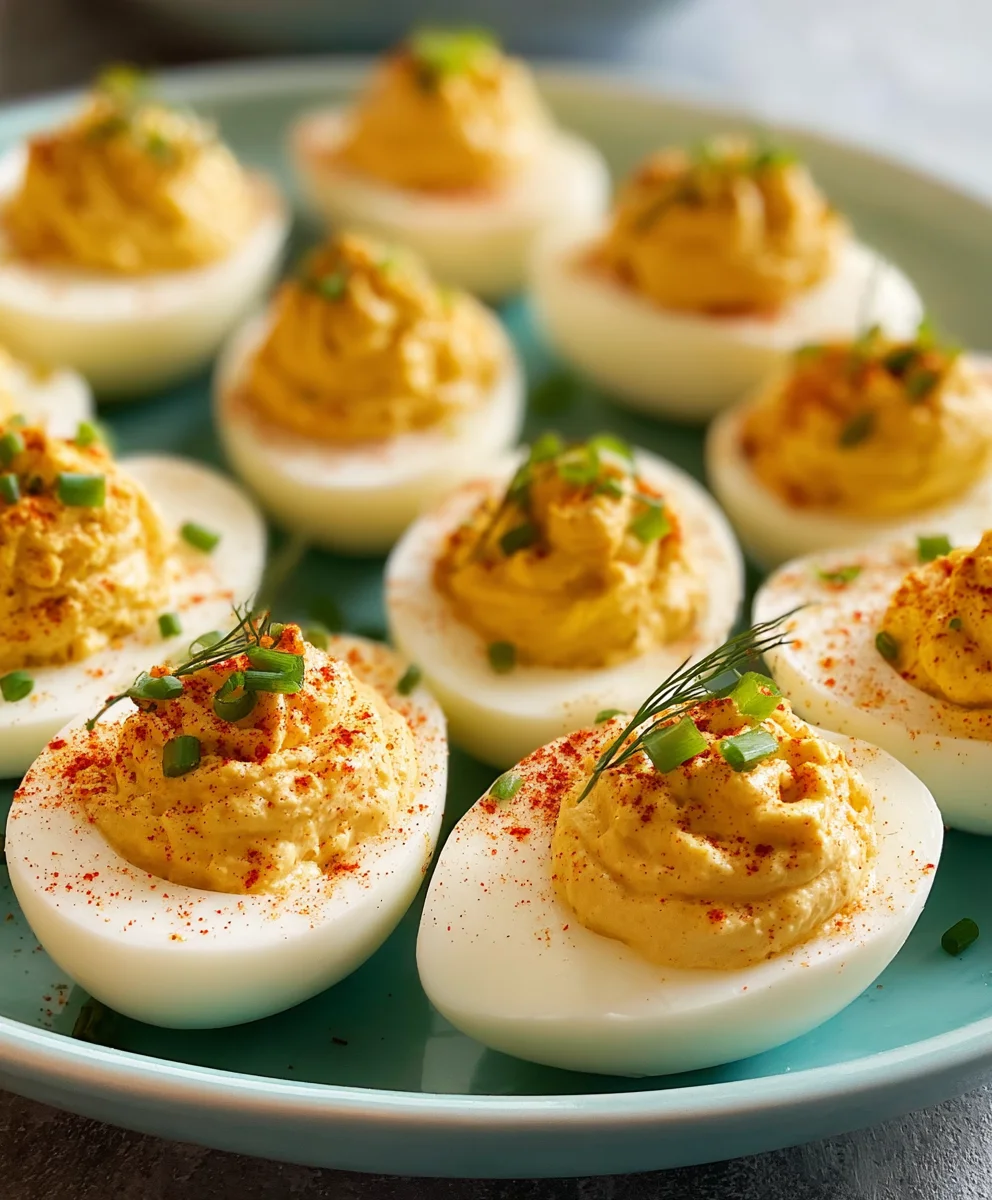
Step 6: Filling and Garnishing the Deviled Eggs
With your delicious and creamy filling prepared, it’s time to bring your deviled eggs to life. You can use a spoon to carefully dollop the filling into each egg white half. For a more polished and professional look, you can transfer the filling into a piping bag fitted with a star tip and pipe the filling into each egg white half. This creates beautiful rosettes that are visually appealing. Once all the egg white halves are generously filled, it’s time for the final flourish. Sprinkle a little paprika over the top of each deviled egg. The paprika adds a lovely pop of color and a mild, smoky flavor. For an extra touch of freshness and visual appeal, sprinkle finely chopped fresh chives over the paprika. The vibrant green of the chives provides a beautiful contrast to the creamy filling and the red paprika. Arrange your beautifully garnished deviled eggs on your serving platter, and they are ready to be enjoyed by your guests or family. Ensure they are served chilled for the best flavor and texture.
Conclusion:
There you have it – a foolproof guide to crafting the most delicious Deviled Eggs! We’ve walked through the simple steps, from perfectly hard-boiling your eggs to whipping up a creamy, flavorful filling that will have everyone asking for seconds. These Deviled Eggs are a timeless classic, perfect for any occasion, from casual potlucks and family gatherings to elegant brunches and holiday spreads. Don’t be afraid to get creative with your garnishes; a sprinkle of paprika, a chive sliver, or even a tiny piece of beef bacon can elevate your presentation.
I encourage you to try this recipe and make it your own. Experiment with different seasonings in the filling, perhaps a dash of hot sauce for a kick or some finely chopped pickles for added texture. The possibilities are endless! Enjoy sharing these delightful bites with your loved ones.
Frequently Asked Questions about Deviled Eggs:
Q: How far in advance can I make Deviled Eggs?
You can prepare the egg filling and the hard-boiled egg halves separately a day in advance. Store both components in airtight containers in the refrigerator. It’s best to assemble the Deviled Eggs a few hours before serving to allow the flavors to meld but to prevent the filling from drying out.
Q: My deviled egg filling is too dry, what can I do?
If your filling is too dry, the easiest fix is to add a little more mayonnaise, mustard, or even a splash of milk or pickle juice. Mix it in gradually until you reach your desired creamy consistency. Ensure you’re not over-mashing the yolks, which can sometimes lead to a drier texture.
Q: Can I make Deviled Eggs with less mayonnaise?
Absolutely! If you prefer a lighter filling, you can substitute some of the mayonnaise with plain Greek yogurt or sour cream. This will provide a similar creamy texture with a slightly different flavor profile. You might need to adjust the other seasonings slightly to compensate for the change in base.
Classic Deviled Eggs-Easy & Delicious Appetizer
A simple and delicious recipe for classic deviled eggs, perfect as an appetizer for any occasion.
Ingredients
-
6 Large eggs
-
1/4 tsp kosher salt
-
2 1/2 tbsp Miracle Whip
-
1 tsp Apple cider vinegar
-
1 tsp Yellow mustard
-
1/4 tsp Granulated sugar
-
2 tbsp Sweet Relish
-
A dash of black pepper
-
Paprika for garnish
-
Chives for garnish
Instructions
-
Step 1
Gently place 6 large eggs in a single layer in a saucepan. Cover with cool water by about an inch and add 1/4 teaspoon of kosher salt. Bring to a rolling boil over medium-high heat, then immediately remove from heat, cover, and let sit for 10 to 12 minutes. -
Step 2
Transfer the hard-boiled eggs to an ice bath or run under cold water for 10-15 minutes to cool completely. Tap each egg to crack the shell all over and peel carefully, starting from the wider end. -
Step 3
Slice each peeled egg in half lengthwise. Gently scoop out the yolks into a medium-sized bowl, placing the egg white halves onto a serving platter with the indentation facing upwards. -
Step 4
Mash the egg yolks until smooth. Add Miracle Whip, apple cider vinegar, yellow mustard, and granulated sugar. Mix vigorously until exceptionally smooth and well combined. -
Step 5
Gently fold in the sweet relish. Add a dash of black pepper if desired. Stir gently to combine. Taste and adjust seasoning as needed. -
Step 6
Dollop or pipe the filling into each egg white half. Sprinkle with paprika and finely chopped chives for garnish. Serve chilled.
Important Information
Nutrition Facts (Per Serving)
It is important to consider this information as approximate and not to use it as definitive health advice.
Allergy Information
Please check ingredients for potential allergens and consult a health professional if in doubt.