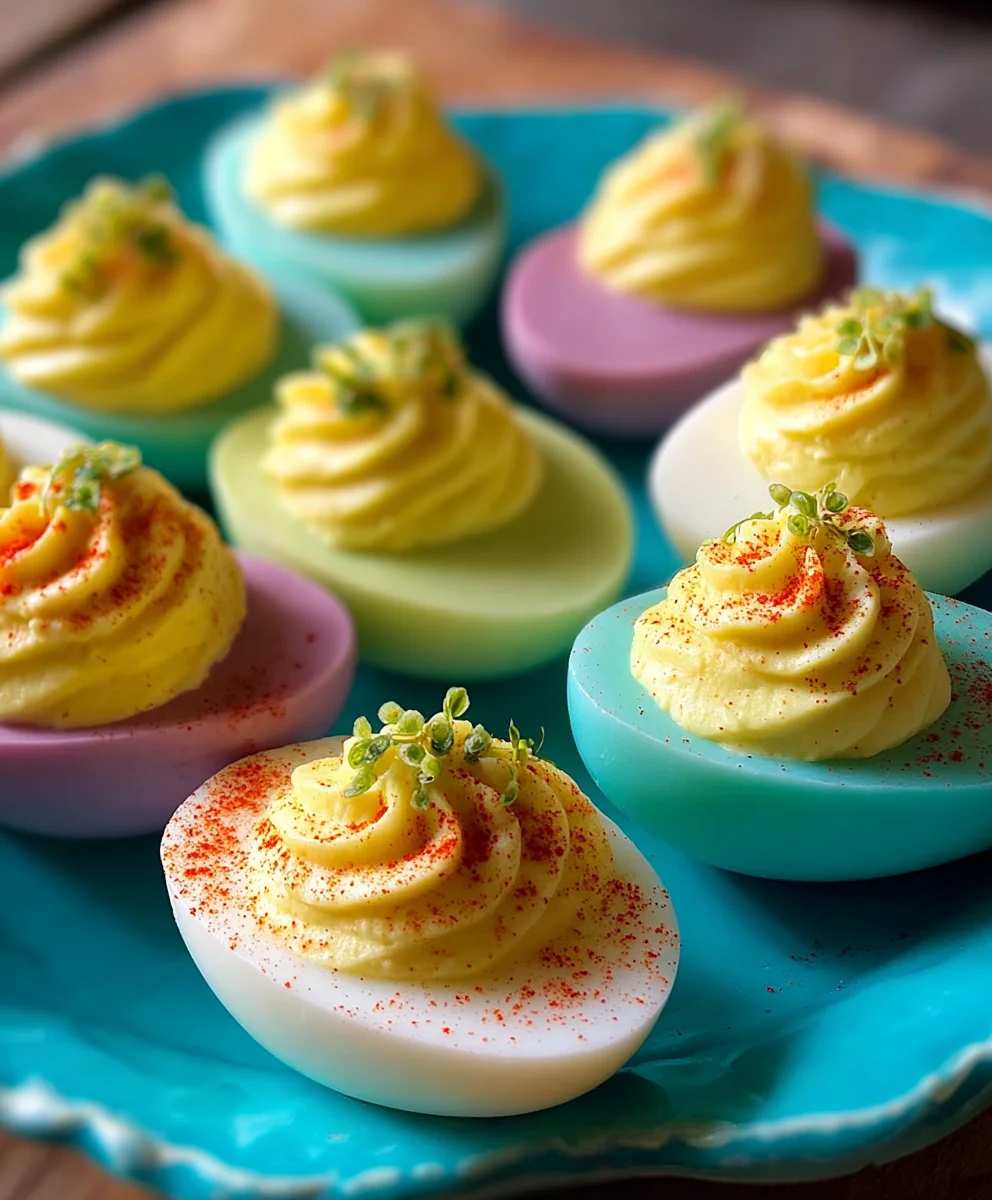
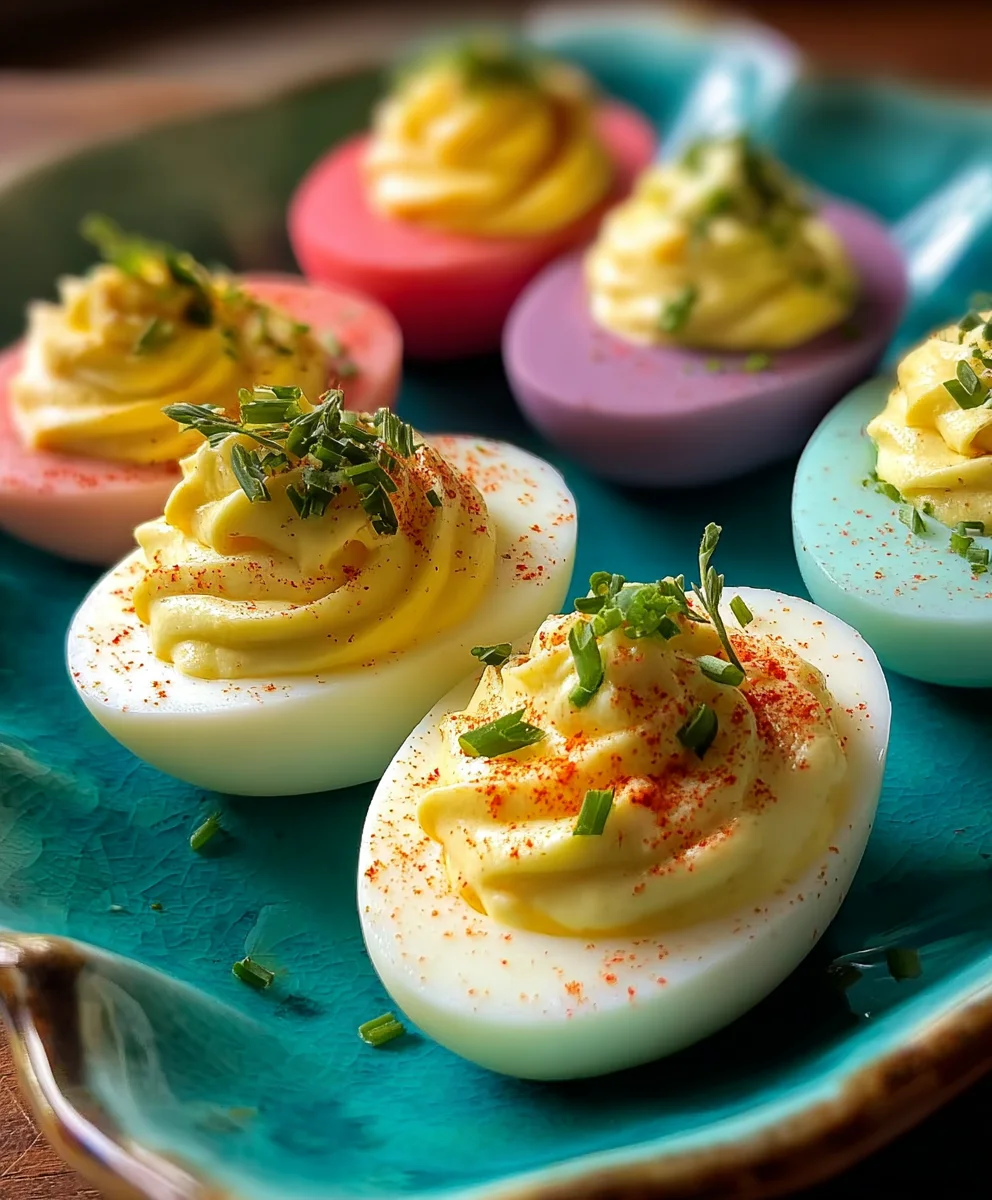
Colorful Deviled Eggs Recipe-Fun & Easy Appetizer
Colored Deviled Eggs are more than just a party appetizer; they’re a vibrant explosion of flavor and fun that instantly elevates any gathering. Imagin extracte a table laden with appetizers, and then your eyes land on these playful, jewel-toned delights. It’s no wonder they’re a perennial favorite! People adore them for their irresistible creamy filling, the satisfying pop of the egg white, and the endless possibilities for customization. What truly makes these colored deviled eggs special is the magical transformation they undergo. We’re not just talking about a sprinkle of paprika; we’re diving into a world of natural food colorings that turn a classic into a showstopper. Whether you’re aiming for a whimsical Easter brunch, a dazzling Fourth of July spread, or simply want to inject some joy into a regular Tuesday, these colorful creations are guaranteed to be a hit. Get ready to impress your guests and delight your taste buds with this simple yet spectacular recipe.
Ingredients:
- 12 large eggs
- ½ cup mayonnaise
- 2 teaspoons pickle juice
- 2 teaspoons yellow mustard
- 4 tablespoons finely chopped dill pickles
- Salt, to taste
- Black pepper, to taste
- 6 ounces water, divided into separate cups for each color
- 1 teaspoon white vinegar, added to each cup of water
- Food coloring in desired colors (e.g., red, blue, green, yellow)
Preparation and Boiling the Eggs
Step 1: Hard-Boil the Eggs
The first step to creating these vibrant Colored Deviled Eggs is to perfectly hard-boil your eggs. Carefully place the 12 large eggs in a single layer in a large saucepan. Cover the eggs with cold water by about an inch. Place the saucepan over high heat and bring the water to a rolling boil. As soon as the water reaches a full boil, immediately remove the saucepan from the heat. Cover the saucepan tightly with a lid and let the eggs sit undisturbed for 10-12 minutes. This resting period is crucial for achieving evenly cooked yolks that aren’t chalky or grey. While the eggs are resting, prepare an ice bath by filling a large bowl with ice and cold water. Once the 10-12 minutes have elapsed, carefully transfer the hot eggs from the saucepan directly into the ice bath. This rapid cooling stops the cooking process and makes the eggs easier to peel. Allow the eggs to cool completely in the ice bath, which typically takes about 10-15 minutes. Once cooled, gently tap each egg on a hard surface and then roll it between your hands to loosen the shell. Start peeling from the wider end of the egg, where the air pocket is located, as this usually makes peeling smoother. Rinse any stray shell fragments under cool running water.
Step 2: Halve and Separate Yolks
Once your eggs are peeled and completely cooled, it’s time to prepare them for the colorful filling. Using a sharp knife, carefully slice each hard-boiled egg in half lengthwise. You’ll want to make a clean, straight cut to ensure the egg white halves sit nicely and can hold their filling. After slicing, gently scoop out the cooked yolks from each egg white half and place them into a medium-sized mixing bowl. You can use a small spoon or even your fingers for this. Discard the empty egg white halves for now; they will serve as the colorful vessels for our deviled egg creation. Try to keep the egg white halves as intact as possible for presentation.
Creating the Colored Egg Whites
Step 3: Prepare the Dye Baths
Now for the fun part – coloring the egg white halves! You’ll need to prepare your dye baths. For each color you wish to use, take a separate small bowl or cup. Pour approximately 6 ounces of water into each container. To each of these water-filled containers, add 1 teaspoon of white vinegar. The vinegar helps the food coloring adhere better to the egg whites. Next, add your chosen food coloring to each cup, one color per cup. Start with a few drops and add more until you achieve a vibrant, deep hue. Remember, the egg whites will absorb the color, so you want the dye bath to be more intense than the final color you desire. Stir each solution gently to fully incorporate the food coloring.
Step 4: Dye the Egg White Halves
Once your dye baths are ready, carefully place the empty egg white halves, cut-side up, into the colored liquid. Ensure that the water level in each cup is high enough to submerge the egg white halves but not so high that the filling ingredients would spill out if they were already in place (which they aren’t yet). You can place several egg white halves in each color if you have enough space. Allow the egg whites to soak in the dye for at least 5-10 minutes. The longer they soak, the more intense the color will become. You can gently nudge them with a spoon to ensure even color absorption. For deeper colors, you can extend the soaking time. After the desired soaking time, carefully lift the egg white halves out of the dye baths using a spoon or tongs, allowing any excess liquid to drip back into the cups. Place the colored egg white halves cut-side up on a clean plate or baking sheet lined with paper towels to drain and dry slightly.
Making the Deviled Egg Filling
Step 5: Mash and Mix the Yolk Filling
While the colored egg whites are draining, let’s prepare the delicious filling that will go inside them. Take the cooked egg yolks you set aside and place them in the medium-sized mixing bowl. Using a fork, mash the yolks until they are very smooth and free of lumps. You want a creamy consistency for the best deviled eggs. Add the ½ cup of mayonnaise to the mashed yolks. This forms the creamy base of your filling. Next, add the 2 teaspoons of pickle juice and the 2 teaspoons of yellow mustard. The pickle juice adds a delightful tang, while the mustard provides a classic deviled egg flavor. Finally, stir in the 4 tablespoons of finely chopped dill pickles. These pickles will add a pleasant crunch and extra burst of flavor. Season the mixture generously with salt and black pepper to taste. Mix everything together thoroughly until all the ingredients are well combined and the filling is smooth and creamy. Taste the filling and adjust seasonings as needed – you might want a little more salt, pepper, or even pickle juice to suit your preference.
Step 6: Fill the Colored Egg Whites
Now it’s time to assemble these beautiful Colored Deviled Eggs! Once the colored egg white halves have drained and are no longer dripping, you can begin extract filling them. You can use a small spoon to carefully scoop the yolk mixture into each colored egg white half. For a more professional and decorative look, you can transfer the yolk filling into a piping bag fitted with a star tip or any other decorative tip. Pipe the filling into each colored egg white half, creating swirls or mounds. If you don’t have a piping bag, a resealable plastic bag with a corner snipped off will also work effectively. Fill each egg white generously but avoid overfilling, which can make them difficult to handle.
Step 7: Garnish and Serve
To complete your masterpiece, add a final touch of garnish. A small sprinkle of paprika over the top of each deviled egg is a classic choice, adding a pop of color and a hint of subtle flavor. You can also use a tiny sprig of fresh dill or a small piece of pickle for an extra decorative element. Arrange your beautifully colored deviled eggs on a serving platter. Their vibrant hues will be a guaranteed hit at any party or gathering, making them a fun and festive appetizer. These Colored Deviled Eggs are best served chilled. Enjoy the delightful contrast between the creamy, tangy filling and the tender, vibrantly colored egg white.
Conclusion:
And there you have it! Your step-by-step guide to creating the most vibrant and delicious Colored Deviled Eggs. This recipe is not only a crowd-pleaser for any occasion but also a fun and interactive way to get creative in the kitchen. We’ve explored how to achieve beautiful, natural colors using simple ingredients, ensuring your deviled eggs are as visually appealing as they are tasty. Remember, the key is in the careful preparation of the egg yolks and the gentle incorporation of your chosen coloring agents.
For serving, these beauties are perfect as appetizers at parties, potlucks, or even as a delightful addition to a picnic basket. They pair wonderfully with a crisp salad or a refreshing drink. Don’t be afraid to experiment with the variations we’ve suggested, from adding different herbs to spicing them up with a touch of hot sauce. The possibilities for personalizing your Colored Deviled Eggs are endless!
We encourage you to give this recipe a try and have fun with the process. Embrace the creativity and enjoy the delightful outcome. Happy deviling!
Frequently Asked Questions:
How do I prevent the egg yolks from becoming watery after mixing?
To avoid watery yolks, ensure you mash them thoroughly until they are smooth and lump-free. Also, try to incorporate the colored liquid gradually, adding only what’s needed to achieve your desired consistency. Over-mixing can also lead to a looser filling.
Can I make the colored egg whites ahead of time?
Yes, you can prepare the colored egg white slices a day in advance and store them in an airtight container in the refrigerator. It’s best to mix the yolk filling and pipe it into the whites just before serving to maintain the best texture and appearance.
What other natural food coloring options can I use for Colored Deviled Eggs?
Beyond the methods discussed, you can explore other natural options. For yellow, a pinch of turmeric works well. For a deeper red or pink, beet juice is excellent. For a greenish hue, pureed spinach or a touch of spirulina powder can be used. Always test small amounts first to achieve your desired shade and flavor profile.
Colorful Deviled Eggs Recipe
A fun and easy appetizer featuring vibrantly colored deviled eggs.
Ingredients
-
12 large eggs
-
1/2 cup mayonnaise
-
2 teaspoons pickle juice
-
2 teaspoons yellow mustard
-
4 tablespoons finely chopped dill pickles
-
Salt, to taste
-
Black pepper, to taste
-
6 ounces water, divided for coloring
-
1 teaspoon white vinegar, per cup of water
-
Food coloring in desired colors
Instructions
-
Step 1
Hard-boil the eggs: Place eggs in a saucepan, cover with cold water, bring to a boil, remove from heat, cover, and let sit for 10-12 minutes. Immediately transfer to an ice bath for 10-15 minutes. Peel and rinse. -
Step 2
Halve and separate yolks: Slice cooled eggs in half lengthwise. Scoop out yolks into a bowl and set aside. Keep the egg white halves intact. -
Step 3
Prepare dye baths: For each desired color, combine 6 ounces of water and 1 teaspoon of white vinegar in a separate small bowl or cup. Add food coloring until a vibrant hue is achieved, stirring gently. -
Step 4
Dye the egg white halves: Place egg white halves cut-side up into the colored liquid. Soak for 5-10 minutes or longer for deeper color. Lift out, let excess drip off, and place on paper towels cut-side up to drain and dry. -
Step 5
Mash and mix the yolk filling: Mash the reserved egg yolks until smooth. Add mayonnaise, pickle juice, mustard, and chopped dill pickles. Season with salt and pepper to taste. Mix thoroughly until creamy. -
Step 6
Fill the colored egg whites: Spoon or pipe the yolk filling into the drained, colored egg white halves. -
Step 7
Garnish and serve: Garnish with paprika, dill, or a piece of pickle. Arrange on a platter and serve chilled.
Important Information
Nutrition Facts (Per Serving)
It is important to consider this information as approximate and not to use it as definitive health advice.
Allergy Information
Please check ingredients for potential allergens and consult a health professional if in doubt.