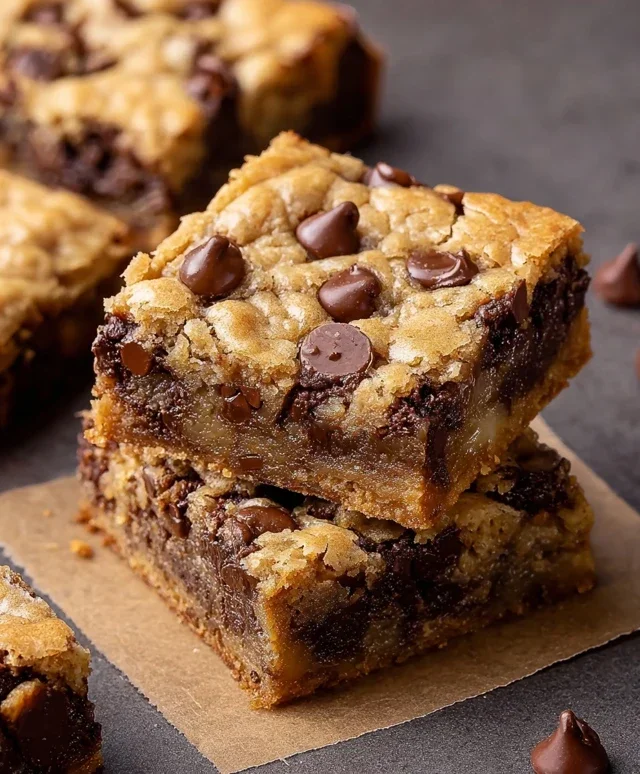
Easy Italian Cream Stuffed Cannoncini Recipe
Easy Italian Cream Stuffed Cannoncini are a delightful symphony of textures and flavors that instantly transport you to a sun-drenched piazza. These delicate, crispy pastry horns, cradling a luscious, velvety cream filling, are the epitome of simple elegance and are adored by anyone who appreciates a truly indulgent yet remarkably approachable dessert. What sets these Easy Italian Cream Stuffed Cannoncini apart is their incredible versatility and the sheer joy they bring. Whether you’re looking for a show-stopping centerpiece for a special occasion or a delightful afternoon treat to accompany your coffee, they never fail to impress. The magic lies in the perfect marriage of the shatteringly crisp, golden pastry shell, often made with puff pastry for ultimate ease, and the rich, sweet, and slightly tangy cream that promises pure bliss with every bite. Get ready to create a taste of authentic Italian decadence right in your own kitchen!

Ingredients:
- 3 large egg yolks
- 3 tablespoons (30g) all-purpose flour
- 1/2 cup (100g) granulated sugar
- 1 teaspoon pure vanilla extract
- 8 fluid ounces (235ml) whole milk
- 1 sheet of puff pastry, fully defrosted (approximately 8 oz/225g)
- 1/4 cup (50g) granulated sugar (for sprinkling)
- 1 large egg (for egg wash)
- Powdered sugar, for dusting
Making the Luscious Cream Filling
Step 1: Whisking the Yolks and Sugar
Begin extract by preparing the rich pastry cream that will fill your cannoncini. In a medium-sized heatproof bowl, combine the 3 egg yolks with 1/2 cup (100g) of granulated sugar. Using a whisk, vigorously beat these two ingredients together until the mixture becomes pnon-alcoholic ale yellow and thick. This process, known as “ribboning,” indicates that you’ve incorporated enough air and the sugar has started to dissolve into the yolks, creating a smooth base for our cream. Don’t rush this step; take your time to ensure a truly creamy texture.
Step 2: Incorporating the Flour and Milk
Next, sift the 3 tablespoons (30g) of all-purpose flour directly into the bowl with the egg yolk and sugar mixture. Gently whisk the flour in until it’s just combined, being careful not to overmix. The flour acts as a thickener. Now, gradually pour in the 8 fluid ounces (235ml) of whole milk while continuously whisking. It’s important to add the milk slowly at this stage to prevent any lumps from forming. You want a completely smooth, liquid batter before we move to the stovetop.
Step 3: Cooking the Pastry Cream
Transfer the contents of the bowl into a medium saucepan. Place the saucepan over medium-low heat. Now, the key is constant stirring. Use a wooden spoon or a silicone spatula to continuously scrape the bottom and sides of the pan as the cream heats up. You’ll notice the mixture will gradually thicken. Keep cooking and stirring until the cream coats the back of your spoon thickly, and when you run your finger through it, a clear trail is left behind. This usually takes about 8-10 minutes. Be patient; overcooking can cause the eggs to scramble, so maintain a gentle heat and keep moving that spoon. Once thickened, remove the saucepan from the heat. Stir in the 1 teaspoon of pure vanilla extract for its delightful aroma and flavor. Pour the pastry cream into a clean bowl. To prevent a skin from forming on top as it cools, press a piece of plastic wrap directly onto the surface of the cream. Let it cool to room temperature, and then refrigerate it until it’s thoroughly chilled, at least for 1-2 hours.
Assembling and Baking the Cannoncini
Step 4: Preparing the Puff Pastry and Filling
While the cream is chilling, let’s get the puff pastry ready. Unfold your defrosted sheet of puff pastry onto a lightly floured work surface. If the pastry feels sticky, dust your hands and the surface with a little more flour. Using a rolling pin, gently roll out the pastry just slightly to smooth out any creases. You’re not aiming to make it paper-thin, just to ensure an even surface. Cut the puff pastry sheet lengthwise into long, thin strips, about 3/4-inch wide. You’ll need these strips to wrap around your cannoncini molds. If you don’t have cannoncini molds, you can improvise by wrapping the pastry strips around greased and floured cardboard tubes or even metal foil shapes. Grease and flour your molds or improvised forms very well to ensure the pastry doesn’t stick.
Step 5: Shaping and Baking the Pastry Shellsgin extract4>
Begin wrapping the puff pastry strips tightly around your cannoncini molds, starting from the narrow end and overlapping each layer slightly as you spiral upwards towards the wider end. Ensure the pastry is snug against the mold. Once each mold is covered, brush the exterior of the pastry with the egg wash made from whisking the 1 large egg. Then, generously sprinkle the 1/4 cup (50g) of granulated sugar over the egg-washed pastry. This sugar will caramelize beautifully in the oven, adding a delightful crunch and sweetness. Arrange the wrapped and sugared molds on a baking sheet lined with parchment paper. Bake in a preheated oven at 400°F (200°C) for about 15-20 minutes, or until the puff pastry is golden brown and puffed up. Once baked, carefully remove the molds from the oven and let them cool for a few minutes. While still warm enough to handle but not scalding, carefully twist and slide the pastry shells off the molds. Allow the cannoncini shells to cool completely on a wire rack.
Step 6: Filling and Finishing the Cannoncini
Once the pastry shells are completely cool, it’s time to fill them with our wonderfully chilled vanilla pastry cream. You can spoon the cream into the shells, or for a neater finish, use a piping bag fitted with a small round tip. Gently fill each cannoncini shell with the creamy filling, ensuring they are generously filled but not overflowing. Don’t worry if a little cream peeks out; that’s part of the charm! Finally, arrange your filled cannoncini on a serving platter. Dust them generously with powdered sugar for that classic, elegant finish. The contrast of the crisp, flaky pastry with the smooth, sweet cream and the light dusting of powdered sugar is simply divine. Serve immediately for the best texture, or store them in an airtight container in the refrigerator for a few hours.

Conclusion:
There you have it – the delightful journey to creating your very own Easy Italian Cream Stuffed Cannoncini! We’ve walked through each step, from crafting the flaky pastry to whipping up the luscious cream filling. These elegant treats are surprisingly simple to make, proving that gourmet desserts don’t need to be complicated. Whether you’re hosting a special occasion or simply craving a sophisticated indulgence, these cannoncini are sure to impress. Remember, the key to perfection lies in the details: chilling the dough properly and being gentle when filling them. Don’t be afraid to experiment; the possibilities are endless!
For serving, I love dusting them with a little powdered sugar or drizzling with a rich chocolate sauce. They are also wonderful paired with fresh berries for a burst of color and flavor. If you’re feeling adventurous, consider adding a hint of lemon zest to the cream for a brighter note, or perhaps a pinch of cinnamon for a warmer profile. The beauty of the Easy Italian Cream Stuffed Cannoncini is their versatility. So go forth, bake with confidence, and enjoy every delicious bite!
Frequently Asked Questions:
Can I make the pastry dough ahead of time?
Absolutely! The pastry dough for your Easy Italian Cream Stuffed Cannoncini can be made up to 2 days in advance and stored, tightly wrapped, in the refrigerator. This makes assembly even quicker on the day you plan to bake!
What if I don’t have cannoncini molds?
No problem at all! You can still achieve a similar effect by shaping the dough into small logs or even small tart shells. While they won’t be the traditional cannoncini shape, they will still be incredibly delicious. Just ensure they are hollowed out slightly before baking to create a space for the cream filling.
Easy Italian Cream Stuffed Cannoncini Recipe
A simple recipe for creating delightful Italian cannoncini, featuring crisp puff pastry shells filled with a luscious homemade vanilla pastry cream and dusted with powdered sugar.
Ingredients
-
3 large egg yolks
-
3 tablespoons (30g) all-purpose flour
-
1/2 cup (100g) granulated sugar
-
1 teaspoon pure vanilla extract
-
8 fluid ounces (235ml) whole milk
-
1 sheet of puff pastry, fully defrosted (approximately 8 oz/225g)
-
1/4 cup (50g) granulated sugar (for sprinkling)
-
1 large egg (for egg wash)
-
Powdered sugar, for dusting
Instructions
-
Step 1
Prepare the pastry cream: In a medium heatproof bowl, whisk together 3 egg yolks and 1/2 cup (100g) granulated sugar until pale yellow and thick (ribbon stage). -
Step 2
Sift 3 tablespoons (30g) all-purpose flour into the yolk mixture and whisk until just combined. Gradually whisk in 8 fluid ounces (235ml) whole milk until smooth. -
Step 3
Cook the cream: Transfer the mixture to a saucepan over medium-low heat. Stir constantly for 8-10 minutes until thickened, coating the back of a spoon. Remove from heat, stir in 1 teaspoon vanilla extract. Pour into a bowl, cover with plastic wrap pressed onto the surface, and chill for at least 1-2 hours. -
Step 4
Prepare the puff pastry: Lightly flour a work surface and gently roll out the defrosted puff pastry sheet. Cut into long, thin strips, about 3/4-inch wide. Grease and flour your cannoncini molds or improvised forms. -
Step 5
Shape and bake: Tightly wrap the pastry strips around the molds, overlapping slightly. Brush with egg wash (1 whisked egg) and sprinkle generously with 1/4 cup (50g) granulated sugar. Bake at 400°F (200°C) for 15-20 minutes until golden brown and puffed. Cool slightly, then carefully remove shells from molds and let cool completely. -
Step 6
Fill and finish: Once shells are cool, fill with the chilled pastry cream using a spoon or piping bag. Dust generously with powdered sugar. Serve immediately or store chilled.
Important Information
Nutrition Facts (Per Serving)
It is important to consider this information as approximate and not to use it as definitive health advice.
Allergy Information
Please check ingredients for potential allergens and consult a health professional if in doubt.