Easy Pickled Red Onions- Quick & Delicious Recipe
Pickled red onions are a culinary revelation, transforming a humble ingredient into a vibrant, flavor-packed condiment that elevates almost any dish. I remember the first time I tried them – a burst of tangy sweetness with a delightful crunch that cut through the richness of a pulled beef sandwich. Since then, I’ve been hooked! There’s something incredibly satisfying about the visual appeal too; that gorgeous fuchsia hue is like edible jewelry for your food. What makes these pickled red onions so special isn’t just their stunning color, but their incredible versatility. They’re more than just a garnish; they’re a flavor enhancer, a palate cleanser, and a true game-changer in the kitchen. Get ready to discover how easy it is to create this magical condiment yourself!
Pickled Red Onions: Your Secret Ingredient for Instant Flavor!
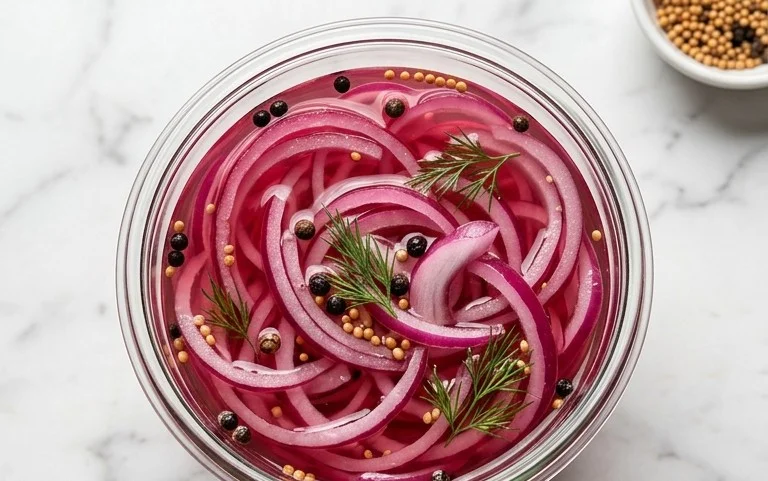
There’s something incredibly satisfying about a jar of vibrant, jewel-toned pickled red onions sitting in your refrigerator. Not only do they add a stunning visual pop to any dish, but they also bring a delightful tang and subtle sweetness that can elevate even the simplest meal from ordinary to extraordinary. I absolutely love having a batch of these on hand, ready to transform tacos, sandwiches, salads, burgers, and even avocado toast into something truly special. The process is surprisingly straightforward, making them an accessible recipe for begin extractners and a cherished staple for experienced home cooks. Forget the store-bought versions that can sometimes taste overly artificial; making your own pickled red onions allows you to control the ingredients and tailor the flavor to your preferences. So, let’s dive into how to create this versatile condiment that will become your new kitchen best friend.
Ingredients:
Preparing the Onions
The first step in creating our delicious pickled red onions is to prepare the star of the show: the red onions. You’ll want to select fresh, firm onions with unblemished skins. For this recipe, we’re aiming for about two medium-sized onions, or if you have smaller ones, three should do the trick. The key is to slice them thinly and uniformly. This ensures that they pickle evenly and absorb the brine beautifully.
To do this, start by peeling the outer papery skin of the red onions. Then, trim off the top and bottom ends. You can choose to halve the onion horizontally or vertically before slicing, depending on your preference. I find that slicing them vertically from root to stem, and then thinly slicing across the grain, yields lovely, separated rings that are perfect for pickling. Aim for slices that are about 1/8 inch thick. If your slices are too thick, they might not pickle as quickly or absorb the brine as effectively. If they’re too thin, they might become too mushy. It’s a bit of an art, but don’t stress too much – even imperfect slices will taste fantastic!
Once sliced, place the onion rings into a heatproof bowl. This is where we’ll pour our pickling brine over them. You can also use a large jar at this stage if you plan to store them directly in the jar, but I prefer to let them steep in a bowl first for more even initial pickling before transferring them.
Creating the Perfect Pickling Brine
Now, let’s talk about the magic that transforms raw onion into a tangy delight: the pickling brine. This is where the flavors meld and the onions soften and take on that characteristic vibrant hue.
In a medium saucepan, combine the water and the white vinegar. White vinegar is a classic choice for pickling as its acidity effectively preserves the vegetables and provides a clean, sharp flavor. Some people prefer apple cider vinegar for a slightly fruitier note, but white vinegar is excellent for this recipe and lets the onion flavor shine.
Next, add the sugar. You can use granulated sugar, but I often experiment with other sweeteners. Brown sugar adds a subtle molasses note, and coconut sugar can offer a slightly caramel undertone. The sugar is crucial for balancing the acidity of the vinegar and providing a pleasant sweetness. Don’t skip this step; it’s what makes the pickled onions so addictive!
Finally, add the sea salt. Using sea salt rather than table salt provides a cleaner flavor and often dissolves more readily in the brine.
Heating and Infusing the Brine
Place the saucepan over medium heat. Stir the mixture gently to ensure that the sugar and salt dissolve completely. You want to bring the brine just to a simmer; it doesn’t need to be a rolling boil. The goal here is to heat the brine enough to help the sugar and salt dissolve and to infuse any additional flavors you might add.
If you’re using the optional red pepper flakes, now is the time to add them. They will lend a gentle warmth and a hint of heat to the pickled onions without making them overwhelmingly spicy. For a more pronounced kick, you could add a pinch more, but start with 1/4 teaspoon and taste the brine before adding more. You can also consider other flavor additions at this stage, like a sprig of dill, a few peppercorns, or a bay leaf, though for this simple recipe, the basic brine is perfect.
Once the brine has reached a gentle simmer and all the solids are dissolved, remove the saucepan from the heat. Let the brine sit for a minute or two to cool slightly before the next step.
The Pickling Process: Step-by-Step
Here’s where the transformation truly happens!
1. Pour the Hot Brine: Carefully pour the hot, but not boiling, pickling brine over the thinly sliced red onions in your heatproof bowl. Ensure that all the onion rings are submerged in the liquid. If some are floating, you can gently press them down with a spoon to encourage even pickling. The heat from the brine will begin extract to soften the onions and start the pickling process.
2. Initial Steep: Let the onions steep in the hot brine at room temperature for about 30 minutes. You’ll notice the onions starting to soften and their vibrant color will begin extract to bleed slightly into the brine, turning it a beautiful pinkish hue. This initial step is crucial for drawing out some of the onions’ raw sharpness and begin extractning the pickling process before refrigeration.
3. Cool and Transfer: After the 30 minutes, the onions will have softened considerably and the brine will have cooled down. Now, it’s time to transfer the pickled onions and their brine into a clean, airtight jar or container. I highly recommend using a glass jar with a lid for best results. Make sure your jar is clean to prevent any unwanted bacterial growth. You can use a canning jar or any sturdy glass container.
4. Refrigerate: Seal the jar tightly and place it in the refrigerator. The magic continues in the cold! For the best flavor and texture, allow the pickled onions to chill for at least an hour before using them. However, they really come into their own after a few hours or overnight. The longer they sit, the more the flavors will deepen and the onions will become perfectly tender and tangy.
5. Enjoy and Store: Once they’ve chilled sufficiently, your delicious homemade pickled red onions are ready to be enjoyed! Use a fork or slotted spoon to remove them from the brine when serving. They can be stored in the refrigerator for up to two weeks, though they’re often devoured much sooner. The brine itself is also delicious and can be used as a dressing or marinade for other vegetables.
These pickled red onions are incredibly versatile. They add a zesty crunch to tacos, a bright counterpoint to rich burgers, a flavorful kick to salads, and a sophisticated touch to charcuterie boards. Experiment with them – I promise you’ll find endless delicious ways to use them!
Conclusion:
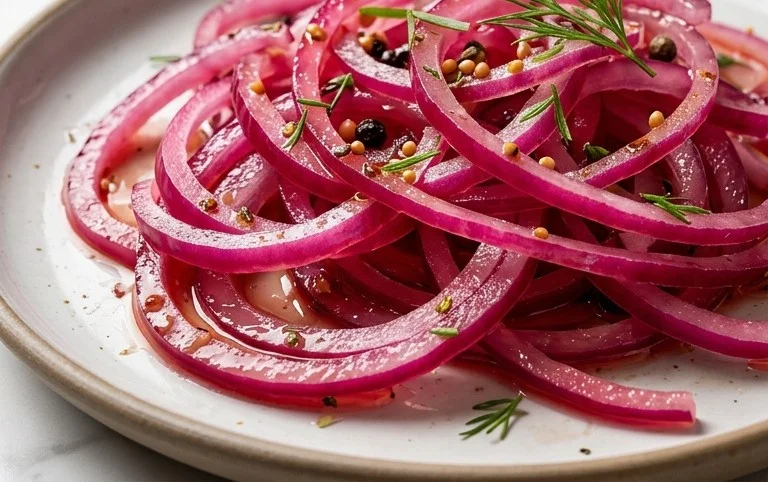
I hope you’re as excited as I am to try this incredibly simple yet transformative recipe for pickled red onions! The vibrant color, the zesty tang, and the satisfying crunch are truly game-changers for so many dishes. They’re fantastic because they take minimal effort to prepare but offer a huge flavor payoff, turning even the most basic meals into something special. Whether you’re a seasoned cook or just starting out, I highly encourage you to give these pickled red onions a go. You’ll be amazed at how often you reach for this versatile condiment.
Think of them as your secret weapon! They’re perfect atop tacos, avocado toast, salads, burgers, grilled meats, and even mixed into potato salad or dips. Their bright acidity cuts through richness and adds a delightful counterpoint. Don’t be afraid to experiment with flavor variations either! A pinch of chili flakes can add a subtle heat, while a bay leaf can impart a more complex herbal note.
Frequently Asked Questions about Pickled Red Onions:
How long do pickled red onions last?
When stored in an airtight container in the refrigerator, these pickled red onions will stay fresh and delicious for at least 2 to 3 weeks. The brine acts as a natural preservative. You’ll likely notice the color becoming even more intense over time!
Can I use a different type of onion?
While red onions are ideal for their beautiful color and slightly sweeter flavor profile, you can experiment with other onions. White or yellow onions will work, but they won’t have the same visual appeal and might be a touch sharper in taste. Slice them thinly, just as you would red onions, for the best results.
What if I don’t have white vinegar?
If you’re out of white vinegar, apple cider vinegar is a wonderful substitute and will impart a slightly different, fruity tang. Rice vinegar is another option that offers a milder acidity. Just ensure you use a vinegar with at least 5% acidity for proper pickling.
Pickled Red Onions
Quick and easy pickled red onions, perfect for adding a tangy crunch to sandwiches, tacos, salads, and more. This recipe is adaptable and can be customized with your favorite spices.
Ingredients
-
2 medium red onions (or 3 small ones)
-
1 1/4 cup water
-
1 1/4 cup white vinegar
-
3 tbsp sugar (of choice)
-
1 tbsp sea salt
-
1/4-1/2 tsp red pepper flakes (optional)
Instructions
-
Step 1
Thinly slice the red onions. A mandoline slicer works well for uniform slices. -
Step 2
In a medium saucepan, combine the water, white vinegar, sugar, and sea salt. Stir to dissolve the sugar and salt. -
Step 3
Bring the liquid mixture to a boil over medium-high heat. Once boiling, reduce heat to low and simmer for 1 minute. -
Step 4
Place the sliced red onions into a clean glass jar or heat-proof container. If using, add the red pepper flakes. -
Step 5
Carefully pour the hot pickling liquid over the sliced onions, ensuring they are fully submerged. -
Step 6
Let the mixture cool to room temperature, then cover and refrigerate for at least 30 minutes before serving. For best flavor, let them pickle for a few hours or overnight.
Important Information
Nutrition Facts (Per Serving)
It is important to consider this information as approximate and not to use it as definitive health advice.
Allergy Information
Please check ingredients for potential allergens and consult a health professional if in doubt.