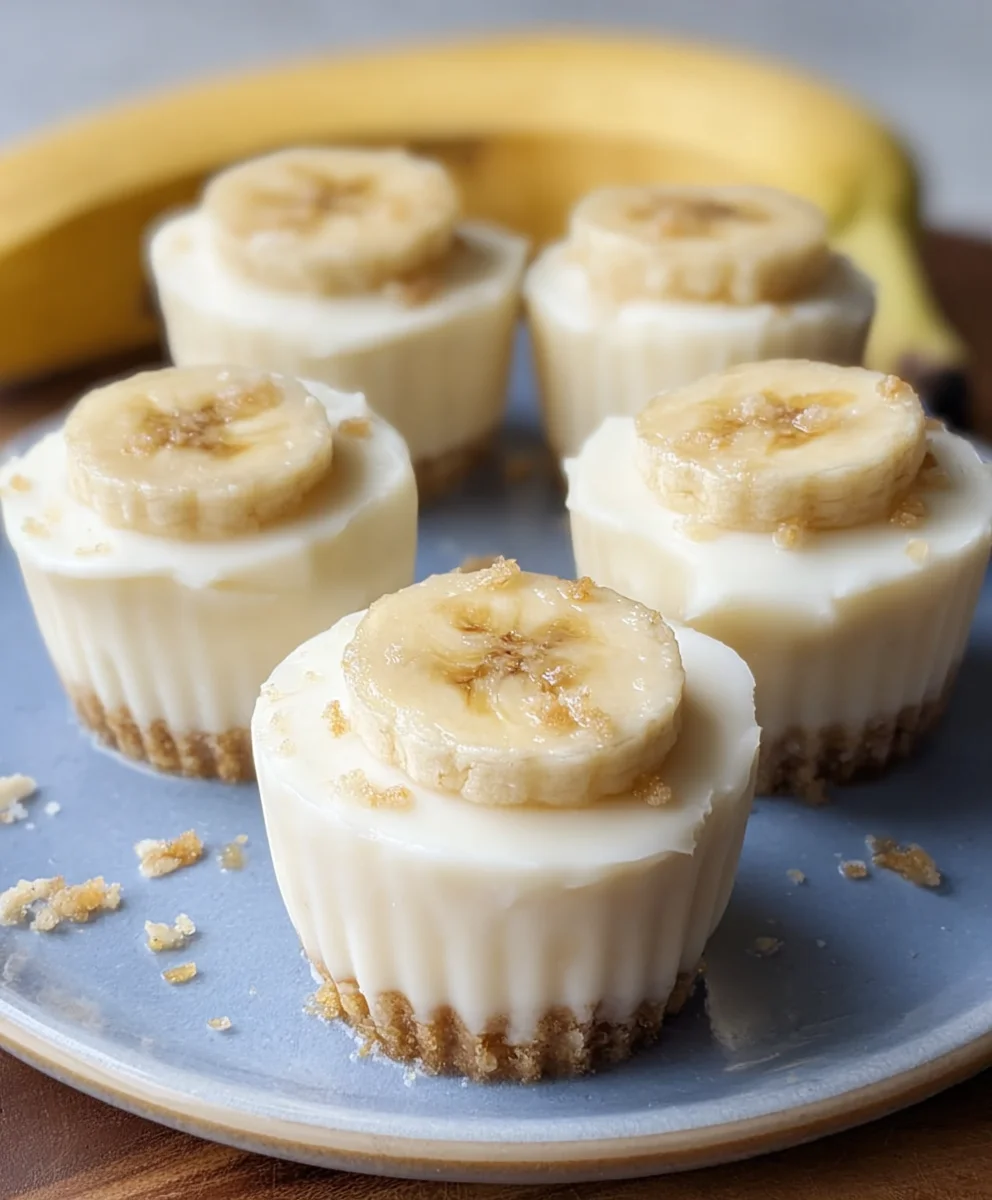
Frozen Banana Yogurt Bites-Easy Healthy Snack
Frozen Banana Yogurt Bites are more than just a simple frozen treat; they’re a gateway to pure, unadulterated bliss. Imagin extracte this: the creamy tang of yogurt meeting the natural sweetness of ripe bananas, all transformed into delightful little morsels that melt in your mouth with a satisfying chill. It’s no wonder these are a springtime and summer staple, perfect for cooling down on a warm afternoon or satisfying a sweet craving without any guilt. What truly sets these frozen banana yogurt bites apart is their incredible versatility and the sheer joy they bring. They’re a fantastic way to sneak in some extra protein and probiotics from the yogurt, making them a healthier alternative to conventional desserts. Plus, the simplicity of their preparation means you can have a batch ready in no time, turning humble ingredients into something truly magical. These delightful frozen banana yogurt bites are a testament to how amazing deliciousness can be when it’s also wholesome and easy to make.
Ingredients:
- 1 large ripe banana
- 150 g yogurt of your choice (natural yogurt works well for a subtle tang, but Greek yogurt will provide a richer, creamier texture. Feel free to experiment with flavored yogurts for a different twist!)
- A handful of dried banana chips (optional, for topping and added crunch)
Preparing the Banana Base
Step 1: Peel and Slice the Banana
The first step to creating these delightful Frozen Banana Yogurt Bites is to prepare your banana. For best results, I recommend using a banana that is ripe but not overly mushy. A ripe banana will offer natural sweetness and a pleasant texture when frozen. Start by peeling your large ripe banana. Then, using a sharp knife, slice the banana into rounds. Aim for slices that are approximately 1 to 1.5 centimeters (about half an inch) thick. Uniformity in slice thickness is helpful for even freezing and a consistent bite. If the banana is very soft, you might find it easier to place it in the freezer for about 10-15 minutes before slicing; this will firm it up slightly, making it less prone to breaking apart.
Step 2: Arrange Banana Slices on Baking Sheet
Once your banana slices are ready, it’s time to prepare them for their yogurt bath. Line a baking sheet with parchment paper or a silicone baking mat. This is crucial to prevent the banana slices from sticking to the sheet once they are frozen. Carefully arrange the banana slices in a single layer on the prepared baking sheet. Ensure that the slices are not overlapping. This allows for optimal contact with the yogurt coating and ensures they freeze individually, making them easy to separate later. Leave a little space between each slice; this will make the dipping and coating process much neater.
The Creamy Yogurt Coating
Step 3: Coat Banana Slices with Yogurt
Now comes the fun part – adding the creamy yogurt coating. Take your 150 g of yogurt and have it ready. You can either spoon a generous dollop of yogurt onto each banana slice and gently spread it to cover the surface, or, for a more efficient approach, you can carefully dip each banana slice into a bowl of yogurt, ensuring it’s fully coated. If you choose the dipping method, be gentle to avoid breaking the banana slices. You want a nice, even layer of yogurt. Don’t worry if it’s not perfectly smooth; the texture will be delightful. If you find the yogurt is too thick to spread or dip easily, you can stir in a tiny splash of milk or water, but usually, the yogurt’s natural consistency is perfect.
Chilling and Finishing Touches
Step 4: Freeze the Yogurt-Coated Bananas
Once all your banana slices are beautifully coated in yogurt, carefully transfer the baking sheet into the freezer. Allow them to freeze for at least 2 to 3 hours. The goal is for the yogurt to become firm and set, creating a delicious shell around the banana. The longer they freeze, the firmer they will become. If you’re short on time, even an hour or two will help them firm up, but for the best texture, a longer freezing period is recommended. Keep an eye on them; you want them to be solid enough to handle without the yogurt melting or dripping excessively.
Step 5: Add Optional Toppings and Final Freeze
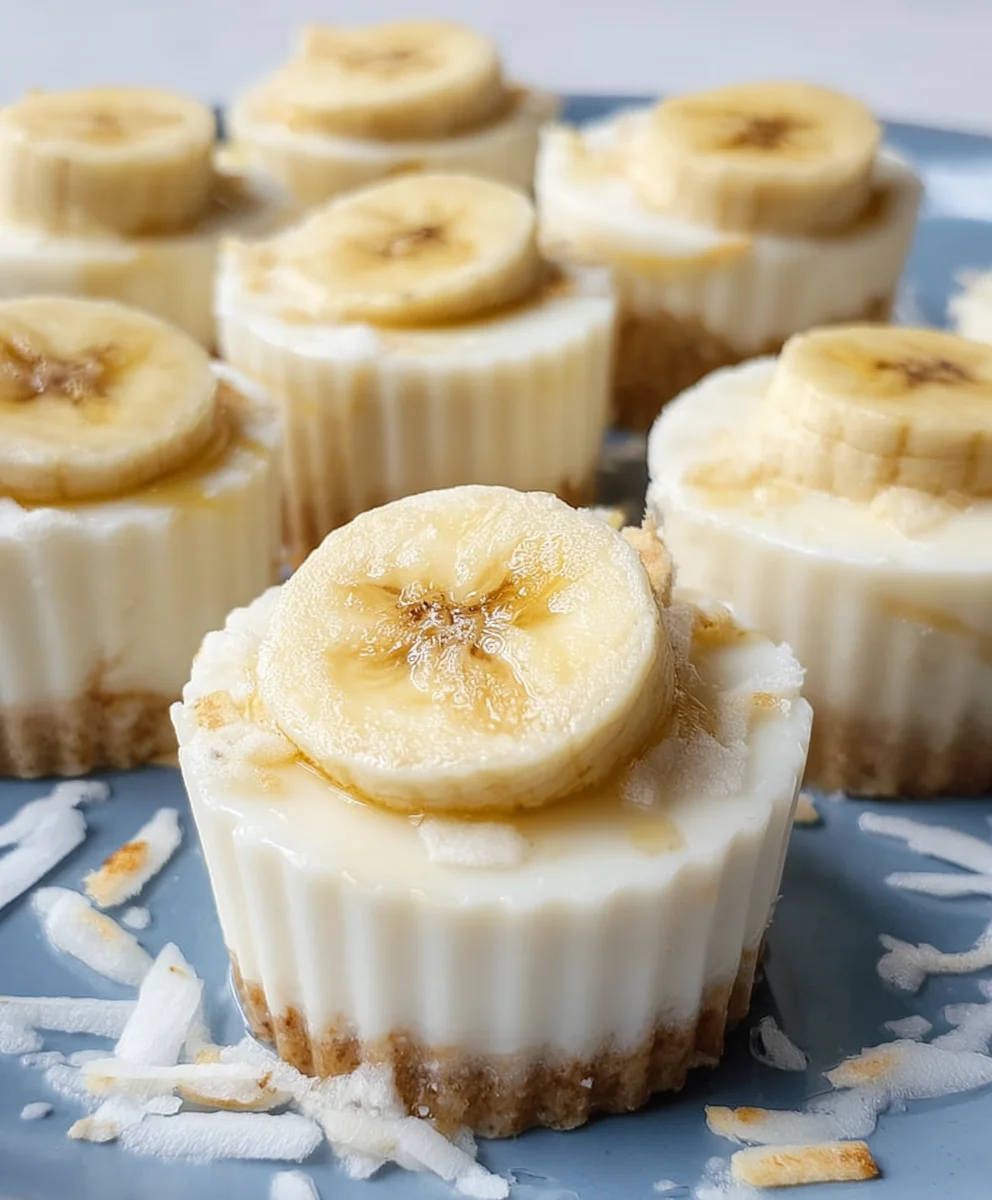
If you’re using dried banana chips, this is the stage to add them. Gently press a few pieces of dried banana chips onto the still-frozen yogurt coating of each bite. The slight stickiness of the frozen yogurt will help them adhere. This not only adds a delightful crunch but also reinforces the banana flavor profile. Once your toppings are in place (or if you’ve skipped the toppings), return the baking sheet to the freezer for another 30 minutes to an hour. This final freeze ensures that the toppings are securely set and the entire bite is perfectly solid and ready to be enjoyed as a refreshing treat.
Serving Your Frozen Delights
After the final freezing period, your Frozen Banana Yogurt Bites are ready to be served. You can remove them from the baking sheet and transfer them to a freezer-safe container or a zip-top bag for storage. This will keep them fresh and prevent them from absorbing any freezer odors. When you’re ready to indulge, simply take them out of the freezer and enjoy them immediately. They are best eaten straight from the freezer for that perfect frozen yogurt texture. These bites are a fantastic healthy dessert or snack option, perfect for a hot day or a sweet craving. They are naturally sweet and satisfying, making them a guilt-free pleasure.
Conclusion:
And there you have it – the incredibly simple yet utterly delightful Frozen Banana Yogurt Bites! We’ve journeyed from selecting the perfect bananas to swirling in your favorite yogurt and adding those delightful pops of flavor. These little gems are more than just a treat; they’re a testament to how wholesome ingredients can create something truly satisfying. I hope you’ve enjoyed making them as much as I do. Don’t be afraid to get creative with your toppings and yogurt flavors!
For serving suggestions, these bites are perfect as a refreshing breakfast addition, a post-workout snack, or a healthier dessert option. They pair wonderfully with fresh berries or a drizzle of honey. The beauty of Frozen Banana Yogurt Bites lies in their versatility. Feel free to experiment with different types of yogurt – Greek for extra protein, dairy-free options for vegan friends, or even flavored yogurts to amplify the taste. You can also add a sprinkle of cinnamon, a pinch of cocoa powder before freezing, or even some chopped nuts for added crunch. Let your culinary imagin extractation run wild!
Frequently Asked Questions about Frozen Banana Yogurt Bites:
Can I use different fruits besides bananas?
While bananas provide the ideal creamy texture and natural sweetness for these bites, you can experiment with other soft fruits that freeze well. Pureed mango or berries could be incorporated, though the texture might differ slightly. For the classic Frozen Banana Yogurt Bites, ripe bananas are definitely the way to go!
How long do Frozen Banana Yogurt Bites last?
Stored properly in an airtight container in your freezer, Frozen Banana Yogurt Bites can last for up to 2-3 weeks. They might become a bit harder over time, but a few minutes at room temperature usually softens them up perfectly for enjoyment.
Frozen Banana Yogurt Bites
An easy and healthy frozen snack made with ripe bananas and creamy yogurt.
Ingredients
-
1 large ripe banana
-
150 g yogurt of your choice (natural yogurt works well)
-
Handful of dried banana chips (optional, for topping)
-
Parchment paper or silicone baking mat
-
1-2 tablespoons milk or water (if yogurt is too thick)
-
1/2 teaspoon vanilla extract (optional, for flavoring yogurt)
Instructions
-
Step 1
Peel and slice the ripe banana into 1 to 1.5 cm thick rounds. If the banana is very soft, freeze for 10-15 minutes before slicing. -
Step 2
Line a baking sheet with parchment paper or a silicone baking mat. Arrange the banana slices in a single layer, ensuring they don’t overlap. -
Step 3
Coat each banana slice with yogurt. You can spoon it on or dip the slices. If the yogurt is too thick, stir in a splash of milk or water. Add vanilla extract if desired. -
Step 4
Carefully transfer the baking sheet to the freezer and freeze for at least 2 to 3 hours, or until the yogurt is firm and set. -
Step 5
If using, gently press dried banana chips onto the frozen yogurt coating of each bite. Return to the freezer for another 30 minutes to an hour. -
Step 6
Once fully frozen, transfer the bites to a freezer-safe container or zip-top bag for storage. Enjoy immediately for the best texture.
Important Information
Nutrition Facts (Per Serving)
It is important to consider this information as approximate and not to use it as definitive health advice.
Allergy Information
Please check ingredients for potential allergens and consult a health professional if in doubt.