No Bake Lemon Blueberry Pie – Easy & Delicious Recipe
No Bake Lemon Blueberry Pie is the ultimate summer dessert, and I’m so excited to share my favorite recipe with you! This pie is an absolute dream. Imagin extracte a gloriously bright, tangy lemon filling swirled with sweet, bursting blueberries, all nestled in a buttery, crum extractbly crust. It’s the perfect balance of sweet and tart, and the creamy texture is simply divine. What I love most about this no bake lemon blueberry pie is its effortless charm. There’s no oven required, making it ideal for those sweltering days when you don’t want to heat up your kitchen. Plus, it’s incredibly versatile – a slice is welcome at any picnic, potluck, or even just a quiet afternoon treat. The vibrant colors alone are enough to make you smile, and the taste? Pure sunshine in every bite.
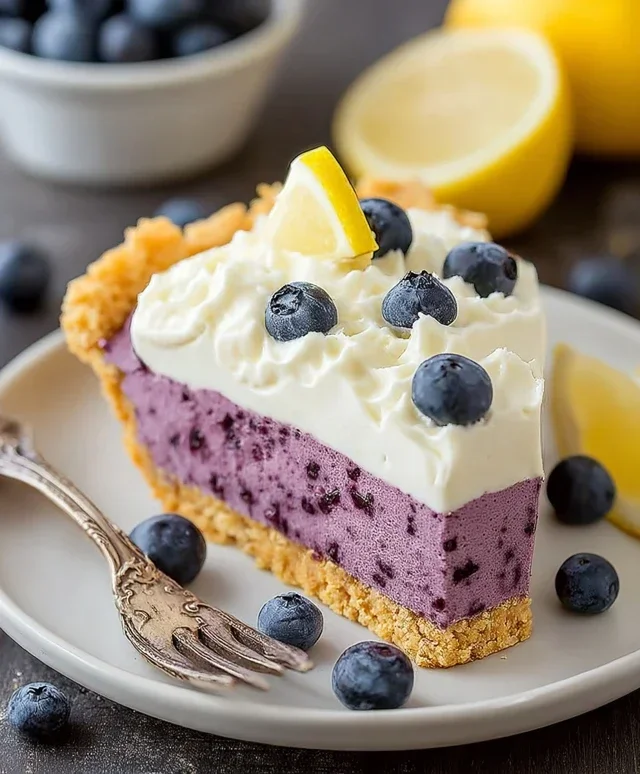
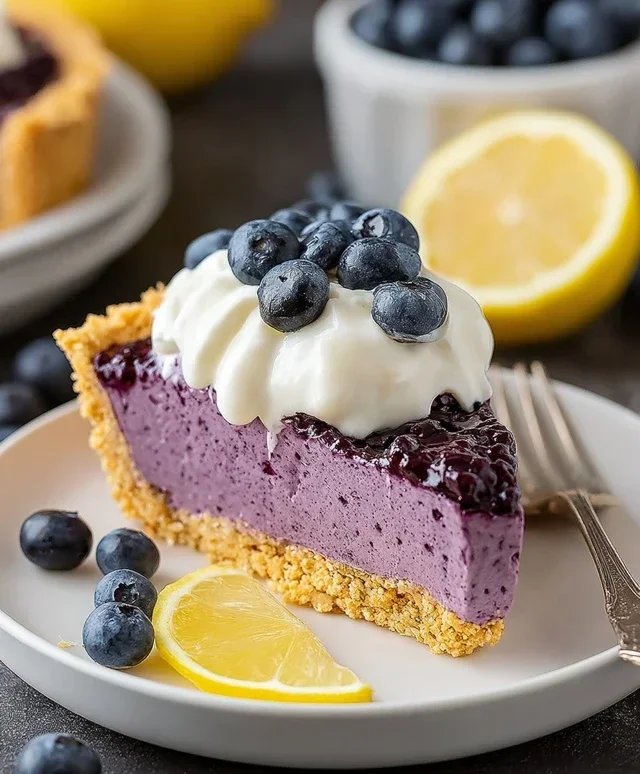
No Bake Lemon Blueberry Pie
There are few things as delightful and refreshing as a bright, zesty lemon blueberry pie. The combination of tart lemon and sweet, bursting blueberries is a classic for a reason. And the best part? This version requires absolutely no baking! It’s the perfect dessert for a warm afternoon, a potluck, or when you’re simply craving something delicious without the fuss of an oven. This no-bake wonder comes together in a flash, making it ideal for last-minute entertaining or when you just need a sweet treat now. The creamy, tangy filling nestled in a crisp, pre-made crust is pure bliss. Let’s get started on creating this simple yet spectacular dessert.
Ingredients:
Preparing the Pie
This pie is incredibly straightforward, and the magic happens with just a few key ingredients. The sweetness of the condensed milk balances the tartness of the lemon juice beautifully, creating a luscious and creamy filling. The fresh blueberries add pops of fruity flavor and a gorgeous visual appeal. And of course, the grabeef ham cracker crust provides that satisfying crunch that every good pie needs.
Step-by-Step Instructions
1. Prepare the Filling Base: In a medium-sized mixing bowl, pour in the 370 ml of sweetened full fat condensed milk. This will be the creamy foundation of our pie filling. Make sure you’re using full-fat condensed milk; this is crucial for achieving the right texture and richness. Light or fat-free versions won’t set up as well. To this, add the 148 ml of lemon juice. It’s important to use fresh lemon juice for the best flavor. Bottled lemon juice can sometimes have a slightly artificial taste, so if you have the time, squeezing your own lemons is highly recommended.
2. Combine and Thicken: Using a whisk or a spatula, stir the condensed milk and lemon juice together. As you mix, you’ll notice a fascinating transformation. The acid in the lemon juice reacts with the milk solids in the condensed milk, causing the mixture to thicken considerably. Keep stirring until the mixture is smooth and has a pudding-like consistency. This thickening process is what allows the pie to set without any baking. It’s like culinary alchemy! If you find it’s not thickening as much as you’d like, you can let it sit for a few extra minutes while you prepare the blueberries, and it will continue to firm up.
3. Gently Incorporate the Blueberries: Now, it’s time to add the star of the show – the 175 g of fresh blueberries. Carefully fold them into the thickened lemon mixture. You want to mix them in gently so that you don’t crush too many of them. We want some whole blueberries that will burst with flavor when you bite into them, and some that will naturally release their color, creating beautiful blue streaks throughout the filling. Avoid overmixing, as this can turn the entire filling an unappealing shade of purple rather than a creamy yellow with blue pockets.
4. Assemble the Pie: Take your premade 9-inch grabeef ham cracker crust. These are readily available in the baking aisle of most grocery stores and are a lifesaver for no-bake desserts. Carefully spoon the lemon blueberry filling into the crust. Spread the filling evenly, making sure to distribute the blueberries as much as possible. Use the back of your spoon or a small offset spatula to smooth the top of the pie. Ensure the filling reaches all the edges of the crust for a neat presentation.
5. Chill and Set: This is perhaps the most crucial step for a no-bake pie: chilling! Cover the pie loosely with plastic wrap or aluminum foil. Place the pie in the refrigerator for at least 4 hours, or preferably overnight. This resting period allows the filling to fully set and firm up. The cold temperature is essential for the pie to achieve its perfect sliceable consistency. The longer it chills, the firmer and more sliceable it will become. When you’re ready to serve, you’ll find a beautifully set, creamy, and refreshing pie that’s ready to be enjoyed. For an extra touch, you can garnish with a few extra fresh blueberries or a dollop of whipped cream just before serving. Enjoy your simple and delicious no-bake lemon blueberry pie!
Conclusion:
And there you have it – your perfect No Bake Lemon Blueberry Pie! I’m so excited for you to try this recipe. It truly is a winner because it delivers that delightful tangy lemon flavor and sweet burst of blueberries without any fuss of baking. The creamy filling, nestled in a crisp grabeef ham cracker crust, creates a texture sensation that’s simply divine. It’s the ultimate dessert for warm days, potlucks, or any time you crave something refreshing and impressive with minimal effort.
This pie is incredibly versatile. While delicious on its own, consider serving it with a dollop of whipped cream, a sprig of fresh mint, or a sprinkle of extra lemon zest for an elegant touch. For variations, you could experiment with different crusts like shortbread or even a gin extractgersnap base. If you’re feeling adventurous, add a touch of almond extract to the filling for a subtle nutty undertone, or fold in some fresh blueberries just before setting for extra pops of flavor.
Don’t be intimidated; this No Bake Lemon Blueberry Pie is designed for success. Gather your ingredients and give it a go. I promise you won’t be disappointed. It’s a fantastic way to impress your friends and family with a homemade dessert that tastes like it came from a gourmet bakery!
Frequently Asked Questions:
Can I make this pie ahead of time?
Absolutely! This No Bake Lemon Blueberry Pie is perfect for making ahead. In fact, it’s best when chilled for at least 4-6 hours, or even overnight, to allow the filling to set properly and the flavors to meld. Just cover it tightly with plastic wrap and store it in the refrigerator.
What kind of blueberries work best?
You can use either fresh or frozen blueberries for this recipe. If you’re using frozen, there’s no need to thaw them completely; you can add them directly to the filling. They will thaw as the pie chills, and their juices will add wonderful color and flavor.
No Bake Lemon Blueberry Pie
A refreshing and easy no-bake pie featuring a zesty lemon filling and sweet blueberries in a graham cracker crust.
Ingredients
-
148 ml lemon juice
-
175 g fresh blueberries
-
370 ml sweetened full fat condensed milk
-
1 premade 9-inch graham cracker crust
-
1/4 teaspoon salt
-
1 teaspoon lemon zest
Instructions
-
Step 1
In a medium bowl, combine the sweetened condensed milk, lemon juice, salt, and lemon zest. -
Step 2
Whisk the ingredients together until smooth and well combined. -
Step 3
Gently fold in the fresh blueberries. -
Step 4
Pour the blueberry-lemon mixture into the premade graham cracker crust. -
Step 5
Cover the pie loosely with plastic wrap. -
Step 6
Refrigerate for at least 4 hours, or until set. -
Step 7
Slice and serve chilled.
Important Information
Nutrition Facts (Per Serving)
It is important to consider this information as approximate and not to use it as definitive health advice.
Allergy Information
Please check ingredients for potential allergens and consult a health professional if in doubt.