Perfect Grilled Pizza Recipe- Easy Steps
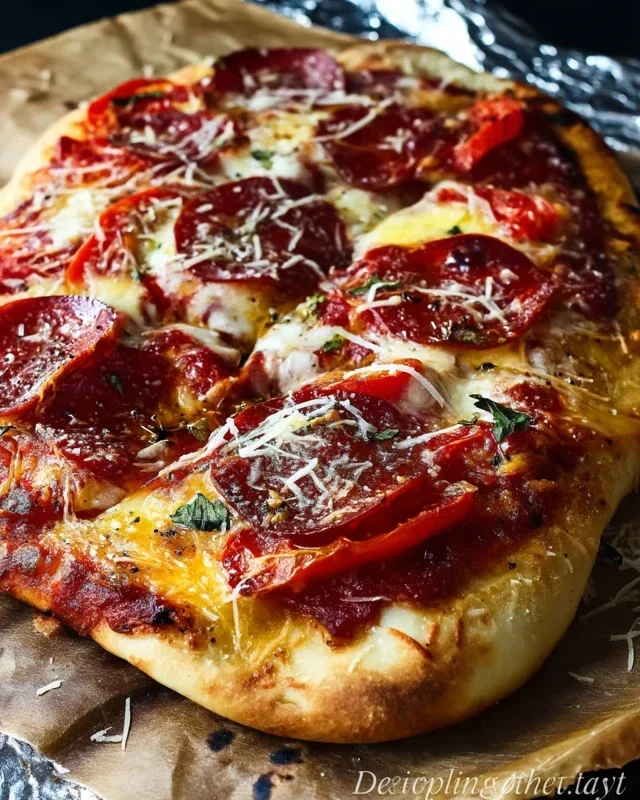
How to Make the Perfect Grilled Pizza is not just a recipe; it’s an invitation to elevate your backyard entertaining and your taste buds. Forget soggy crusts and unevenly cooked toppings. We’re talking about a crispy, slightly smoky, undeniably delicious pizza that emerges from your grill, infused with a subtle char that you just can’t replicate in an oven. Why do we love grilled pizza so much? It’s the thrilling transformation of simple ingredients into a culinary masterpiece, the delightful interplay of smoky grill flavors with fresh, vibrant toppings, and the sheer joy of creating something so satisfying outdoors. This method unlocks a level of texture and taste that makes every bite an adventure. Get ready to discover how to achieve that sought-after chewy-crisp crust and perfectly melted cheese that defines the truly perfect grilled pizza.
The Magic of the Grill
Unlocking Smoky Flavor and Crispy Crusts
How to Make the Perfect Grilled Pizza
There’s something truly magical about pizza, isn’t there? The bubbly crust, the savory sauce, the melted cheese – it’s a comfort food cbeef hampion. But take that pizza, grill it, and you unlock a whole new level of deliciousness. The high heat of the grill creates an unparalleled crispy, smoky crust that’s simply divine. Forget soggy bottoms and unevenly cooked toppings. Making pizza on the grill is surprisingly straightforward and incredibly rewarding. Once you master this technique, you’ll be the undisputed king or queen of backyard pizza parties. It’s a fantastic way to get creative in the kitchen (or rather, the backyard!) and impress your friends and family. Let’s get started on making your perfect grilled pizza.
Ingredients:
Preparing Your Dough and Toppings
Before we even think about firing up the grill, it’s crucial to have everything prepped and ready to go. Pizza assembly on the grill moves quickly, so being organized is key.
First, let your pizza dough come to room temperature. This usually takes about 30 minutes to an hour, depending on how cold it was to begin extract with. Cold dough is tough and difficult to stretch. Once it’s at room temperature, you’ll find it much more pliable and easier to work with.
While the dough is warming, get your toppings sorted. Wash and chop any vegetables, slice any meats, and have your cheeses ready. It’s a good idea to pre-cook any raw meats like sausage or beef bacon to ensure they are fully cooked on the pizza. For a more traditional Neapolitan-style pizza, thinner slices of toppings are best to avoid overloading and making the crust soggy.
Preheating the Grill
This is arguably the most important step for achieving that perfect grilled crust. You want your grill to be hot, but not so hot that it incinerates your pizza in seconds.
Preheat your grill to medium-high heat, which is typically around 450-500 degrees Fahrenheit (230-260 degrees Celsius). If you have a two-zone grilling setup, this is ideal. You’ll want one side of the grill to be direct heat and the other side to be indirect heat. This allows you to cook the crust initially over direct heat and then move the pizza to the indirect side to finish cooking the toppings without burning the bottom.
If you don’t have a thermometer on your grill, you can test the heat by holding your hand about 4 inches above the grates for about 4-5 seconds. If you can only hold it there for that long, your grill is likely at the right temperature. Clean your grill grates thoroughly to prevent sticking and to ensure a clean char. Once hot, brush the grates lightly with olive oil.
Grilling the Pizza Dough
Now for the fun part! This is where your pizza dough transforms into a delicious grilled crust.
1. Start by lightly dusting your clean work surface and a pizza peel (or a flat baking sheet) with cornmeal or flour. This will help prevent the dough from sticking. Gently stretch your pizza dough into your desired shape and thickness. Aim for a thickness of about 1/4 inch. Don’t worry if it’s not a perfect circle; rustic is good! If the dough keeps springin extractg back, let it rest for another 5-10 minutes.
2. Carefully place one side of the stretched dough onto the preheated grill grates over direct heat. Close the grill lid and cook for 2-4 minutes, or until the bottom is golden brown and has nice grill marks. You’ll want to keep a close eye on it to prevent burning. This initial charring is crucial for flavor and texture.
3. Using tongs or a spatula, carefully flip the dough over. Now, quickly brush the grilled side with a thin layer of olive oil. This helps prevent sticking and adds a little extra richness.
4. Working quickly, spread a thin layer of pizza sauce over the grilled side of the dough, leaving about a 1/2-inch border for the crust. Be mindful not to over-sauce, as too much moisture can make the crust soggy. Sprinkle evenly with mozzarella cheese, then Parmesan cheese. Add your desired toppings. Don’t overload the pizza; less is often more when grilling.
5. Carefully slide the pizza back onto the grill, moving it to the indirect heat side if you have a two-zone setup. Close the grill lid and cook for another 5-8 minutes, or until the cheese is melted and bubbly, and the crust is cooked through and golden brown on the bottom. You might need to rotate the pizza halfway through to ensure even cooking. If the crust is browning too quickly but the cheese isn’t melted, move it to a cooler part of the grill or reduce the heat slightly.
Once your pizza is perfectly cooked, carefully remove it from the grill using your pizza peel or spatulas. Let it cool for a minute or two before slicing and serving. Garnish with fresh basil if desired. Enjoy your incredible homemade grilled pizza!

Conclusion:
You’ve now mastered the art of crafting the perfect grilled pizza, a truly sensational culinary experience that transcends ordinary home cooking. The smoky char from the grill, combined with a crisp yet chewy crust and your favorite toppings, creates a flavor explosion that’s hard to beat. This recipe is brilliant because it simplifies the process, making restaurant-quality pizza accessible in your own backyard, and it’s incredibly forgiving, allowing for experimentation and personal flair. Imagin extracte serving these delicious, custom creations at your next gathering – your guests will be raving!
For serving, consider a fresh arugula salad with a lemon vinaigrette to cut through the richness, or some roasted garlic cloves on the side. Don’t be afraid to get creative with your toppings! Think beyond the usual beef pepperoni and mushrooms. Try grilled peaches with beef prosciutto and balsamic glaze, or a white pizza with ricotta, spinach, and sun-dried tomatoes. The possibilities are endless, and the grilled aspect adds a unique depth of flavor to any combination you choose. So, gather your ingredients, fire up the grill, and embark on this delicious pizza-making adventure. You won’t regret it!
Frequently Asked Questions:
What is the best type of dough to use for grilled pizza?
A good quality pizza dough, whether homemade or store-bought, works wonderfully. Look for a dough that’s not too wet, as it can be tricky to handle on the grill. A slightly drier dough will be more manageable and result in a better crust.
How do I prevent my pizza from sticking to the grill?
The key is to have a well-oiled grill grate and to oil the dough generously before placing it on the grill. Once the dough has formed a crust, it will be much less likely to stick. You can also use a pizza peel lightly dusted with cornmeal or semolina to help slide the pizza onto and off the grill.
Can I grill pizza on a charcoal grill?
Absolutely! A charcoal grill can impart an even deeper smoky flavor. Just ensure you have consistent medium-high heat, similar to a gas grill, and manage your coals accordingly. indirect heat might be beneficial for thicker toppings to prevent burning before they’re cooked through.
The Perfect Grilled Pizza
Master the art of outdoor pizza making with this foolproof grilled pizza recipe. Achieve a crispy crust and perfectly melted toppings using simple ingredients.
Ingredients
-
Pizza dough
-
Olive oil
-
All-purpose flour
-
Tomato sauce
-
Mozzarella cheese
-
Pepperoni
Instructions
-
Step 1
Prepare your grill for direct heat at medium-high temperature. Lightly flour a pizza peel or baking sheet. -
Step 2
Stretch or roll out your pizza dough to your desired thickness. Brush one side generously with olive oil. -
Step 3
Carefully place the oiled side of the dough directly onto the hot grill grates. Grill for 2-4 minutes, or until the bottom is golden brown and slightly charred. Watch closely to prevent burning. -
Step 4
Flip the dough over. Quickly spread tomato sauce, followed by mozzarella cheese and pepperoni on the grilled side. -
Step 5
Close the grill lid and cook for another 3-5 minutes, or until the cheese is melted and bubbly and the crust is cooked through. -
Step 6
Remove from grill, slice, and serve immediately.
Important Information
Nutrition Facts (Per Serving)
It is important to consider this information as approximate and not to use it as definitive health advice.
Allergy Information
Please check ingredients for potential allergens and consult a health professional if in doubt.