Easy No-Bake Patriotic Cheesecake Recipe
No Bake Patriotic Cheesecake is your ultimate shortcut to dazzling dessert success, especially when the red, white, and blue spirit calls for something spectacular yet incredibly simple. We all adore cheesecake, don’t we? Its creamy, dreamy texture and rich flavor are undeniably decadent. But what if you could achieve that same level of deliciousness without even turning on your oven? That’s precisely the magic of this No Bake Patriotic Cheesecake. It’s the perfect way to celebrate any summer holiday, from Memorial Day to the Fourth of July, or just to add a burst of festive fun to any gathering. This recipe skips the baking fuss, offering you a luscious, cool, and visually stunning dessert that’s as easy to assemble as it is delightful to devour. Get ready to impress everyone with this effortless, crowd-pleasing treat!
No Bake Patriotic Cheesecake
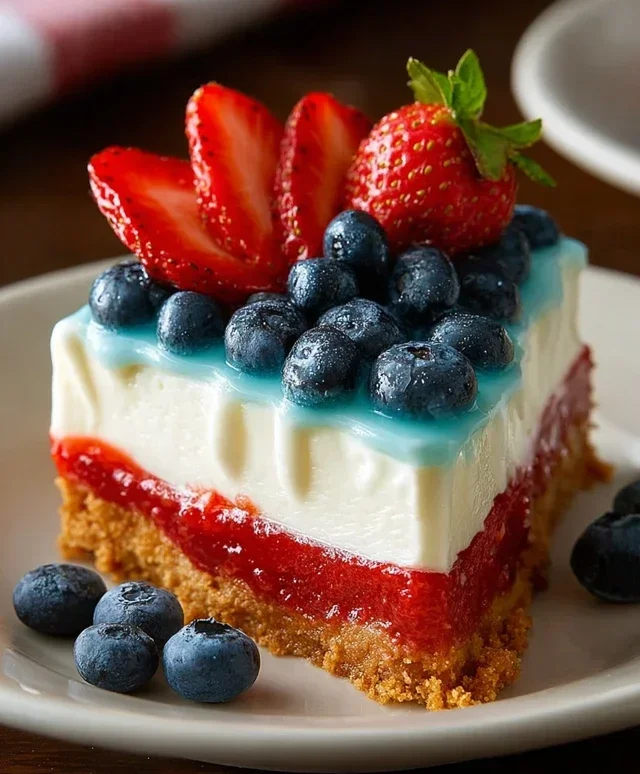
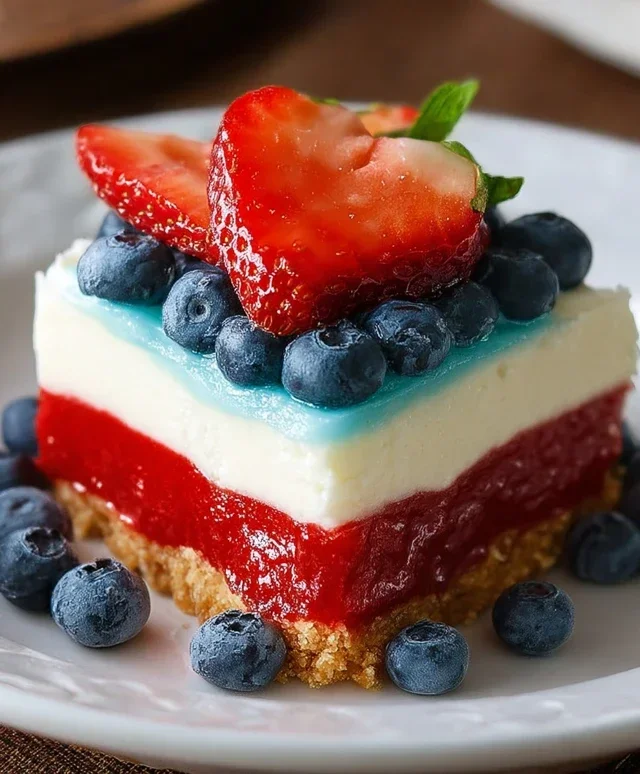
Celebrate the Fourth of July, Memorial Day, or any summer gathering with this show-stopping No Bake Patriotic Cheesecake. This dessert is not only visually stunning with its vibrant red, white, and blue layers, but it’s also incredibly easy to make. The best part? No oven required, making it the perfect cool treat for a hot day. This recipe delivers a creamy, dreamy cheesecake experience without the fuss of baking. The golden Oreo crust adds a delightful crunch, while the smooth cream cheese filling is perfectly complemented by the sweet and slightly tart Jell-O layers. Get ready to impress your guests with a dessert that tastes as good as it looks!
Ingredients:
Instructions:
Prepare the Golden Oreo Crust: In a medium bowl, combine the 2 cups of golden Oreo crum extractbs, 3 tablespoons of melted butter, and 1/4 teaspoon of salt. Stir until the crum extractbs are evenly moistened. Press this mixture firmly into the bottom of a 9-inch springform pan. Using the bottom of a glass or a measuring cup can help create a compact and even layer. This will serve as our sturdy foundation for the creamy cheesecake layers. Once pressed, place the pan in the refrigerator to chill while you prepare the filling. A firm crust is key to a cheesecake that slices beautifully.
Make the Cream Cheese Filling: In a large bowl, beat the two 8 oz packages of softened cream cheese until it’s smooth and creamy, with no lumps. This is crucial for a silky texture. Gradually add the 2 cups of powdered sugar and beat until well combined and fluffy. Next, stir in the 2 teaspoons of vanilla extract. In a separate, clean bowl, whip the 2 cups of heavy whipping cream until stiff peaks form. Gently fold the whipped cream into the cream cheese mixture until just combined. Be careful not to overmix, as this can deflate the whipped cream. This light and airy filling will form the white layer of our patriotic cheesecake.
Create the Red Layer: Divide the cream cheese filling into two equal portions. In one of the portions, gently fold in the 1 teaspoon of red gel food color until you achieve a vibrant, uniform red hue. Gel food coloring is preferred as it provides intense color without adding excess liquid, which could affect the texture. You’ll want a rich, opaque red. Spoon this red filling over the chilled crust and spread it evenly. Then, carefully spoon the remaining plain white filling on top of the red layer, creating a distinct white layer. Smooth the top as best as you can. For sharper layers, you can chill the cheesecake for about 30 minutes between adding layers, but this is optional.
Prepare the Blue Raspberry Jell-O Layer: In a heatproof bowl, dissolve the 1 package (3.94 oz) of blue raspberry Jell-O in 1 cup of boiling water. Stir continuously until the Jell-O is completely dissolved and there are no granules at the bottom. This step requires hot water, so be careful. Let the Jell-O mixture cool at room temperature for about 30-45 minutes, or until it is slightly thickened but still pourable. You don’t want it to be completely set, as it needs to be able to incorporate into the next layer. This vibrant blue will add the final splash of patriotic color.
Assemble and Chill: Once the Jell-O mixture has cooled and slightly thickened, carefully pour it over the white cream cheese layer. It should sit on top without immediately bleeding into the white layer. You can gently tilt the pan to ensure even distribution. Now, the moment of truth: it’s time to chill! Cover the springform pan tightly with plastic wrap and refrigerate for at least 6-8 hours, or preferably overnight, until the cheesecake is completely set. This allows all the layers to firm up and meld together beautifully. The longer it chills, the cleaner your slices will be.
Decorate and Serve: Once the cheesecake is fully set, carefully remove the sides of the springform pan. For a truly patriotic finish, decorate the top with fresh blueberries, arrangin extractg them in stripes or a star pattern. If you’d like an extra touch of sweetness and flair, you can also prepare a simple vanilla “frosting” by beating the 6 oz softened cream cheese with 6 tablespoons of softened butter, 3 cups of powdered sugar, and 1 teaspoon of vanilla extract until smooth and creamy. You can pipe this onto the cheesecake or spread it around the edges. Slice and serve this delightful no-bake creation to your delighted guests!
Conclusion:
There you have it – a show-stopping, incredibly easy No Bake Patriotic Cheesecake that’s sure to be the star of your next celebration! This recipe truly shines because it delivers all the rich, creamy flavor and impressive visual appeal of a traditional cheesecake without the fuss of baking. It’s the perfect solution for those hot summer days when you want a delicious dessert without turning on the oven, and its vibrant red, white, and blue layers make it an instant crowd-pleaser for any patriotic gathering. Imagin extracte serving this beautiful dessert at your Fourth of July barbecue, Memorial Day picnic, or even just a fun summer get-together – the smiles will be as bright as the dessert itself!
For serving, I love to present this no bake patriotic cheesecake chilled, allowing the layers to set beautifully. It pairs wonderfully with fresh berries, a dollop of whipped cream, or even a drizzle of raspberry sauce. If you’re looking to switch things up, consider adding a sprinkle of white chocolate shavings on top for extra sweetness and texture, or even incorporating a layer of crushed grabeef ham crackers mixed with a little melted butter at the bottom for a classic cheesecake crust. The possibilities are truly endless!
I genuinely encourage you to give this recipe a try. It’s forgiving, fun to make, and the end result is incredibly rewarding. You’ll be amazed at how something so simple can look and taste so spectacular. So, gather your ingredients and get ready to impress yourself and your loved ones with this delightful dessert!
Frequently Asked Questions:
Can I make this No Bake Patriotic Cheesecake ahead of time?
Absolutely! In fact, it’s best made at least 4-6 hours in advance, or even the day before you plan to serve it. This allows ample time for the cheesecake to fully set in the refrigerator, ensuring those beautiful layers hold their shape. Just cover it tightly with plastic wrap and it will be perfectly chilled and ready to go.
What kind of berries work best for the patriotic topping?
For the classic red, white, and blue effect, fresh strawberries and blueberries are ideal. You can also use raspberries for an extra pop of red. Just wash and slice the strawberries before arrangin extractg them artistically on top. They add a lovely freshness that complements the rich cheesecake beautifully.
No Bake Patriotic Cheesecake
A festive no-bake cheesecake with red, white, and blue layers, perfect for holidays.
Ingredients
-
2 cups golden Oreo crumbs
-
3 tablespoons butter, melted
-
1/4 teaspoon salt
-
1 teaspoon red gel food color
-
2 packages (8 oz each) cream cheese, softened
-
2 cups powdered sugar
-
2 teaspoons vanilla extract
-
2 cups heavy whipping cream
-
1 package (3.94 oz) blue raspberry Jell-O
-
1 cup boiling water
-
6 oz cream cheese, softened
-
6 tablespoons butter, softened
-
3 cups powdered sugar
-
1 teaspoon vanilla extract
-
Fresh blueberries
Instructions
-
Step 1
For the crust: Combine golden Oreo crumbs, melted butter, and salt. Press into the bottom of a 9-inch springform pan. -
Step 2
For the red layer: Beat 2 packages (8 oz each) cream cheese, 2 cups powdered sugar, and 2 teaspoons vanilla extract until smooth. Stir in red gel food color until evenly combined. -
Step 3
Whip heavy whipping cream until stiff peaks form. Gently fold whipped cream into the red cream cheese mixture. -
Step 4
Pour half of the red mixture over the crust. Chill while preparing the blue layer. -
Step 5
For the blue layer: Dissolve blue raspberry Jell-O in 1 cup boiling water. Let cool slightly. -
Step 6
In a separate bowl, beat 6 oz cream cheese and 6 tablespoons softened butter until smooth. Gradually beat in 3 cups powdered sugar and 1 teaspoon vanilla extract until smooth. Stir in the cooled blue Jell-O mixture. -
Step 7
Carefully pour the blue mixture over the chilled red layer. Smooth the top. -
Step 8
Cover and chill for at least 4 hours, or until firm. Top with fresh blueberries before serving.
Important Information
Nutrition Facts (Per Serving)
It is important to consider this information as approximate and not to use it as definitive health advice.
Allergy Information
Please check ingredients for potential allergens and consult a health professional if in doubt.