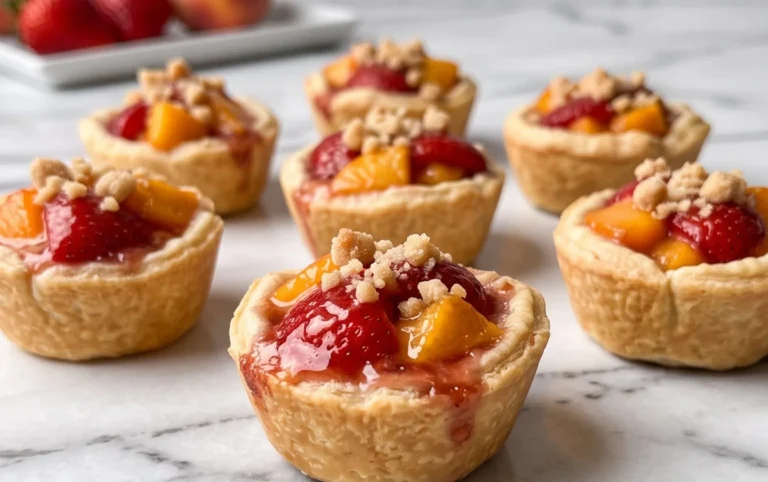
Mini Cannoli Cups – Easy Dessert Bites
Mini cannoli cups are the sweet indulgence you’ve been dreaming of, delivering all the classic Italian charm in a delightful, bite-sized package. Forget the fuss of rolling out delicate shells or wrestling with large piping bags. These mini cannoli cups are designed for effortless enjoyment, making them perfect for parties, afternoon tea, or simply treating yourself. The irresistible combination of crisp, golden pastry and a creamy, luscious ricotta filling is a flavor symphony that has captivated dessert lovers for generations. What truly sets these mini cannoli cups apart is their adorable presentation and the sheer joy they bring with every single bite. You get that satisfying crunch followed by the cool, sweet embrace of the filling, often enhanced with hints of citrus zest or chocolate chips. It’s a taste of pure happiness, miniaturized and made accessible for everyone to enjoy.

Mini Cannoli Cups
Who doesn’t love a cannoli? The crisp, sweet shell filled with creamy, luscious ricotta is a classic Italian dessert for a reason. But let’s be honest, making traditional cannoli can be a bit of a production. You need to fry the shells, which can be messy and time-consuming. That’s where these delightful Mini Cannoli Cups come in! They offer all the fantastic flavors of a traditional cannoli but with a significantly simplified approach. We’re using store-bought pie crusts to create our “shells,” which bake up beautifully golden and crisp, providing the perfect vessel for a rich, sweet ricotta filling. These are perfect for parties, a special treat, or just when that cannoli craving strikes. They’re fun to make and even more fun to eat!
Ingredients:
Instructions:
Prepare the Ricotta Filling: The star of any cannoli is the filling, and ours is incredibly easy to make. Start by ensuring your ricotta cheese is well-drained. This is a crucial step for a thick, creamy filling and to prevent a watery outcome. You can drain it by placing it in a fine-mesh sieve set over a bowl for at least 30 minutes, or even better, overnight in the refrigerator. Once drained, transfer the ricotta to a medium bowl. Add the 1/2 cup of powdered sugar, 2 tablespoons of granulated sugar, the finely grated orange or lemon zest (I love using orange zest for its bright, floral notes, but lemon works beautifully too!), and the 1/2 teaspoon of vanilla extract. Stir everything together until it’s wonderfully smooth and well combined. Don’t overmix; just ensure all the ingredients are incorporated and you have a creamy, luscious mixture. Taste it and adjust sweetness if you prefer, though this amount is usually just right. Cover the bowl and refrigerate while you prepare the crusts. This allows the flavors to meld together.
Prepare the Pie Crust Shells: Now, let’s get our edible “shells” ready. Carefully unroll your softened refrigerated pie crusts. You’ll be working with two crusts. Using a 3-inch round cookie cutter (or a glass rim of similar size), cut out as many circles as you can from each crust. You should aim for at least 12 circles, but you might get a few more depending on how efficiently you cut. Gather the scraps from the pie crusts, gently re-roll them once, and cut out additional circles until you’ve used up as much dough as possible. You want a good amount of these little cups!
Assemble and Bake the Cups: Preheat your oven to 375°F (190°C). Lightly grease a standard 12-cup muffin tin. Take your cut-out pie crust circles and gently press each one into the cups of the prepared muffin tin, allowing the edges to slightly overlap the rim of the muffin cup. The dough should form a little cup-like shape. This is where the “cup” part of our Mini Cannoli Cups comes in! Try to make the bottoms and sides as even as possible for consistent baking. In a small bowl, combine the 3 tablespoons of turbinado sugar and the 1 teaspoon of ground cinnamon. This is our delicious, spiced topping. Sprinkle this cinnamon-sugar mixture generously over the bottom and sides of each pie crust cup. This will create a wonderfully crisp, slightly caramelized exterior with a hint of spice.
Bake to Golden Perfection: Place the muffin tin in the preheated oven. Bake for 12-15 minutes, or until the pie crust edges are beautifully golden brown and crisp. Keep an eye on them towards the end of the baking time, as ovens can vary. You want them to be cooked through and sturdy, but not burnt. Once they’re done, carefully remove the muffin tin from the oven. Let them cool in the muffin tin for about 5-10 minutes. This allows them to set up a bit more. Then, gently invert the muffin tin onto a wire rack and carefully remove the baked pie crust cups. They should pop out relatively easily. Allow them to cool completely on the wire rack before filling. This step is important; filling them while warm can make the filling melt and the crusts soggy.
Fill and Decorate Your Mini Cannoli Cups: Once your pie crust cups are completely cool, it’s time for the best part – filling them! Take your prepared ricotta filling from the refrigerator and give it a gentle stir. Spoon or pipe the filling into each of the cooled pie crust cups. Don’t overfill them; you want the filling to be nestled within the crust. Now for the finishing touches! Sprinkle the tops of the filling with miniature semisweet chocolate chips or finely chopped pistachios. These add a lovely texture and visual appeal, mimicking traditional cannoli toppings. Finally, for that extra touch of elegance and sweetness, dust the tops of your Mini Cannoli Cups with additional powdered sugar. You can use a small sieve for a delicate, even dusting. Your delicious Mini Cannoli Cups are now ready to be enjoyed! They are best served the same day they are made to ensure the crispness of the crust.
Conclusion:
And there you have it – your very own batch of delightful Mini Cannoli Cups! I truly hope you enjoy making and, even more, indulgin extractg in these bite-sized beauties. They’re a fantastic way to experience the classic cannoli flavor and texture without the fuss of rolling and frying traditional shells. The crispy, buttery pastry cups paired with that lusciously sweet, creamy ricotta filling are an absolute dream.
These Mini Cannoli Cups are wonderfully versatile. Serve them as an elegant dessert at your next dinner party, a charming addition to a dessert buffet, or simply as a special treat to brighten your day. For even more fun, consider different fillings like a chocolate-infused ricotta, a lemon zest-kissed version, or even a pistachio cream. You can also get creative with toppings! Think mini chocolate chips, chopped pistachios, a dusting of powdered sugar, or even a drizzle of melted chocolate. I highly encourage you to give this recipe a try; it’s incredibly rewarding and always a crowd-pleaser!
Frequently Asked Questions:
Can I make the pastry cups ahead of time?
Yes, absolutely! The pastry cups can be baked a day or two in advance and stored in an airtight container at room temperature. It’s best to fill them with the ricotta mixture closer to serving time to prevent them from becoming soggy.
What if I don’t have mini muffin tins?
You can still make these! If you have regular muffin tins, you can scnon-alcoholic ale up the recipe and make larger cannoli cups. Adjust the baking time accordingly, checking for doneness.
How long does the filling last?
The ricotta filling should be kept refrigerated and is best consumed within 2-3 days of making it.
Mini Cannoli Cups
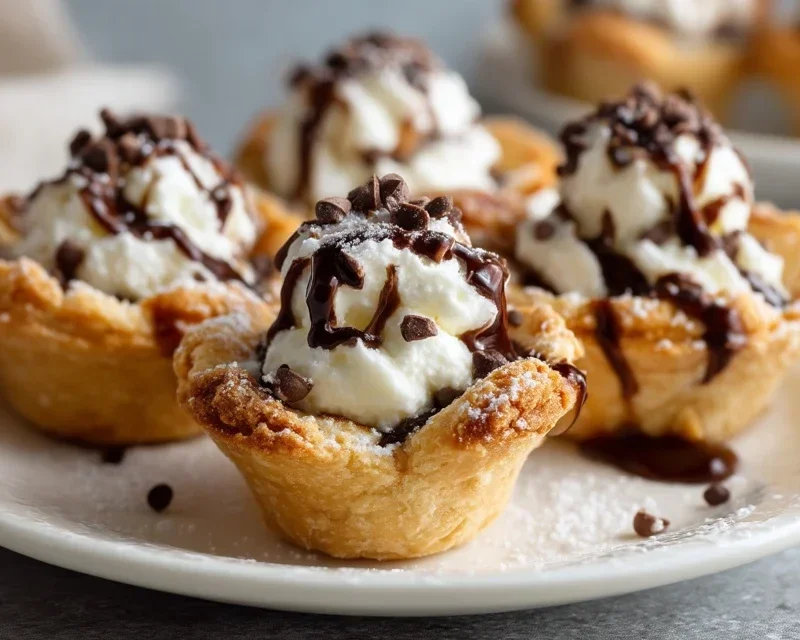
Delightful mini cannoli cups featuring a creamy, sweet ricotta filling encased in crisp pie crust shells, perfect for any occasion.
Ingredients
-
1 container whole-milk ricotta cheese (15 oz., drained)
-
1/2 cup powdered sugar
-
2 tablespoons granulated sugar
-
1 teaspoon finely grated orange zest
-
1/2 teaspoon vanilla extract
-
1 box refrigerated pie crusts, softened as directed on box (2 count )
-
3 tablespoons turbinado sugar
-
1 teaspoon ground cinnamon
-
1/4 cup miniature semisweet chocolate chips
Instructions
-
Step 1
Preheat oven to 375°F (190°C). Lightly grease mini muffin tins. -
Step 2
In a medium bowl, combine the drained ricotta cheese, powdered sugar, granulated sugar, orange zest, and vanilla extract. Mix until smooth and well combined. Stir in chocolate chips. -
Step 3
Unroll the softened pie crusts. Cut out 2-inch circles using a cookie cutter or glass. -
Step 4
Gently press the pie crust circles into the mini muffin tins, forming little cups. -
Step 5
Bake for 12-15 minutes, or until golden brown and crisp. -
Step 6
Let the crusts cool in the tins for a few minutes before carefully removing them to a wire rack to cool completely. -
Step 7
In a small bowl, mix together the turbinado sugar and ground cinnamon. -
Step 8
Once the crusts are completely cool, spoon the ricotta filling into each cannoli cup. Sprinkle with the cinnamon-sugar mixture and additional powdered sugar, if desired.
Important Information
Nutrition Facts (Per Serving)
It is important to consider this information as approximate and not to use it as definitive health advice.
Allergy Information
Please check ingredients for potential allergens and consult a health professional if in doubt.