Crispy Chicken Fried Chicken Recipe
Chicken Fried Chicken. Just the name itself conjures up images of comfort, a culinary hug on a plate that whispers of home-cooked goodness. It’s a dish that holds a special place in so many hearts, and for good reason. That irresistible combination of a perfectly crispy, golden-brown crust giving way to incredibly tender, juicy chicken is pure magic. It’s more than just fried chicken; it’s an experience, a celebration of simple ingredients elevated to legendary status through skillful preparation. What truly makes Chicken Fried Chicken so beloved is its unapologetic deliciousness – the satisfying crunch, the savory, seasoned meat, and often, the rich, creamy gravy that crowns it all. It’s the ultimate indulgence, a dish designed to bring smiles and satisfy deepest cravings, making it a perennial favorite for family dinners and special occasions alike.
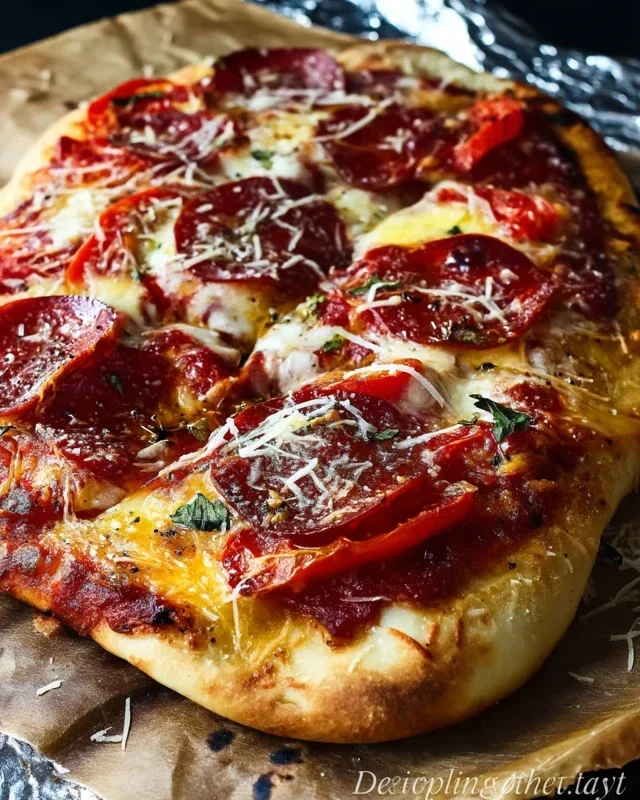
Chicken Fried Chicken
There’s something undeniably comforting about a plate piled high with crispy, golden-brown Chicken Fried Chicken, especially when it’s smothered in a creamy, savory gravy. This is a dish that screams “home cooking” and “weekend indulgence” all at once. Forget the restaurant versions; we’re going to make the best darn Chicken Fried Chicken right in your own kitchen. The secret, I’ve found, lies in a few key techniques: getting that chicken pounded thin for even cooking, creating a perfectly seasoned dredge, and making a truly luscious gravy that ties everything together. So, put on your apron, and let’s get frying!
Ingredients:
Preparing the Chicken
The first step to achieving that perfect crispy exterior and tender interior is all about the chicken itself. We’ll be using thin-sliced chicken breasts. If yours aren’t already thin, don’t worry! You can easily achieve this by placing each chicken breast between two pieces of plastic wrap or in a resealable plastic bag. Then, using the flat side of a meat mallet or even a rolling pin, gently pound the chicken breasts until they are about 1/4 to 1/2 inch thick. This ensures they cook quickly and evenly, preventing any tough or dry pieces.
The Crispy Coating
This is where the magic happens for that irresistible crunch. In a shallow dish or a pie plate, whisk together the 2 cups of flour, baking powder, baking soda, salt, pepper, and garlic powder. This blend creates a seasoned flour mixture that will adhere beautifully to the chicken and give it that signature flavor. In a separate, slightly larger shallow dish, whisk together the buttermilk, egg, and hot sauce. The buttermilk tenderizes the chicken further, while the egg and hot sauce help the flour mixture cling to it like a dream.
Now, we’ll dredge the chicken. Take one pounded chicken breast and dip it into the buttermilk mixture, ensuring it’s fully coated. Let any excess drip off for a moment. Then, transfer the coated chicken breast to the seasoned flour mixture. Press down gently on the chicken, making sure it’s thoroughly covered on all sides with the flour. You want a good, thick coating. Once coated, place the floured chicken on a wire rack set over a baking sheet. Repeat this process for all of your chicken breasts. Letting the dredged chicken sit for about 10-15 minutes at room temperature allows the coating to adhere even better, preventing it from falling off during frying.
Frying to Golden Perfection
Now for the fun part – frying! You’ll need a good amount of oil for deep-frying. A heavy-bottomed pot or a Dutch oven works best. Pour in enough oil so that the chicken can be submerged about halfway. Heat the oil over medium-high heat to about 350°F (175°C). It’s crucial to maintain this temperature; if the oil is too hot, the coating will burn before the chicken is cooked through, and if it’s too cool, the chicken will absorb too much grease and become soggy. You can test the oil by dropping a tiny pinch of flour into it; it should sizzle immediately and float to the surface.
Carefully place a few chicken breasts into the hot oil, being careful not to overcrowd the pot. Overcrowding will lower the oil temperature, leading to unevenly cooked chicken. Fry the chicken for about 3-5 minutes per side, or until it’s a deep golden brown and cooked through. The internal temperature of the chicken should reach 165°F (74°C). Use tongs to carefully remove the fried chicken from the oil and place it on a clean wire rack set over a baking sheet to drain. This allows air to circulate, keeping the bottom crispy. Reserve about 1/4 cup of the hot frying oil – this is essential for our gravy!
Making the Creamy Gravy
While the fried chicken rests and stays warm (you can keep it in a low oven for a few minutes if needed), it’s time to whip up that luscious gravy. In the same pot you used for frying (after carefully pouring out most of the oil, leaving about 1/4 cup behind), place it back over medium heat. Whisk in the 1/3 cup of flour into the reserved hot oil. This is your roux, the base of our gravy. Cook the roux, stirring constantly, for about 1-2 minutes until it’s a pnon-alcoholic ale golden color. This cooks out the raw flour taste and builds flavor.
Gradually whisk in the 2 cups of milk, a little at a time, ensuring each addition is fully incorporated before adding more. Continue whisking until the gravy starts to thicken. Bring it to a gentle simmer, then reduce the heat to low. Season generously with salt and pepper to your taste. Keep stirring occasionally until the gravy is smooth and has reached your desired consistency. If it’s too thick, you can add a splash more milk; if it’s too thin, you can let it simmer a bit longer or whisk in another tablespoon of flour mixed with a little milk to make a slurry.
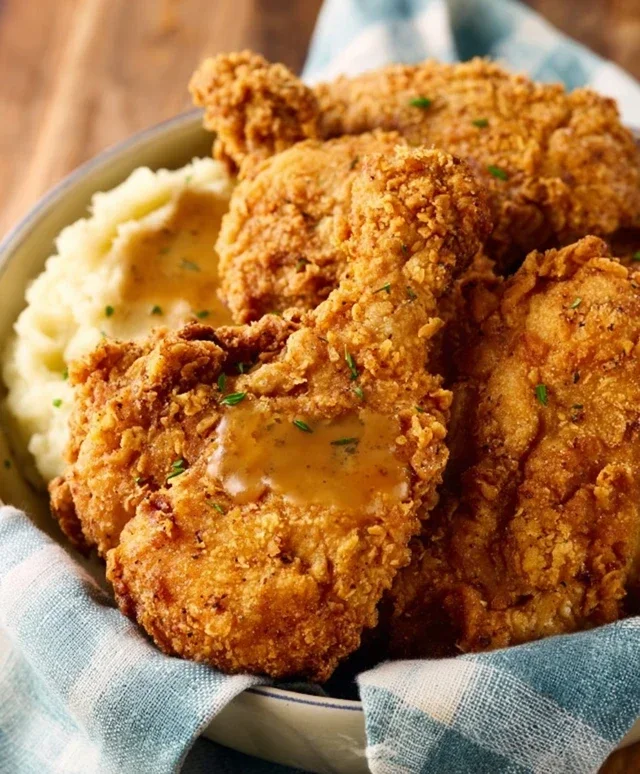
Once your Chicken Fried Chicken is golden and ready, and your gravy is perfectly creamy, it’s time to serve. Pile the crispy chicken high on plates and generously ladle that warm, comforting gravy over the top. This dish is fantastic served with mashed potatoes, green beans, or any of your favorite Southern sides. Enjoy every delicious, crispy, creamy bite!
Conclusion:
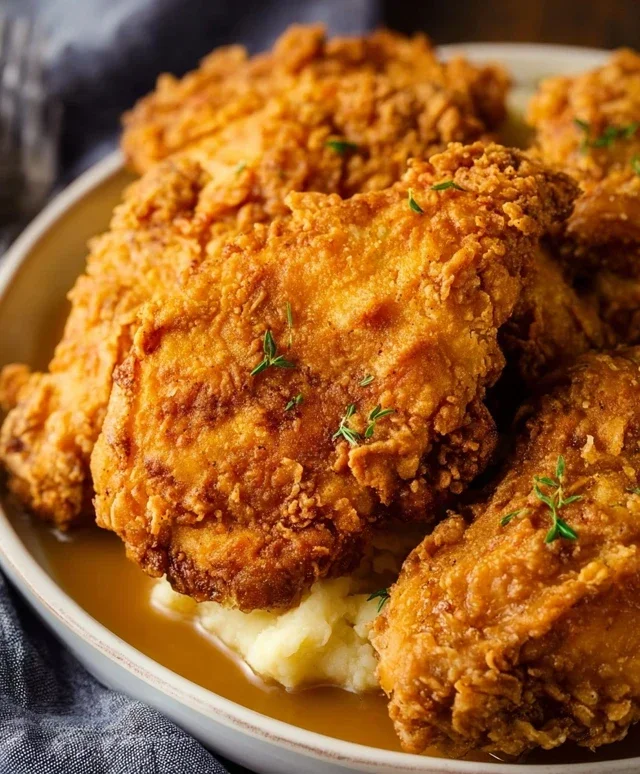
And there you have it – a truly delightful journey into the world of Chicken Fried Chicken! This recipe is a winner because it delivers that irresistible combination of crispy, golden-brown exterior and tender, juicy chicken interior that we all crave. It’s comforting, satisfying, and surprisingly achievable for home cooks of all levels. Don’t be intimidated by the breading process; it’s where all the magic happens for that perfect crunch. My favorite part is the aroma that fills the kitchen as it fries – pure bliss!
For serving, I highly recommend pairing your homemade Chicken Fried Chicken with classic Southern sides. Think creamy mashed potatoes, a vibrant green bean casserole, or a tangy coleslaw. A drizzle of homemade gravy is, of course, non-negotiable! If you’re feeling adventurous, consider a spicy honey glaze or a Cajun-inspired spice blend in your flour mixture for a flavorful twist. I truly encourage you to give this recipe a try. It’s a crowd-pleaser that’s sure to become a regular in your dinner rotation. Let me know how yours turns out!
Frequently Asked Questions:
Can I bake this Chicken Fried Chicken instead of frying?
While frying yields the crispiest results, you can bake it for a lighter option. Ensure your oven is preheated to a high temperature (around 400°F or 200°C). Place the breaded chicken on a wire rack set inside a baking sheet to allow air to circulate and promote crispiness. Baking time will vary, but aim for around 25-35 minutes, flipping halfway through, until golden brown and cooked through.
What’s the secret to a truly crispy coating?
The secret lies in a few key elements: ensuring your chicken is well-dried before breading, double-dipping in the egg wash (flour, egg, flour again), and making sure your frying oil is at the correct temperature (around 350°F or 175°C). Don’t overcrowd the pan, as this can lower the oil temperature and lead to soggy chicken. Allowing the breaded chicken to rest for a few minutes before frying can also help the coating adhere better.
How do I store leftovers?
Once completely cooled, store any leftover Chicken Fried Chicken in an airtight container in the refrigerator for up to 3-4 days. For the best results when reheating, I suggest using an oven or air fryer to help regain some of that crispy texture. Microwaving can make the breading soft.
Chicken Fried Chicken
A classic Southern comfort food featuring crispy, golden-brown fried chicken breasts served with a creamy white gravy. This recipe uses thin-sliced chicken for a quicker cook time and even crispiness.
Ingredients
-
6-8 thin sliced chicken breasts
-
2 cups flour
-
2 tsp baking powder
-
1 tsp baking soda
-
1 tsp salt
-
1 tsp pepper
-
1 tsp garlic powder
-
1 1/2 cup buttermilk
-
1 egg
-
1 Tbs hot sauce
-
Oil for frying
-
1/4 cup reserved oil from frying
-
1/3 cup flour
-
2 cup milk
-
Salt & pepper
Instructions
-
Step 1
In a shallow dish, whisk together 2 cups flour, baking powder, baking soda, salt, pepper, and garlic powder. In a separate bowl, whisk together buttermilk, egg, and hot sauce. -
Step 2
Dip each thin-sliced chicken breast into the buttermilk mixture, then dredge in the flour mixture, ensuring each piece is fully coated. Set aside on a wire rack. -
Step 3
Heat enough oil for frying in a large, heavy skillet over medium-high heat until it shimmers (about 350°F/175°C). -
Step 4
Carefully place the coated chicken breasts into the hot oil, being careful not to overcrowd the pan. Fry for 3-5 minutes per side, or until golden brown and cooked through. -
Step 5
Remove chicken from skillet and drain on a wire rack. Reserve 1/4 cup of the frying oil in the skillet. -
Step 6
To make the gravy, reduce heat to medium. Whisk 1/3 cup flour into the reserved oil until smooth. Cook for 1-2 minutes, stirring constantly, until lightly browned. -
Step 7
Gradually whisk in the milk until smooth. Bring to a simmer, stirring frequently, until the gravy thickens. Season with salt and pepper to taste. -
Step 8
Serve the chicken fried chicken immediately with the warm gravy.
Important Information
Nutrition Facts (Per Serving)
It is important to consider this information as approximate and not to use it as definitive health advice.
Allergy Information
Please check ingredients for potential allergens and consult a health professional if in doubt.